


Every parent and coach knows the feeling: your young pitcher has been working hard, but the same mechanical errors keep showing up game after game. The ball sails high. The stride looks short. The arm drags behind. It’s frustrating, and it can make kids want to give up on a sport they love. The good news is that most youth pitching mistakes follow predictable patterns, and once you know what to look for, you can address them quickly and effectively. This article breaks down the ten most common pitching flaws, gives you a visual comparison of mistake versus mastery, and arms you with coaching strategies that actually work.
Table of Contents
- Criteria for recognizing pitching mistakes
- The 10 most common youth pitching mistakes (and how to fix them)
- Mistake versus mastery: Visual comparison of pitching technique
- Best coaching strategies to prevent these mistakes
- Why focusing on mechanical details early saves careers later
- Take the next step: Build better pitching with proven tools
- Frequently asked questions
Key Takeaways
| Point | Details |
|---|---|
| Spot mechanical errors fast | Knowing the common signs makes it easier for coaches and parents to identify issues early. |
| Correct flaws with targeted fixes | Pairing each mistake with a specific drill or cue delivers real improvement. |
| Build good habits for long-term success | Addressing pitching mechanics early lays the foundation for confidence and injury prevention. |
| Regular review boosts results | Frequent feedback with practice tools helps young pitchers make lasting changes. |
Criteria for recognizing pitching mistakes
Before you can fix a problem, you need to know what you’re looking at. Many parents and coaches watch their young pitcher and sense something is off, but they can’t quite name it. That’s where a clear framework for evaluating mechanics makes all the difference.
What good mechanics actually look like
Good pitching mechanics aren’t about looking pretty. They’re about efficiency, repeatability, and safety. A pitcher with solid mechanics will show a consistent stride length, a relaxed arm that stays in sync with the lower body, and smooth weight transfer from the back foot to the front foot. The hips lead, the shoulders follow, and the arm arrives at release point right on time.
The 12 pitching grips tutorial is a great starting point for understanding how hand and arm position connect to the rest of the delivery. But mechanics go far beyond the grip.
According to top-level mechanical analysis, the lower body must lead the upper body throughout the delivery, with hips closed and the stride foot landing properly before the arm fires. When that sequence breaks down, everything else suffers.
Red flags to watch for during practice
Here are the most reliable early warning signs that a young pitcher is developing or reinforcing bad habits:
- Inconsistent pitch location from one throw to the next, even on the same pitch type
- Visible arm tension or a “rushing” motion where the arm fires before the hips open
- Loss of velocity late in a practice session, which can signal fatigue from poor mechanics
- Complaints of elbow or shoulder soreness after throwing
- Flat pitches that lack movement or spin
- A delivery that looks different every time, with no repeatable pattern
“Mechanics are the foundation of pitching. When the foundation is shaky, everything built on top of it is unstable.” This is the principle that guides every correction we recommend.
Why both lower and upper body patterns matter
Most coaches focus on arm action because it’s the most visible part of a pitch. But the lower body is where velocity and control actually originate. A weak or misdirected stride, poor hip rotation, or landing on the wrong part of the foot can sabotage even the best arm action. Think of it like a chain reaction: if one link breaks, the whole chain loses its strength.
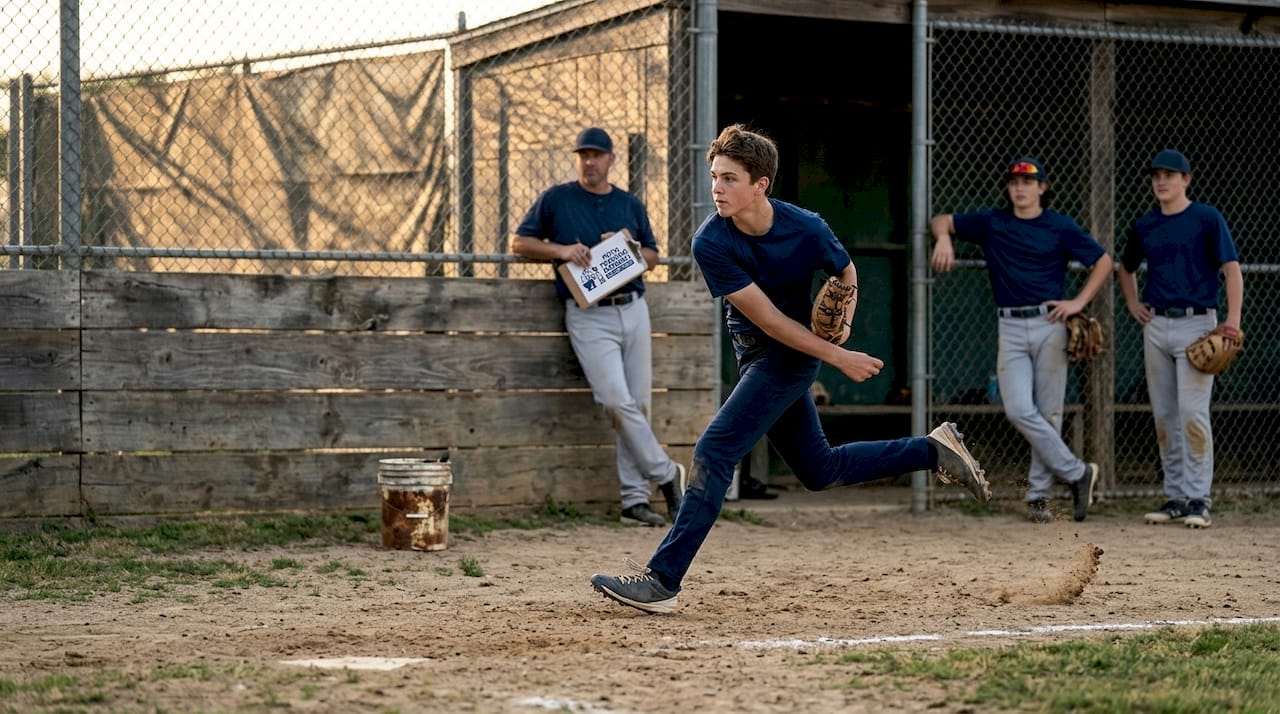
Regular, detailed observation is the only way to catch these patterns early. Watching a pitcher throw three or four times isn’t enough. You need to observe multiple sessions, ideally from different angles, to identify what’s consistent and what’s variable.
Pro Tip: Film your pitcher from the side and from behind the plate. Two angles reveal twice as many mechanical issues as one.
The 10 most common youth pitching mistakes (and how to fix them)
Once you’ve identified signs of mechanical trouble, you’ll want a clear guide for what the most frequent pitching mistakes actually are, and how to correct them efficiently.
The top ten flaws, explained
- Short stride length. A short stride reduces velocity, stability, and control. The stride should be 85 to 100 percent of the pitcher’s height. Short strides rob power and force the arm to do all the work.
- Arm not at shoulder height at foot plant. When the arm lags below shoulder height at the moment the stride foot lands, pitches go high and velocity drops. The arm needs to be up and ready when the foot hits the ground.
- Eyes off the target. Eyes wandering away from the catcher’s mitt is one of the most overlooked causes of poor command. Young pitchers often look down at their feet or at the batter, losing their visual anchor.
- Opening the hips too early. When the hips rotate before the stride foot lands, the pitcher loses power and the arm has to compensate, increasing stress on the elbow and shoulder.
- Rushing the delivery. A pitcher who speeds through their windup without controlled tempo will struggle to repeat their mechanics. Rushing is often a sign of anxiety or a lack of body awareness.
- Collapsing the back leg. If the back knee buckles during the drive phase, the pitcher loses the power platform they need to generate velocity. The back leg should stay firm and drive forward.
- Improper glove arm action. Many young pitchers let the glove arm fly out to the side instead of tucking it toward the body. This pulls the throwing shoulder open too soon and throws off timing.
- Gripping the ball too deep in the hand. Holding the ball too far back in the palm reduces spin rate and control. The ball should be held with the fingertips for all pitch types.
- Inconsistent release point. If the arm slot changes from pitch to pitch, location will be unpredictable. A consistent, repeatable release point is the single biggest factor in command.
- Poor follow-through. Stopping the arm abruptly after release puts stress on the shoulder and telegraphs the pitch. The arm should continue naturally across the body after the ball leaves the hand.
Explore youth pitching exercises to build the muscle memory that supports each of these corrections.
Correction table: Flaw, fix, and coaching tip
| Pitching flaw | Quick fix | Coaching tip |
|---|---|---|
| Short stride | Mark a target on the ground at 90% of height | Use tape or a cone to give visual feedback |
| Arm too low at foot plant | Drill “arm up” checkpoints at balance point | Pause and check arm position before throwing |
| Eyes off target | Stare at the glove, not the batter | Use a colored mitt to hold visual focus |
| Early hip rotation | Hip to hip drill, hold hips closed longer | Place a towel between knees to feel the difference |
| Rushing the delivery | Slow-motion delivery practice | Count a beat between balance point and stride |
| Collapsing back leg | Single-leg balance drills | Strengthen glutes and quads off the mound |
| Glove arm flying out | Tuck glove to chest after release | Mirror drills to feel proper glove position |
| Ball too deep in palm | Fingertip grip check before every throw | Squeeze test: ball should move freely in fingers |
| Inconsistent release point | Shadow throwing in front of a mirror | Mark a spot on the wall to aim at consistently |
| Poor follow-through | Finish drill: arm across body to opposite hip | Video review to confirm full follow-through |
Work on pitching accuracy drills to reinforce the corrections above in a structured, measurable way.
Pro Tip: Don’t try to fix all ten mistakes at once. Pick the two or three that are causing the most visible problems and work on those for two to three weeks before moving on.
Which mistakes to prioritize first
Not all flaws are created equal. Short stride, arm position at foot plant, and eyes off the target tend to have the biggest immediate impact on control and velocity. Fix those three first and you’ll often see the other issues start to self-correct as the overall mechanics improve. Use tools for improving stride and rotation to give young pitchers immediate, tangible feedback on their progress.
Mistake versus mastery: Visual comparison of pitching technique
Seeing the difference between flawed and correct mechanics is often what helps young pitchers and coaches make the most impactful changes.
Side-by-side comparison table
| Phase | Mistake | Correct form |
|---|---|---|
| Stride | Short, choppy, less than 80% of height | Long, controlled, 85 to 100% of height |
| Hand separation | Too early or too late, disrupts timing | Smooth, timed with hip drive |
| Arm position | Below shoulder at foot plant | At or above shoulder at foot plant |
| Hip rotation | Opens before foot lands | Stays closed until foot plants, then fires |
| Foot landing | Landing on the heel | Landing on the ball of the foot |
| Eyes on target | Looking at batter or ground | Locked on catcher’s mitt throughout delivery |
| Follow-through | Arm stops abruptly after release | Arm continues naturally across the body |
The heel landing problem
One of the most damaging and least discussed errors is how the stride foot lands. Landing on the heel creates a jarring impact that disrupts balance, causes control problems, and puts unnecessary stress on the knee and ankle. The pitcher should land on the ball of the foot, slightly closed (pointing toward the plate), which allows the hips to rotate fully and the body to stay balanced through the finish.
This single correction, landing on the ball of the foot instead of the heel, can improve command noticeably within just a few practice sessions. Use strike zone targeting practice to measure the immediate impact of this adjustment on pitch location.
Statistical callout: The combined impact of stride and foot landing
Research consistently points to stride length and foot landing as two of the highest-leverage mechanical variables in youth pitching. When both are corrected together, pitchers typically see improvements in velocity, control, and arm health simultaneously. These two elements work as a pair: a long, properly directed stride sets up a correct foot landing, and a correct foot landing enables full hip rotation. Fix one without the other and you only get half the benefit.
Quick-reference correction reminders
- Use tape on the mound to mark ideal stride length
- Practice “soft landing” drills to train ball-of-foot contact
- Film from the side to check arm height at foot plant
- Use a target net to measure the effect of hip rotation on location
- Practice slow-motion deliveries to lock in hand separation timing
- Remind pitchers to keep eyes locked on the target before, during, and after delivery
Best coaching strategies to prevent these mistakes
Understanding the technical side is essential, but putting corrections into practice takes thoughtful coaching and consistent routines.
Step-by-step practice routine for mechanical improvement
- Start every session with a mechanics check. Before any live throwing, have the pitcher do five to ten slow-motion deliveries without a ball. Watch for stride length, arm position, and hip timing.
- Use video at least once per week. Set up a phone on a tripod at the side angle and behind the plate. Review footage together with the pitcher after practice, pointing out one or two specific items to work on.
- Drill before you throw. Spend ten minutes on targeted drills (stride drills, arm path drills, balance drills) before moving to full pitching. This activates the correct movement patterns before fatigue sets in.
- Limit full-effort pitching early in practice. Young arms need to warm up gradually. Rushing to full velocity too quickly reinforces rushed mechanics and increases injury risk.
- End every session with a positive rep. The last pitch of practice should be one the pitcher feels good about. Ending on a positive note builds confidence and reinforces the correct movement pattern in memory.
- Track progress with a simple log. Write down two or three things you observed each session. Over time, patterns become clear and you can see which corrections are sticking.
Explore youth pitching routines to find structured programs that support these steps.
When to correct and when to let it go
Not every practice is the right time for detailed mechanical feedback. During a game, keep corrections minimal and focused on one simple cue. Save the detailed technical work for practice sessions when there’s no pressure and the pitcher can experiment freely. Over-coaching during games creates anxiety and actually makes mechanics worse.
“The goal is not to create a robot. The goal is to give young pitchers a reliable, repeatable foundation they can trust under pressure.”
The role of positive reinforcement
Young athletes respond to encouragement far more powerfully than criticism. When you see a pitcher execute a correct stride or keep their eyes on the target, name it out loud immediately. “Great stride length, that’s exactly right.” Specific, immediate praise reinforces the behavior far more effectively than a general “good job.” Pair positive feedback with clear, simple correction cues and you’ll see faster improvement than with criticism alone.
According to expert consensus on pitching mechanics, while strong empirical data on injury rates tied to specific flaws is limited, there is broad agreement that correct mechanics reduce physical stress on the arm and body. That means teaching good mechanics isn’t just about performance. It’s about keeping kids healthy and in the game longer.
Pro Tip: Create a “mechanics card” for each pitcher with two or three personal focus points written on it. Have them read it before every bullpen session to prime their attention on the right things.
Why focusing on mechanical details early saves careers later
Here’s a perspective that doesn’t get said often enough: waiting until high school to address pitching mechanics is one of the most costly mistakes in youth baseball development.
There’s a common belief among well-meaning parents and coaches that kids will naturally grow out of bad habits as they get stronger and more experienced. That belief is wrong, and it causes real harm. Bad mechanics don’t disappear with age. They get reinforced. Every rep a young pitcher throws with a short stride, a dropped arm, or a heel landing is a rep that makes that pattern more automatic and harder to undo later.
The neurological reality is that the brain builds movement patterns through repetition. By the time a pitcher reaches high school and a more demanding coach tries to rebuild their mechanics, they’re fighting against thousands of hours of ingrained muscle memory. That’s a much harder battle than simply teaching correct mechanics from the start.
The baseball training foundation matters more than most people realize. Getting the basics right early isn’t about being rigid or taking the fun out of the game. It’s about giving young pitchers a foundation they can build on confidently, rather than one they have to tear down and rebuild later.
Good mechanics also directly reduce injury risk. Elbow and shoulder injuries in youth baseball have become alarmingly common, and most of them are preventable. A pitcher who leads with the hips, lands on the ball of the foot, and keeps the arm in the correct slot puts far less stress on the joints than one who rushes, drags the arm, or lands on the heel. Protecting a young pitcher’s arm health is a long-term investment in their ability to enjoy the sport for years to come.
The phrase “let kids be kids” is absolutely right when it comes to keeping the game fun, low-pressure, and joyful. But it should never be used as a reason to ignore mechanical flaws that will limit performance and increase injury risk. Kids can have fun and learn correct mechanics at the same time. In fact, when mechanics improve and pitches start hitting their spots, kids enjoy the game more because they’re succeeding. Confidence comes from competence, and competence comes from correct, consistent practice.
Start early. Be patient. Be specific. The payoff is a pitcher who is healthier, more confident, and more capable at every level they reach.
Take the next step: Build better pitching with proven tools
Armed with specific fixes and strategies, coaches and parents can amplify their efforts with the right gear and learning aids.
Knowing what to fix is only half the equation. Having the right tools to practice those fixes consistently is what turns knowledge into real improvement. Immediate feedback is the fastest path to better mechanics, and that’s exactly what purpose-built training aids provide.

The Pitch Training Baseball gives young pitchers a tactile, repeatable way to build correct arm path and release habits, while the Pitching Target Net with its nine-zone strike zone gives both pitcher and coach instant visual feedback on location. Together, these tools turn every practice session into a measurable, focused training experience. Browse the full lineup at pitchtrainingbaseball.com and find the right combination of tools to support your pitcher’s development this season.
Frequently asked questions
What is the number one pitching mistake for young players?
The most common mistake is a short stride. A stride under 85% of the pitcher’s height reduces velocity, control, and stability all at once.
How can coaches quickly spot pitching errors in practice?
Watch for inconsistent pitch location, visible arm tension, and eyes wandering off target, which is one of the clearest signs of poor command mechanics.
Does poor pitching mechanics lead to arm injury?
While specific data is still developing, expert consensus agrees that correct mechanics reduce physical stress on the arm, lowering the overall risk of injury over time.
What’s the best way for parents to help their young pitcher?
Use video to review mechanics together, support regular drill-based practice, and focus on reinforcing relaxed, confident throwing rather than pointing out every flaw in the moment.
Should kids focus on mastering mechanics or just play and have fun?
Both goals work together well. Learning solid mechanics early actually makes pitching more enjoyable because young players succeed more often, and success builds the confidence that makes the game fun.