


Young pitchers who struggle with accuracy, arm pain, or inconsistent mechanics are one of the most common frustrations parents and coaches face each spring. You watch a kid throw hard but wild, or worse, you see them rubbing their elbow after every session and wonder if something is seriously wrong. This guide walks you through the safety limits, mechanics, equipment, and monitoring strategies that actually work for youth players. Whether your child is 8 or 16, the steps here are grounded in real research and practical field experience, giving you a clear path from struggling thrower to confident, healthy pitcher.
Table of Contents
- Understanding safe throwing limits for youth pitchers
- Essential throwing mechanics for youth baseball
- Building a youth throwing program: Tools and training equipment
- Correcting mistakes and monitoring progress
- What most coaches miss: The true value of patience in youth throwing
- Take your youth baseball throwing to the next level
- Frequently asked questions
Key Takeaways
| Point | Details |
|---|---|
| Pitch count matters | Always follow age-appropriate pitch limits and enforce rest days to protect arms. |
| Mechanics before velocity | Build strong fundamentals in form and sequencing before chasing higher speeds or complicated pitches. |
| Structured routines perform best | Teams and individuals improve fastest with regular, sequenced throwing programs and progress tracking. |
| Watch for warning signs | Monitor velocity drops, fatigue, and pain to know when to slow down or seek help. |
| Training tools make a difference | The right equipment boosts skill development and keeps workouts safe and engaging. |
Understanding safe throwing limits for youth pitchers
Before any technique work happens, you need to know how much throwing is actually safe. Overuse is the number one cause of arm injuries in youth baseball, and most of it is preventable. The problem is that many parents and coaches don’t realize how quickly a young arm can reach its limit.
Pitch count limits by age are clearly defined: 50 pitches per day for ages 7 to 8, 75 for ages 9 to 10, 85 for ages 11 to 12, and 95 for ages 13 to 16. After throwing 66 or more pitches, a player must rest for at least four full days before pitching again. These aren’t suggestions. They’re protective boundaries built from years of injury data.
Here’s a quick reference table to keep on hand:
| Age group | Max pitches per day | Rest required after 66+ pitches |
|---|---|---|
| 7 to 8 | 50 | 4 days |
| 9 to 10 | 75 | 4 days |
| 11 to 12 | 85 | 4 days |
| 13 to 16 | 95 | 4 days |
| 17 to 18 | 105 | 4 days |
Common warning signs that a young arm is being overworked include:
- A noticeable drop in throwing velocity during a session
- Complaints of elbow or shoulder soreness after or during throwing
- Mechanics that start to break down as the session goes on
- Reluctance to throw or visible wincing at release
- Swelling or tenderness along the inside of the elbow
“Little League shoulder and elbow injuries are almost entirely preventable when pitch count rules and rest periods are followed consistently. The biggest risk factor is not the number of pitches in one game but the cumulative load across a week or a season.”
If your young player also plays softball, the same protective principles apply. You can explore softball pitch training resources that reinforce safe mechanics for that sport as well.
Essential throwing mechanics for youth baseball
With safety limits established, the next step is building the mechanical foundation that protects the arm and produces consistent results. Good mechanics don’t just improve performance. They actively reduce injury risk by distributing stress across the entire kinetic chain rather than concentrating it at the elbow or shoulder.
Here’s what the science actually shows: elbow varus torque during the late cocking phase of a pitch reaches between 64 and 120 Newton meters, while shoulder internal rotation can hit 7,000 to 9,000 degrees per second. The ulnar collateral ligament, commonly called the UCL, can only withstand about 35 Newton meters before it’s at risk. That gap between what the ligament can handle and what the arm actually experiences is closed by proper mechanics, not by rest alone.
Here’s a step-by-step breakdown of the throwing motion for youth players:
- Grip the ball correctly. A four-seam grip is the best starting point for young players. Two fingers across the top seam, thumb underneath, and light pressure throughout. Squeezing too hard creates tension that travels up the arm.
- Set your stance. Feet shoulder-width apart, weight balanced, glove side pointed toward the target. This gives you a stable base before the motion begins.
- Load and stride. As the arm goes back, the stride foot moves toward the target. The stride length should be roughly 80 to 90 percent of the player’s height for optimal power transfer.
- Arm path and cocking. The throwing arm should reach a position where the elbow is at or slightly below shoulder height. Dropping the elbow below this point dramatically increases UCL stress.
- Hip and trunk rotation. Hips rotate before the shoulders, creating the whip effect that generates velocity without overloading the arm. This sequencing is critical and often overlooked in youth coaching.
- Release and follow-through. The ball releases out in front of the body, not beside it. After release, the arm continues across the body in a full follow-through, which decelerates the arm safely.
| Mechanics focus | Why it matters | Common youth mistake |
|---|---|---|
| Four-seam grip | Consistent spin and control | Gripping too tight |
| Elbow height at cocking | Reduces UCL stress | Dropping elbow below shoulder |
| Hip-to-shoulder sequencing | Generates velocity safely | Throwing arm-only, no hip rotation |
| Full follow-through | Protects the shoulder | Stopping arm motion early |
Pro Tip: Video your child throwing from the side and from behind. You’ll spot elbow drop and poor follow-through in seconds. Most kids don’t realize what they’re doing until they see it themselves.
One of the most important principles in youth development is that mechanics matter more than velocity at early ages. Coaches who push for harder throws before the movement pattern is solid are setting players up for injury. Breaking balls and weighted balls should be off the table until a player is physically mature, typically 14 or older. Natural arm slots should be encouraged rather than forced into a “textbook” position that doesn’t fit the player’s anatomy.
To go deeper on grip variations and how they affect ball movement, the pitching grips eBook covers 12 different grips with step-by-step tutorials. For accuracy training, a pitching target net with a marked strike zone gives players immediate visual feedback on every throw.
Building a youth throwing program: Tools and training equipment
Learning correct mechanics is one thing. Reinforcing those mechanics through consistent, structured practice is another. A well-designed throwing program does three things: it builds the habit of correct movement, it gradually increases workload in a safe way, and it gives you data to track improvement over time.
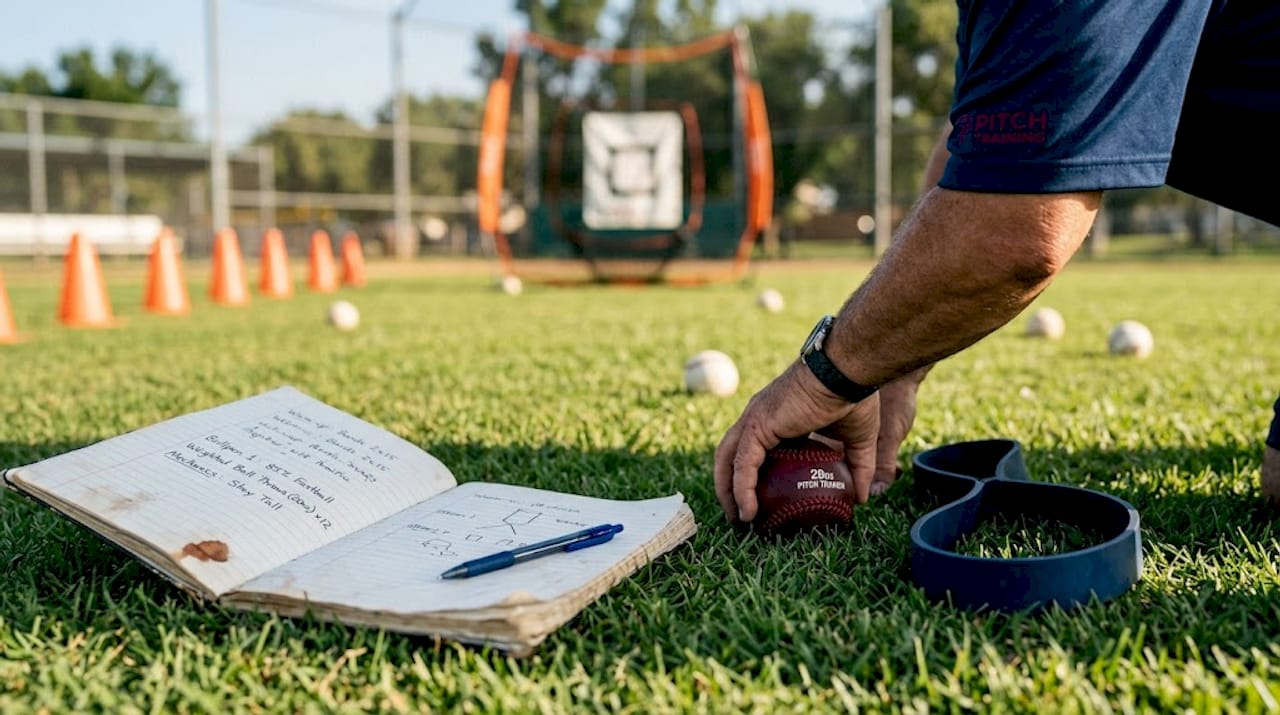
Structured throwing programs produce measurable results. The Madison County baseball team rebuilt their entire pitching staff through an offseason throwing program, finishing with a team ERA of 3.58 and significant velocity gains across the roster. The key was proper sequencing: building base arm strength before adding intensity, not the other way around.
Here’s what a basic weekly structure looks like for a youth pitcher:
- Monday: Light catch at 30 to 45 feet, 20 to 30 throws. Focus on mechanics only.
- Wednesday: Structured bullpen session with target work, staying within pitch count limits.
- Friday: Long toss at comfortable distance, gradually extending range as arm strength builds.
- Weekend: Rest or light activity only. No throwing.
Essential equipment for at-home and field practice includes:
| Equipment | Purpose | Best for |
|---|---|---|
| Training baseball | Grip and release feedback | Daily mechanics work |
| Pitching target net | Accuracy and zone awareness | Bullpen sessions |
| Radar app or speed gun | Velocity tracking | Progress monitoring |
| Resistance bands | Arm care and warm-up | Pre-throw routine |
| Pitching journal | Tracking pitch counts and rest | Season-long planning |
Pro Tip: Start every session with a five-minute band routine targeting the rotator cuff and scapular muscles. This primes the arm for throwing and significantly reduces injury risk over a full season.
The pitch training baseball is designed specifically for youth players working on grip and release mechanics. For a broader look at what you need to set up a complete practice environment, the training essentials collection has everything organized in one place.
Tracking progress doesn’t need to be complicated. A simple notebook where you log the date, number of throws, distance, and any observations about mechanics or how the arm felt is enough to spot trends over weeks and months. If velocity is climbing steadily and mechanics are holding up, the program is working. If you see plateaus or regression, that’s a signal to adjust.
Correcting mistakes and monitoring progress
Once a routine is in place, the focus shifts to quality control. Even with the best intentions, youth players develop bad habits, and those habits are far easier to correct early than after months of repetition.
The most common mechanical mistakes in youth throwing include:
- Rushing the delivery: The arm gets ahead of the hips, eliminating the power sequence and increasing elbow stress.
- Short-arming the ball: The elbow bends too much on the way back, reducing arm path efficiency.
- Opening up too early: The front shoulder flies open before the hips rotate, causing the ball to sail high and outside.
- Inconsistent release point: Usually caused by grip tension or poor timing in the delivery.
- Skipping the follow-through: Often a sign of fatigue or fear of arm soreness.
“Two-way players and high-volume throwers need balanced programming that accounts for both pitching and position play. Treating every throwing session the same regardless of role leads to cumulative overuse that doesn’t show up until it’s already a problem.”
Monitoring guidelines are straightforward but require consistency. Stop throwing immediately if velocity drops more than 10 percent from a player’s baseline during a session. No consecutive-day pitching beyond the age-appropriate limits. Players who also play infield or outfield need their total throwing volume tracked, not just their pitching count.
Pro Tip: Establish a velocity baseline at the start of each season by recording five to ten throws at full effort. This gives you a real number to compare against throughout the year, rather than relying on subjective impressions.
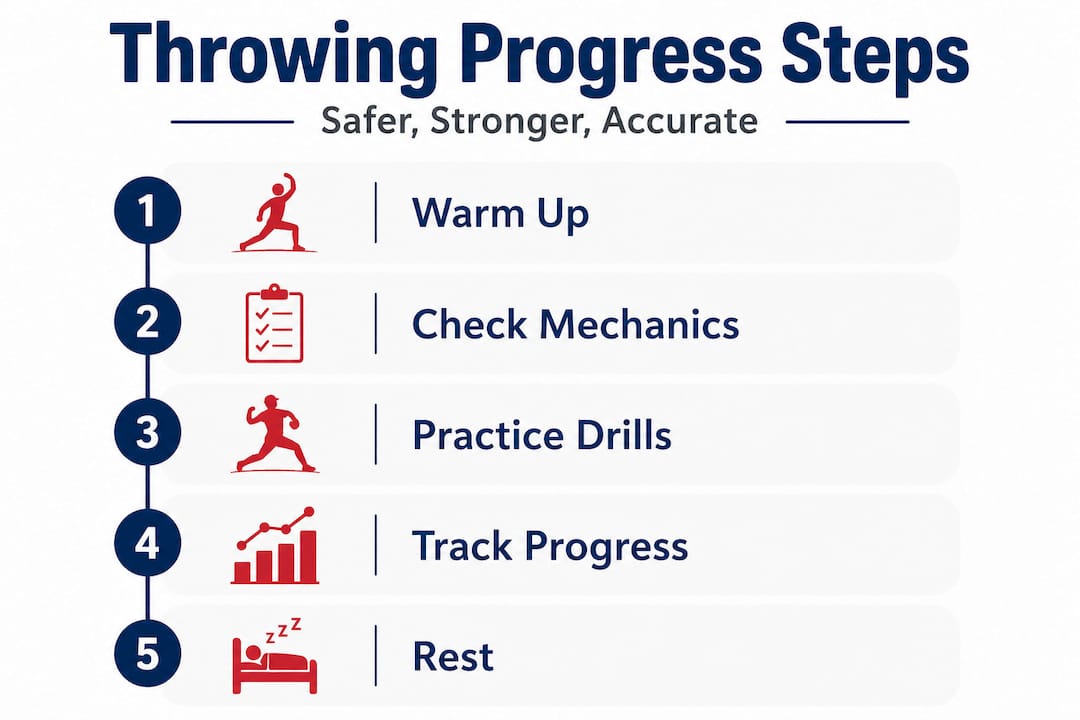
When to seek medical advice: if a player reports pain that persists more than 24 hours after throwing, if there’s visible swelling around the elbow or shoulder, or if they describe a “pop” or sudden sharp pain during a throw, stop all throwing and consult a sports medicine physician. Don’t wait to see if it gets better on its own.
Using a target net for pitching during monitoring sessions gives you a concrete accuracy metric alongside velocity. If accuracy drops at the same time velocity drops, that’s a strong signal the arm is fatigued and needs rest.
What most coaches miss: The true value of patience in youth throwing
Here’s the uncomfortable truth that most youth baseball culture doesn’t want to hear: the coaches and parents who push hardest for early velocity and impressive stats are often the ones whose players flame out by high school. We’ve seen it repeatedly. A 10-year-old who throws 60 miles per hour gets showcased, overworked, and is sitting out his freshman season with a UCL tear.
The players who actually reach their potential are the ones who spent their early years throwing correctly, not throwing hard. Deliberate progression, where mechanics are locked in before intensity is added, creates a physical foundation that holds up under the demands of high school and college baseball. Rushing that process doesn’t accelerate development. It borrows against it.
What deliberate programming actually delivers is less dramatic in the short term and far more valuable over five or ten years. Players who learn to throw with proper hip rotation, consistent arm path, and full follow-through at age 10 are the ones who can handle a 95-pitch game at 16 without breaking down. The mechanics become automatic, which means the brain can focus on reading hitters and executing game plans instead of managing arm pain.
The softball training insights section of our site reflects this same philosophy. Whether it’s baseball or softball, the young athletes who develop lasting skills are the ones whose coaches valued the process over the scoreboard.
Patience isn’t passive. It means designing sessions with clear mechanical goals, tracking progress honestly, and resisting the urge to add intensity before the foundation is solid. That’s the work. And it pays off in ways that a radar gun reading at age 11 never will.
Take your youth baseball throwing to the next level
Everything in this guide points to one practical reality: consistent, well-structured practice with the right tools produces results that raw talent alone never will. The players who improve fastest aren’t always the most gifted. They’re the ones whose parents and coaches set up smart routines and gave them the equipment to reinforce good habits every single session.

At Pitch Training Baseball, we’ve built our product line specifically around what youth players actually need: tools that give immediate feedback, reinforce correct mechanics, and make practice engaging enough that kids want to keep showing up. The pitch training baseball helps players develop feel for grip and release. The strike zone pitching net turns every backyard session into a focused accuracy drill. And if your athlete plays multiple sports, the pitch training softball applies the same evidence-backed approach to softball mechanics. These tools are designed to make the right habits easy to build and hard to break.
Frequently asked questions
What is the safest way to increase throwing velocity for youth players?
Focus on building proper mechanics and following a structured throwing program with gradual workload increases. Avoid weighted balls and breaking pitches until the player is physically mature, typically around age 14 or older.
How many pitches should my child throw per day?
Daily limits depend on age: 50 pitches for ages 7 to 8, 75 for ages 9 to 10, 85 for ages 11 to 12, and 95 for ages 13 to 16, with mandatory rest days after high-pitch-count outings.
What equipment is most helpful for youth throwing workouts?
A training baseball, pitching target net, and resistance bands form the core of an effective setup. Structured programs using these tools have been shown to produce measurable velocity gains and improved accuracy over a full season.
How can I tell if my child needs to rest or see a doctor?
If velocity drops more than 10 percent from baseline, or if your child reports pain, swelling, or a sudden sharp sensation during a throw, stop all throwing immediately and consult a sports medicine specialist.