


Most parents watching their kid pitch assume arm strength is simple: the harder your child throws, the stronger their arm. But that’s only a small part of the picture. Real arm strength in baseball is a combination of muscle power, joint endurance, movement mechanics, and the ability to stay effective from the first pitch to the last. Understanding this distinction is what separates parents who help their young pitchers thrive from those who unknowingly put their kids at risk. This guide breaks it all down so you can support smarter, safer development.
Table of Contents
- Understanding arm strength: More than just muscle
- How arm strength affects pitching performance and fatigue
- Safe training methods for building baseball arm strength
- Best tools and exercises to boost youth baseball arm strength
- A new approach: Focus on consistency and safe progression, not just velocity
- Training tools to boost your athlete’s arm strength
- Frequently asked questions
Key Takeaways
| Point | Details |
|---|---|
| Arm strength defined broadly | Building arm strength in baseball involves muscle power, endurance, and safe biomechanics, not just velocity. |
| Fatigue impacts performance | Pitchers lose velocity and strength as they tire, so smart training must address endurance and recovery. |
| Safe training prevents injuries | Gradual workload progressions and rest days are essential for healthy, strong arms. |
| Practical tools help growth | Parents can use simple drills and specialty equipment to safely improve youth arm strength. |
Understanding arm strength: More than just muscle
When coaches and trainers talk about arm strength in baseball, they’re not just referring to how hard a pitcher can throw on a single rep. They mean the entire system that makes a throwing arm effective, durable, and safe over time. This system includes raw muscle power, of course, but also joint stability, neuromuscular coordination, and the ability of the arm to handle repeated stress across a full game or season.
The key muscle groups involved include the rotator cuff (four muscles that stabilize the shoulder), the biceps and triceps, the forearm flexors and extensors, and the muscles of the upper back and scapula. Each of these contributes to both the force of a pitch and the arm’s ability to decelerate safely after release. If any link in this chain is weak or fatigued, the entire system suffers.
Here’s what truly makes up overall arm strength for a pitcher:
- Muscular power: The ability to generate force quickly through the shoulder, elbow, and wrist during the throwing motion
- Muscular endurance: The ability to repeat that force production pitch after pitch without breaking down
- Joint health: The structural integrity of the shoulder and elbow, maintained through proper loading and recovery
- Biomechanics: Movement patterns that distribute force efficiently and reduce stress on vulnerable joints
- Workload management: A progressive plan that builds capacity without overloading young, developing tissue
“Empirical biomechanics and clinical measurement can operationalize arm strength concepts via shoulder and elbow forces, torques, and workload progression.”
That quote matters because it means arm strength isn’t just felt in the weight room. It’s measurable at the joint level, and it changes based on how much throwing a player does and how that throwing is structured over time.
For young pitchers, proper mechanics play an especially critical role because their bones, growth plates, and connective tissue are still developing. An arm that generates tremendous force with poor mechanics can cause real damage. That’s why working on technique alongside strength is so important. Pairing physical training with resources like a pitching grips tutorial can help your child build correct habits that reduce joint stress from the start.
The bottom line here is that arm strength development is a long-term investment. It doesn’t happen in a single off-season of throwing hard. It’s built carefully through structured repetition, quality mechanics, and smart recovery.
How arm strength affects pitching performance and fatigue
Now that you understand what arm strength actually is, let’s look at what happens when it starts to fade during a game. Fatigue is one of the most underrated risks in youth baseball, and the data makes it clear just how significant its impact is.
Research on pitching workload and grip strength provides a powerful snapshot of what happens to a pitcher’s arm over the course of a game. In a study simulating a 75-pitch fastball game, dominant arm grip strength dropped by 12.66%, falling from 55.67 kg to 48.62 kg, while perceived soreness increased and pitching velocity declined slightly. That’s not a minor dip. That’s a meaningful loss of functional arm strength happening within a single outing.
Here’s a simple breakdown of what that kind of fatigue looks like in practice:
| Performance Marker | Before Game | After 75 Pitches | Change |
|---|---|---|---|
| Grip Strength (kg) | 55.67 | 48.62 | Down 12.66% |
| Pitching Velocity | Baseline | Slight decline | Reduced |
| Perceived Arm Soreness | Low | Elevated | Increased |
| Mechanical Consistency | High | Variable | Degraded |
What this table shows is not just a tired arm. It’s a chain reaction. When grip and forearm strength decline, the larger muscles of the shoulder and upper back have to compensate. That compensation changes mechanics, which increases stress on the elbow and shoulder. That sequence is exactly how overuse injuries start.
For youth pitchers, this becomes even more critical because young arms recover more slowly and have less tolerance for cumulative stress. A 12-year-old pitcher who throws 80 pitches through fatigue every weekend is stacking risk in ways that may not show up as pain until months or years later.
Arm strength at the end of a game is just as important as arm strength at the beginning. This is where endurance separates good pitchers from great ones. A pitcher who can maintain velocity and mechanics through their last pitch is far more valuable than one who starts hot and falls apart. Building that endurance takes targeted training with the right tools, like the pitch training baseball, which is designed to reinforce proper mechanics under repetition.
Pro Tip: Keep a simple log of your child’s pitch count, velocity (if you have a radar app), and any soreness they report after each outing. Even rough notes will help you spot patterns and address fatigue before it becomes injury.
Recognizing the warning signs of fatigue in real time is something parents can learn to do from the sideline. Watch for a drop in release point, shorter follow-through, slower arm speed, or your pitcher favoring their arm between pitches. These are your early signals to pull them out and let the arm recover.
Safe training methods for building baseball arm strength
Understanding the risks of fatigue is only useful if it motivates you to train smart. The good news is that there are well-established, evidence-backed methods for safely building arm strength in youth pitchers. The key principle is progressive overload applied gradually, not all at once.
Interval throwing programs are among the most respected frameworks in sports medicine for baseball arm development. The concept is straightforward: start with low-intensity, short-distance throwing and gradually increase the volume and intensity over weeks. This approach mirrors how the body adapts to stress. An interval throwing program uses elbow varus torque (the twisting force on the inside of the elbow during throwing) as a way to estimate how much biomechanical load each throw places on the arm, then builds workload progressions carefully to avoid sudden spikes.
Why sudden spikes matter: When a pitcher dramatically increases how many throws they make in a week, the tendons and ligaments don’t adapt as quickly as muscles do. That mismatch is where injuries happen. Gradual progression keeps adaptation in sync.
Here’s a comparison of two common training approaches:
| Training Approach | Intensity | Duration | Risk Level | Best For |
|---|---|---|---|---|
| High-volume rapid buildup | High | Short (2-3 weeks) | High | NOT recommended for youth |
| Interval progression | Moderate | 6-12 weeks | Low | All youth pitchers |
| Maintenance throwing | Low to Moderate | Ongoing | Very Low | In-season upkeep |
| Long toss focused | Variable | 4-8 weeks | Moderate | Experienced players with guidance |
The interval progression approach is the clear winner for youth athletes. Here’s how to put it into practice:
- Start with a proper warm-up: Light jogging, arm circles, and dynamic stretching (leg swings, hip rotations) for 10 minutes before any throwing.
- Begin at short distances: Start at 30-45 feet and focus entirely on mechanics before adding distance.
- Increase gradually: Add 5-10 feet per week, or increase throw count by no more than 10% per week.
- Build in rest days: At least one full rest day between throwing sessions. Two is better during peak training.
- Monitor how the arm responds: After each session, ask your child specifically about soreness, stiffness, or discomfort in the elbow and shoulder.
- Use training aids to build consistency: Tools like the pitch training softball or a baseball training glove can reinforce proper hand positioning and grip mechanics during practice.
Pro Tip: If your child reports elbow pain on the inside of the joint, stop throwing immediately. That location is where the ulnar collateral ligament (UCL) lives, and UCL injuries in youth pitchers are both serious and largely preventable with proper training management.
The goal of any safe training program is to build capacity faster than you build fatigue. That’s the difference between a kid who comes out of the off-season stronger and one who comes out already nursing soreness.
Best tools and exercises to boost youth baseball arm strength
With the principles of safe training established, let’s talk about the specific tools and exercises that actually move the needle for young pitchers. The right equipment doesn’t replace technique or structured training, but it does accelerate progress and make practice more effective.
Here are the most impactful tools and drills for youth arm strength development:
- Resistance bands: Lightweight, portable, and highly effective for shoulder strengthening exercises like external rotation, internal rotation, and scapular retraction. Use them as part of the warm-up routine, not in place of throwing.
- Weighted training balls: Slightly heavier balls (used within a structured program and with adult supervision) can improve arm speed and muscle activation when used correctly. Start light, 4-6 oz, and prioritize mechanics over weight.
- Grip trainers: Simple spring-loaded grip devices or stress balls can be used during downtime to build forearm flexor endurance. This directly addresses the grip strength decline seen during pitching workload studies.
- Training gloves: Specially designed gloves like the WebGrip Pro training glove reinforce proper grip patterns and hand positioning, which directly impacts how efficiently force is transferred through the arm.
- Pitching nets: Pitching into a net allows for high-repetition practice without needing a catcher, making it easy to get quality arm work done in short daily sessions.
- Sliding mitts: While primarily a base running tool, the ice cream sliding mitt is part of an overall athletic development approach that keeps players engaged in multi-skill training.
- Soft catch mitts: Pairing with a baseball/slowpitch softball glove for light catch sessions supports arm endurance without high-stress loads.
For specific exercises, focus on these categories:
Shoulder stability work: Prone Y-T-W exercises (lying face down and lifting arms into Y, T, and W shapes) build the rotator cuff and scapular stabilizers that protect the shoulder during throwing. These take under 10 minutes and can be done with no equipment.
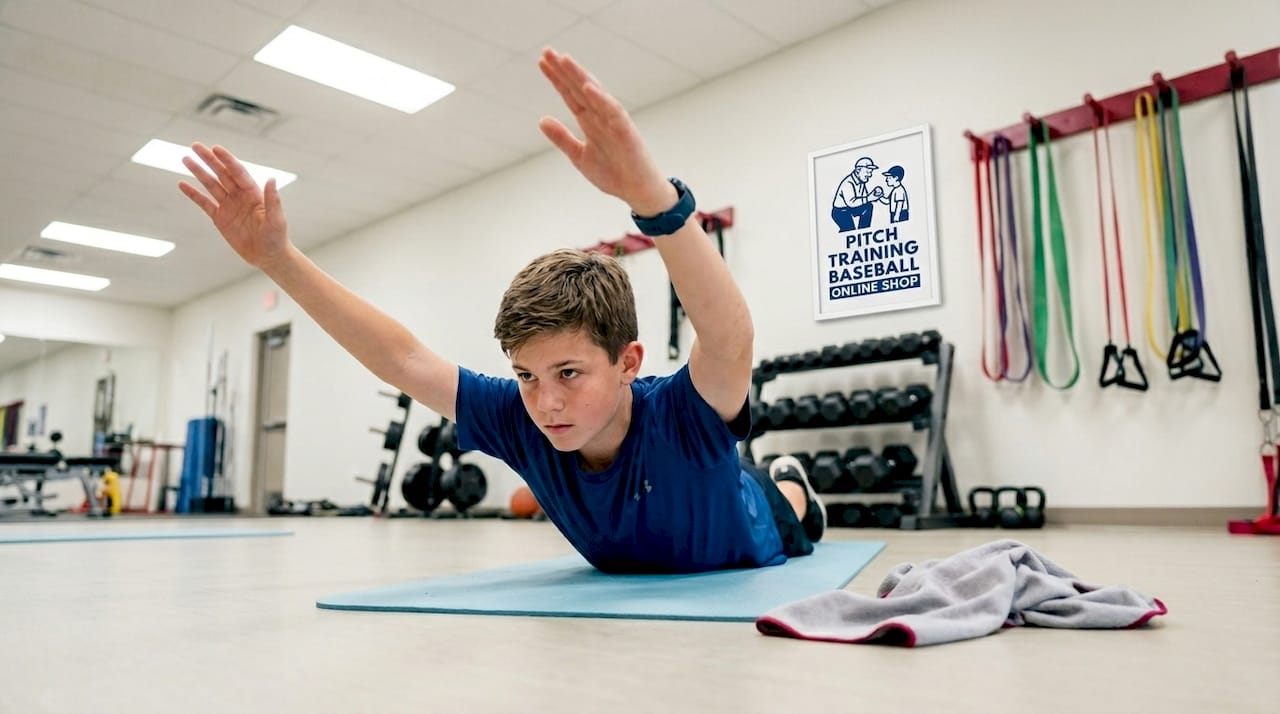
Forearm and grip strength: Wrist curls, reverse wrist curls, and towel wringing exercises build the flexor and extensor muscles that change across pitching workload, linking directly to fatigue resistance and sustained performance.
Long toss (with control): Gradual, controlled long toss at distances of 90-150 feet (age appropriate) builds arm strength through natural, full-effort throws. The key is gradual extension of distance, not maximum effort every day.
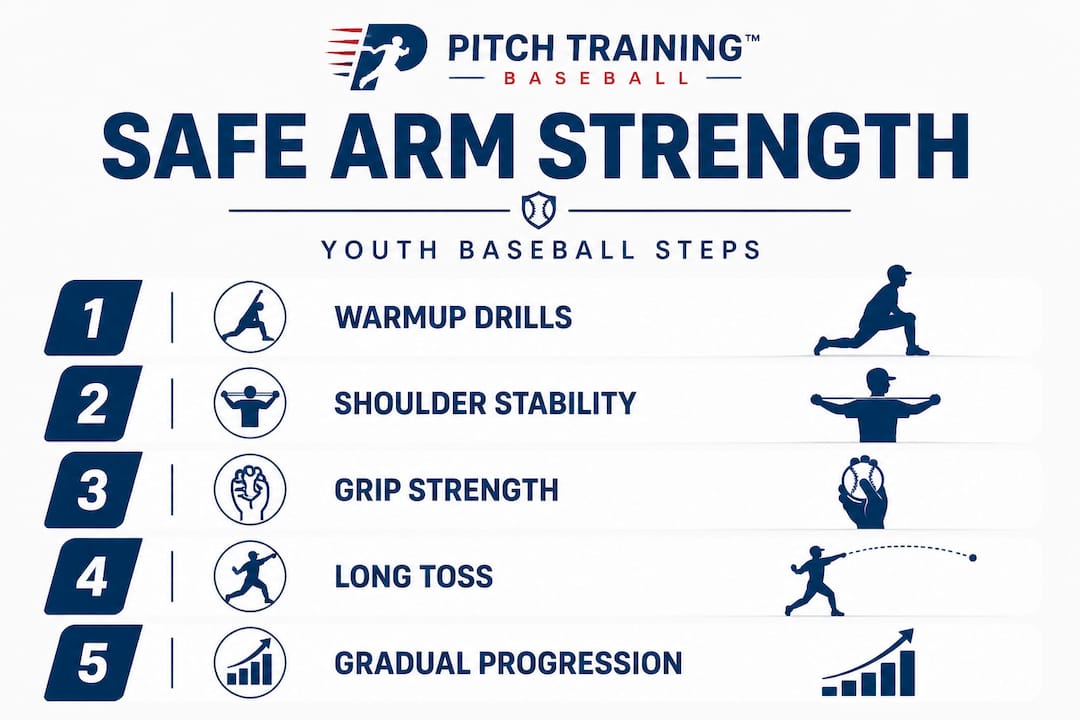
Towel drills: These mechanics drills use a small towel instead of a ball to practice the arm path and release point without any joint stress. They’re especially useful early in a training cycle.
The most effective youth programs combine multiple tools and approaches rather than relying on any single drill or device. Variety keeps young athletes engaged and ensures all the components of arm strength get trained consistently.
A new approach: Focus on consistency and safe progression, not just velocity
Here’s an opinion we hold firmly at Pitch Training Baseball, and it runs counter to what you’ll hear in a lot of dugout conversations: velocity is a symptom, not a goal.
When parents and coaches chase velocity as the primary metric, they tend to push volume and intensity faster than young arms can handle. We’ve seen it countless times. A kid throws hard in fall ball, parents get excited, they ramp up winter training to add more miles per hour, and by spring tryouts the arm is sore and the mechanics are a mess. That’s not development. That’s damage.
The most successful young pitchers we see are the ones whose parents focused on consistency first. Showing up three times a week, doing the band work, building on last week’s distance by just a little, tracking the pitch counts, and staying honest about soreness. Over a full year, that approach adds more velocity than any crash training program could. The body adapts to consistent, manageable stress.
Here’s a real scenario worth considering: imagine two 11-year-olds starting fall training at the same baseline. One follows a structured 12-week interval program with proper warm-ups and rest days. The other does twice as much volume but skips rest days and pushes intensity whenever he feels good. By December, the second kid might look stronger on paper. But by February, he’s dealing with shoulder tightness that costs him six weeks of training. The first kid has been consistent the entire time and finishes spring with better mechanics, stronger endurance, and a healthier arm.
That’s not a hypothetical. That’s what the research on workload management predicts, and it’s what we observe in practice. The value of safe arm training tools isn’t just in what they do physically. It’s in building a practice habit that supports long-term athletic health.
Set goals for your young pitcher in terms of consistency and arm health, not just velocity. How many consecutive weeks of healthy, structured throwing can they complete? How well are they maintaining mechanics in the 50th pitch compared to the first? Those metrics predict long-term success better than radar gun readings ever will.
Training tools to boost your athlete’s arm strength
If you’re ready to put everything in this guide into action, you don’t have to figure out the equipment side on your own.

At Pitch Training Baseball, we’ve designed a line of training tools specifically for youth pitchers and their parents. The pitch training baseball reinforces proper grip and mechanics with every throw, making it ideal for the kind of consistent repetition that builds real arm strength. Pair it with the pitching target net to add precision and purpose to every practice session, turning backyard throws into focused development work. And the WebGrip Pro training glove helps young pitchers develop the grip patterns that directly combat the forearm fatigue shown to impact performance. These tools are built for parents who want more than just practice. They want progress.
Frequently asked questions
What muscles are most important for arm strength in baseball?
The shoulder rotator cuff, forearm flexors, upper back, and grip muscles are all critical for arm strength and durability. Research confirms that grip and forearm strength change measurably across a pitching workload, showing their direct connection to performance.
How often should youth pitchers train their arm strength?
For most youth athletes, 2-3 structured arm strength sessions per week with dedicated rest days between them provide the best results. The key is avoiding abrupt workload spikes, as interval throwing progressions are specifically designed to build capacity without overwhelming the arm.
Does improving grip strength really affect pitching velocity?
Yes, maintaining grip and forearm strength helps pitchers hold velocity as fatigue accumulates. Studies show that grip strength drops 12.66% over a typical pitching outing, and that decline correlates directly with reduced velocity and increased soreness.
Are weighted balls safe for building arm strength in young pitchers?
Weighted balls can be effective for developing arm strength but must be introduced gradually with expert supervision and a structured progression plan to avoid overloading developing joints and soft tissue.
What signs of fatigue should parents watch for during arm strength training?
Watch for decreased velocity, rising arm soreness, or changes in throwing mechanics like a dropping elbow or shorter follow-through. Research shows that fatigue is evident when grip strength declines, soreness increases, and velocity drops, all of which are observable from the sideline with a little practice.