


The safest, most effective backyard pitching sessions come down to fundamentals: a safe throwing space, short accurate reps that build control before speed, and keeping track of pitch counts. Follow MLB’s Pitch Smart limits, work through a control-to-command-to-velocity progression, and you can run a productive short session in your own yard today with a taped target and a bucket of balls. This coaching approach builds around that order.
TL;DR:
- Backyard pitching sessions should stay well below the MLB Pitch Smart annual limit of 80 combined innings, with at least four months of rest annually.
- Use detailed pitch logs and watch for fatigue signs like dropped elbows or high throws to prevent overuse injuries during practice.
- Start warm-ups with mobility and activation exercises, gradually increase throw distance, then cool down, and avoid throwing through soreness.
- Focus on control drills first, such as coin and target tape exercises, before progressing to command drills and only introducing velocity work once control is consistent.
- Limit flat-ground velocity throws to 8-10 max-effort pitches per session, pair them with core-strength exercises, and pause practice if mechanical faults or fatigue occur.
Table of Contents
- Setting Up Backyard Pitching Practice Safely
- How Many Pitches Should Kids Throw In Practice?
- Warming Up An Arm Before Backyard Pitching Drills
- Backyard Drills That Build Control, Command, and Velocity
- Sample Practice Sessions For Any Skill Level
- Fixing The Mechanical Faults That Show Up Most
- Why Control-First Backyard Training Actually Works
- Author Perspective: Practical Trade-Offs Parents Should Know
- Ready-Made Tools For Backyard Pitching Sessions
- Sources
Setting Up Backyard Pitching Practice Safely
Before your pitcher throws a single ball, walk the space. You need a clear throwing corridor free of windows, parked cars, and foot traffic, with some buffer behind the target for missed throws. Mark a mound line and a plate at an appropriate distance depending on your player’s age, mirroring typical youth mound distances without forcing league-regulation spacing.
You don’t need much gear to make this work:
- A home plate marker or painted stone for the pitching spot
- Soft training balls or reduced-impact balls for younger throwers, regulation balls for older ones
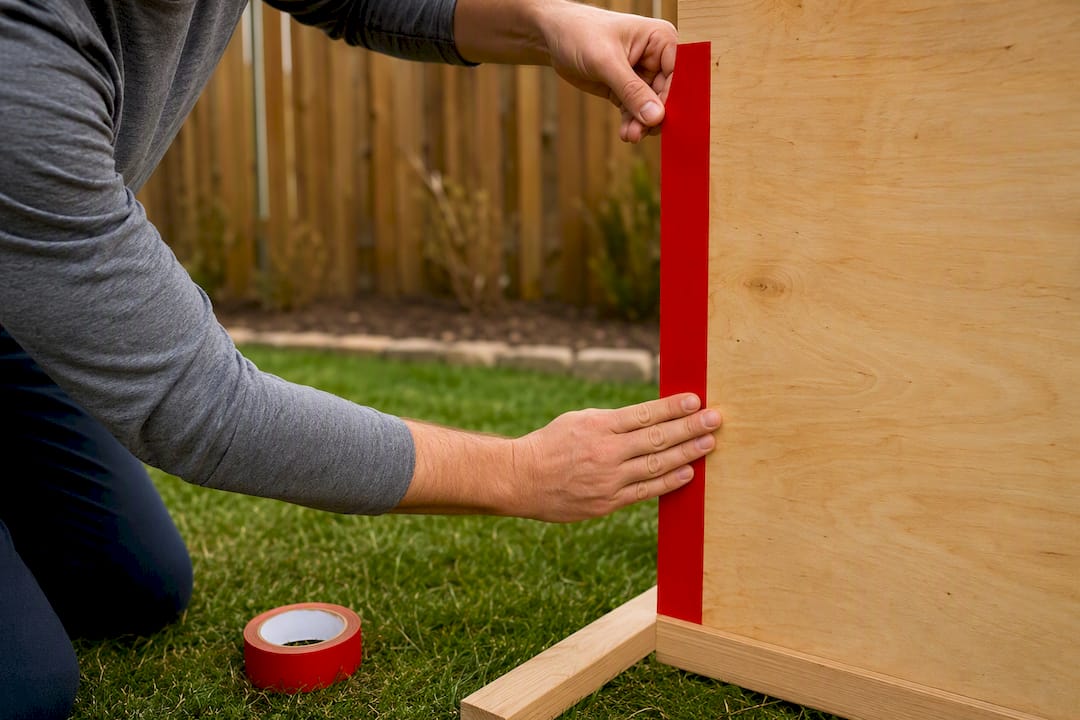
- A taped strike zone on plywood, a fence, or a garage door, or a low-cost net with a target
- A rebound wall or net so one player can pitch without a catcher
If nobody’s around to catch, a wall rebound or a strike-zone target net lets a kid retrieve balls and reset without waiting on a sibling. Rotate partners every 10 to 15 pitches if you’ve got more than one player working the same space.
Pro Tip: A taped strike zone on a sheet of plywood costs less than $10 and gives instant visual feedback. No target means no accountability. Your pitcher will guess at the zone instead of aiming for it.
How Many Pitches Should Kids Throw In Practice?
Backyard throws count toward the same arm workload as game pitches, and most parents don’t track them that way. MLB’s Pitch Smart guidelines cap 9 to 12 year-olds at 80 combined innings pitched per year, with at least 4 months of complete rest from throwing, including 2 to 3 continuous months. Daily limits matter just as much: clinical guidance from the Hospital for Special Surgery puts the game-day caps at specific pitch counts for 9 to 10 year-olds and for 11 to 12 year-olds. Backyard sessions should stay well under those numbers, not push toward them.
80 combined innings per year, 4 months of rest. That’s the Pitch Smart baseline for ages 9 to 12, and it includes every mound rep your kid throws, not just game innings.
A simple system keeps you honest:
- Write down every pitch thrown at full or near-full effort, in a notebook or phone note.
- Watch for fatigue signs: dropped elbow, shortened stride, or the ball sailing high.
- Stop the session the moment mechanics break down, even mid-drill.
- Give 24 to 48 hours of rest after any high-volume day, per AAP guidance.
Little League’s own recommendation is to log every throw, not just game pitches, which is the habit most families skip entirely.
Warming Up An Arm Before Backyard Pitching Drills
A cold arm thrown into max-effort reps is how overuse injuries start, so following warm-up principles is essential to prevent injury. Build the session around three phases:
- Mobility (3 to 5 minutes): Arm circles, shoulder rolls, and torso twists to loosen the joints.
- Activation (5 to 8 reps each): Wall slides and light resistance-band external rotations to wake up the rotator cuff and scapular muscles.
- Progressive throwing: Start at 10 to 15 feet with easy short toss, then step back gradually until arm speed and distance feel natural, before any bullpen work begins.
Cool down with light stretching and a few minutes of easy tossing to bring the arm speed back down. If soreness lingers more than a day, ice the area and skip the next scheduled throwing session entirely rather than pushing through.
Pro Tip: Tape a simple warm-up checklist to the fence or garage door where you practice. Kids skip warm-ups when nobody’s watching, and a visible list fixes that fast.
Backyard Drills That Build Control, Command, and Velocity
Coaching consensus favors a strict order: control first, then command, then velocity, because a pitcher who can’t hit the zone consistently gains nothing from throwing harder. That progression, not fancy equipment, is what separates the best backyard pitchers from kids who just chuck the ball around.
Control drills teach a pitcher to consistently hit the strike zone.
- Coin drill: Place a coin or small marker on the taped plate and have the pitcher aim to hit within a foot of it. Run 5 sets of 10 throws and track hit percentage.
- Target tape: Tape a 17 inch by 24 inch rectangle at the letters-to-knees height. Success is 7 of 10 throws landing inside.
- 5-spot accuracy: Mark five spots across the zone (both corners, both edges, and the middle) and rotate through them, one throw per spot, for five full rounds.
Command drills add movement and sequencing once control is consistent.
- Two-zone and four-zone work: Split the strike zone into halves, then quarters, and call out a zone before each pitch.
- Sequence pitching: Simulate an at-bat by calling three pitch locations in a row, mimicking how a real sequence unfolds.
- Mirror cue drills: Have the pitcher watch a parent or coach point to a zone silently, forcing quick visual processing before the throw.
Velocity work comes last, and only once command is solid. Introduce flat-ground power throws in small doses, no more than 8 to 10 max-effort throws per session, and pair them with medicine-ball rotational throws to build core strength without loading the shoulder. Overuse and fatigue, not effort level on any single throw, drive most of the serious injuries youth pitchers suffer.
A cardboard cutout or a silhouette taped to a fence gives a pitcher something to sequence pitches against, which builds game-like focus without needing a real batter. Watch for a dropped elbow, a shortened stride, or balls sailing consistently high. All three are early fatigue signals, and any one of them is a reason to end the drill rather than push through it.
Sample Practice Sessions For Any Skill Level
You don’t need to invent a plan from scratch. Three templates cover most backyard needs:
- Beginner (30 minutes): 8 minutes warm-up, 15 minutes control drills (coin drill plus target tape), 5 minutes light command work, 2 minutes cooldown.
- Intermediate (40 minutes): 10 minutes warm-up, 15 minutes control refinement, 10 minutes command drills (two-zone, sequence pitching), 5 minutes cooldown.
- Command-focused (45 minutes): 10 minutes warm-up, 10 minutes control maintenance, 20 minutes four-zone and mirror cue work, 5 minutes cooldown.
For a four-week arc, keep total weekly throws conservative and build gradually:
- Week 1: Beginner sessions only, twice a week, control drills exclusively.
- Week 2: Add command drills once accuracy hits 70% or better on target tape.
- Week 3: Introduce the intermediate template, still no max-effort velocity throws.
- Week 4: Add limited flat-ground velocity work only if command has stayed consistent across week 3.
Use accuracy, not enthusiasm, to decide when to add intensity. A pitcher who can’t hit 7 of 10 target-tape throws has no business ramping up speed yet.
Fixing The Mechanical Faults That Show Up Most
Three problems account for most backyard mechanical trouble.
- Open front side: The lead shoulder flies open too early, killing accuracy. Fix with a step-in drill: pitcher steps directly toward the target, foot landing in line with the plate, for 10 reps before throwing full speed.
- Late arm action: The throwing arm lags behind the body, straining the shoulder. A towel drill, where the pitcher whips a small towel through the throwing motion without a ball, rebuilds proper sequencing in 10 to 15 reps.
- Short stride: A stride under 70% of the pitcher’s height reduces power and consistency. A wall drill, where the pitcher practices the leg lift and stride against a wall for balance, helps lengthen it naturally.
Give any correction 10 to 15 reps before reassessing. If the same fault persists across multiple sessions, that’s a signal to bring in an in-person coach or, if pain is involved, a medical evaluation rather than continuing to self-correct.
Why Control-First Backyard Training Actually Works
Pitchers who pitch through fatigue face a dramatically higher risk of serious elbow or shoulder surgery, which is exactly why pitch counts and rest windows exist in the first place. The control-to-command-to-velocity order isn’t a preference, it’s how Pitch Smart’s own risk-factor research frames safe development.
- Control-first training reduces the max-effort throws that drive overuse injuries.
- Logging every backyard throw closes the gap between game pitch counts and total arm workload.
- Some training targets and soft balls are designed specifically around this progression, not around chasing radar-gun numbers early.
Author Perspective: Practical Trade-Offs Parents Should Know
Backyard practice works best when it’s boring in the right way: same target, same reps, same short session, three or four times a week, instead of one marathon Sunday workout. Most families don’t struggle with motivation, they struggle with double-counting. Your kid throws a full bullpen at team practice on Tuesday, then you run another 40 pitches in the yard Wednesday without realizing you’ve stacked two high-volume days back to back. Talk to the team coach about weekly pitch totals and keep your own log independent of theirs. The arm doesn’t know the difference between a game inning and a backyard rep, and neither should your tracking.
— Albert
Ready-Made Tools For Backyard Pitching Sessions
Not every family wants to build a taped strike zone from scratch, and some products exist to fill this gap. The pitching target net with a colorful strike 9-zone gives you the same two-zone and four-zone command work described above without measuring tape or plywood, and it doubles as a rebound surface for solo sessions.

For younger throwers or arm-care days, the soft training balls reduce impact stress while your pitcher works on the control drills that should come before any velocity work. Add a 5-pack of training balls if you’re running multiple reps without constant retrieval trips. Whichever combination you pick, keep logging pitches and stick to the rest windows outlined above. Browse the full lineup of training gear and put together a kit that matches your pitcher’s current stage, control, command, or velocity.
This article is general information, not a substitute for advice from a qualified doctor. Consult a qualified healthcare professional about your own circumstances before acting on anything here.
Sources
- Mlb
- Youth baseball safety — Hospital for Special Surgery (HSS)
- Protecting your children’s arms — Little League
- Youth throwing injuries review — PMC
- Little League Elbow guidance — American Academy of Pediatrics (AAP)