


A mini rebounder is worth buying for pitchers, and the answer is especially clear if you’re managing arm care after a heavy outing or returning from a shoulder injury. The device, formally called a mini rebounder or rebound trampoline, is a small, firm-mat trampoline used as a controlled throwing surface. It is not a toy and not a standalone fix. Used inside a supervised arm-care program, it does three things well: it trains force acceptance during the deceleration phase of the throw, restores neuromuscular control after high-stress outings, and allows high-frequency, low-intensity repetitions that full throwing cannot safely provide during early recovery.
Here is what the evidence points to:
- Rockland Peak Performance lists rebounder work (10 reps) as the first exercise in a post-pitching arm-care circuit that takes under 25 minutes.
- Pitchers commonly lose internal rotation in the throwing shoulder after an outing; rebounder drills are one tool used to restore that mobility and shoulder control.
- Mangiarelli Rehabilitation uses rebounder therapy as a distinct phase in return-to-throw progressions, placed before interval throwing begins.
- Pitchtrainingbaseball offers complementary gear, including pitching target nets and practice balls, that pair naturally with rebounder sessions for mechanics and accuracy work.
Pro Tip: If you are buying a rebounder for a youth pitcher, start with a flat-position setup and low-velocity tosses before moving to any angled configuration. Rushing the angle progression is the most common coaching mistake.
Table of Contents
- What is a baseball trampoline and why does it help pitchers?
- What to look for when buying a rebounder for pitchers
- How to use a rebounder for arm recovery and return-to-throw
- Safety rules and when to stop rebounder training
- What does a baseball rebounder cost, and what should you check before buying?
- What clinicians and researchers say about rebounder use for pitchers
- Key Takeaways
- The rebounder is a tool, not a protocol
- Pitchtrainingbaseball gear that works alongside your rebounder
- Useful sources for coaches and clinicians
What is a baseball trampoline and why does it help pitchers?
A mini rebounder is a compact, round trampoline, typically 36–44 inches in diameter, with a firm mat surface and a frame built to absorb and return force. Unlike a backyard trampoline, the mat does not launch the ball into the air. It redirects it back to the thrower in a controlled arc, which is exactly the point.
The biomechanical case for using one is straightforward. The deceleration phase of a pitch, the moment after ball release when the arm must rapidly slow down, places enormous eccentric demand on the posterior shoulder and rotator cuff. Coaches and clinicians use rebounders specifically to expose athletes to that eccentric loading in a graded, controllable way. Instead of throwing at full effort and hoping the arm handles it, the pitcher throws at low velocity into the rebounder and catches the return, training the shoulder to absorb force repeatedly without the stress of game-speed throwing.
The neuromuscular benefit matters just as much. After a long outing, the shoulder’s proprioceptive feedback, its ability to sense position and load, degrades. Reactive catch-and-throw drills on a rebounder force the arm to respond to unpredictable return angles, which rebuilds that sensory loop efficiently. Mangiarelli Rehabilitation describes this as restoring neuromuscular control before the athlete is ready to progress to interval throwing.
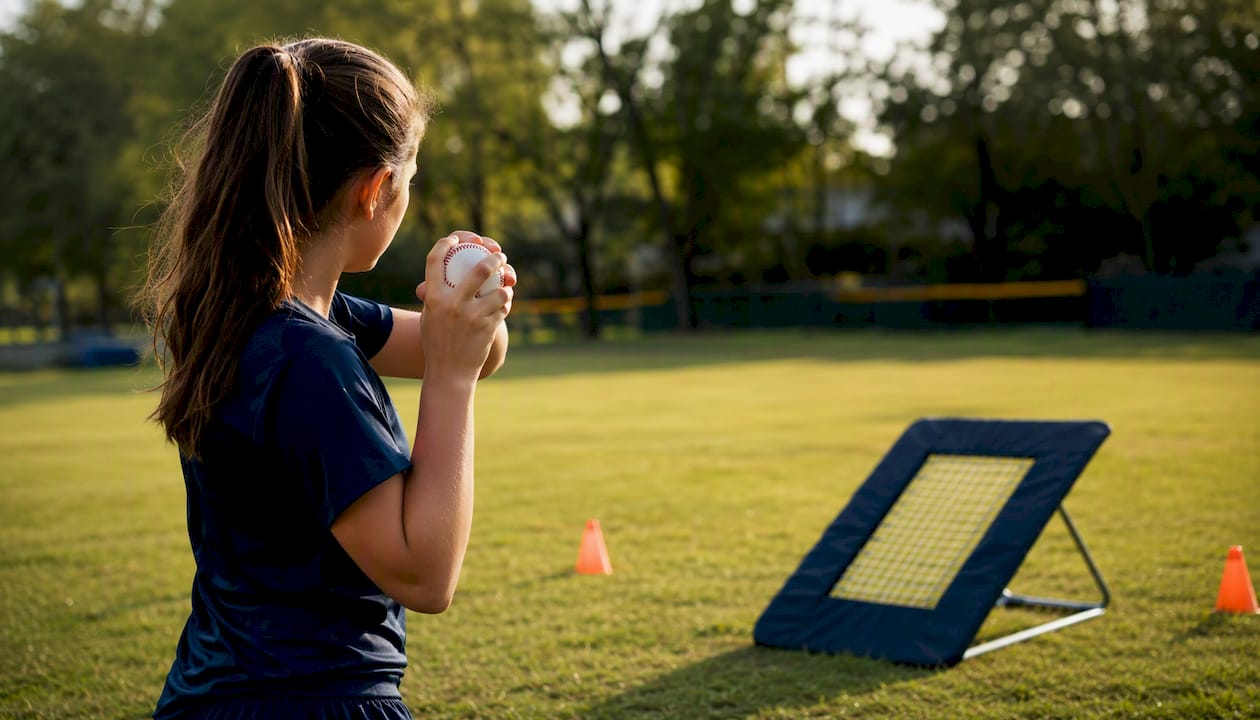
Practical exercises used in clinical and coaching settings include single-arm tosses at low velocity, angled rebounder throws that emphasize deceleration, and bilateral reactive catches used as a plyometric stimulus. The flat-to-angled setup progression, moving the rebounder from horizontal to roughly 45°, changes the return angle and increases task complexity without requiring the pitcher to throw harder.
What to look for when buying a rebounder for pitchers
Not every rebounder on the market is built for throwing athletes. A general fitness rebounder built for jogging in place will not hold up to repeated ball impacts, and its mat tension is usually wrong for the task. Here is what actually matters when you are buying for pitching rehab or conditioning.
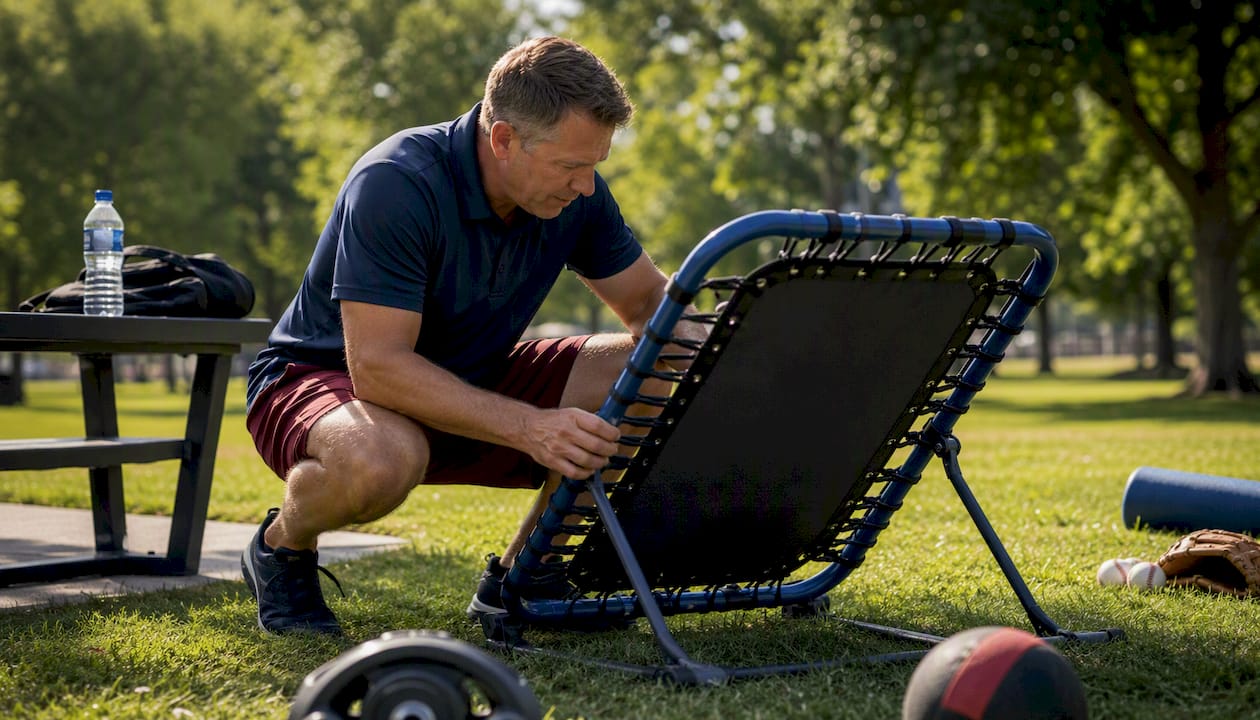
Bounce system: bungee vs. spring
Bungee-cord systems give a softer, more forgiving return and tend to be quieter. Spring-based systems are more durable under heavy use and return the ball more crisply. For rehab, bungee is often preferred because the gentler return reduces impact stress on the catching arm. For conditioning and plyometric work, spring systems hold up better over time.
Size and usable mat area
A mat diameter of at least 36 inches gives pitchers enough surface to work with during single-arm drills. Smaller mats force too-precise targeting and shift focus away from arm mechanics. Clinic-grade models often run 38–44 inches.
Angle adjustability and handle options
Clinics move rebounders from flat to a 45° angle as athletes progress through rehab stages. If you are working with pitchers returning from injury, an angle-adjustable model is not optional. Handle attachments or anchor points also matter for single-arm control drills, where the athlete needs to stabilize the device with one hand while throwing with the other.
Max load and frame durability
Check the manufacturer’s stated weight limit and match it to your athletes. Heavier high-school players can stress frames that are rated for lighter users. Steel frames with powder-coat finish outlast aluminum in outdoor settings.
Portability
A carry case or folding frame matters if you are moving the rebounder between practice stations or transporting it to games. Clinic-grade models are often heavier and less portable; entry-level models trade durability for convenience.
Price bands
- Entry-level ($40–$80): Basic spring or bungee frame, limited angle adjustment, lighter weight limits. Fine for general conditioning, not ideal for structured rehab.
- Mid-tier ($80–$160): Adjustable angle, sturdier frame, better mat tension. This range covers most high-school and travel-ball programs.
- Clinic-grade ($160 and up): Heavy-duty frame, full angle range, replacement parts available, often sold with handles. Built for daily clinical use.
Pro Tip: Always confirm that replacement bungee cords or springs are available before you buy. A rebounder with no replacement parts is disposable, and clinic-grade use will wear out the elastic components within a season or two.
How to use a rebounder for arm recovery and return-to-throw
Before any rebounder work begins, three criteria should be met: the pitcher is pain-free at rest, has full or near-full range of motion in the throwing shoulder, and has received clearance from a clinician if returning from an injury. Do not skip that last step for anyone coming back from a labrum, UCL, or rotator cuff issue.
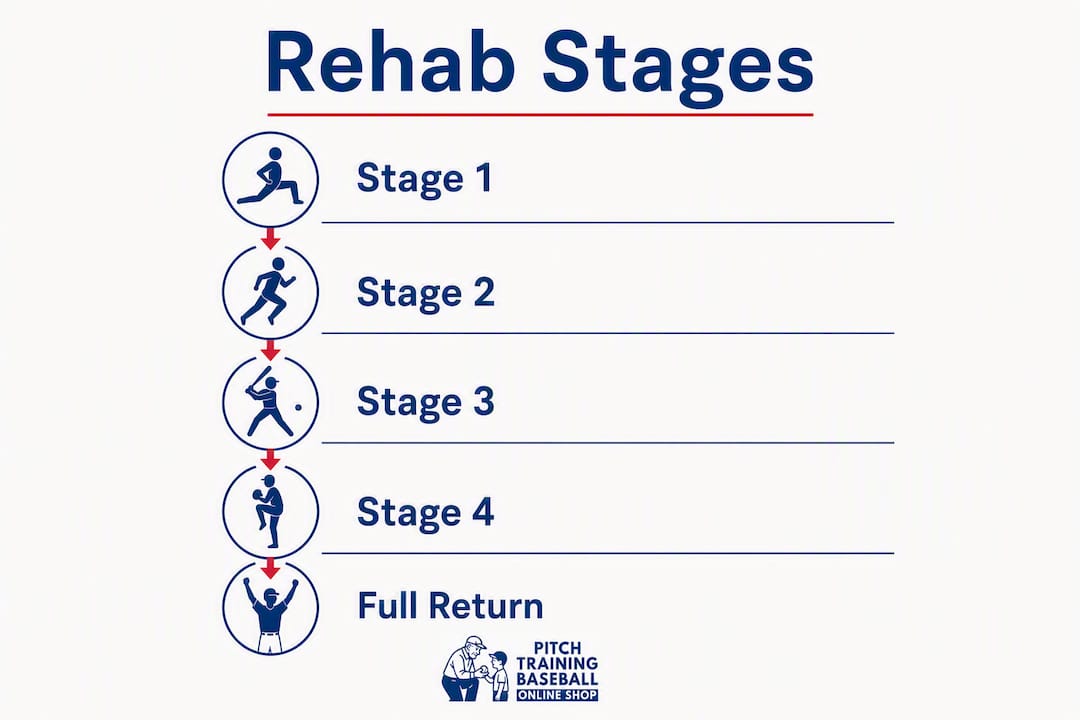
The progression below follows the stage framework used by Mangiarelli Rehabilitation and aligns with the post-pitching circuit recommended by Rockland Peak Performance. It is designed to be coachable, not just clinician-only.
| Stage | Exercise | Reps/Sets | Frequency | Checkpoint to Progress |
|---|---|---|---|---|
| — — Reactive catches | Single-arm toss and catch, rebounder flat | 10 reps × 2 sets | Daily post-outing | No pain, full catch control |
| 2 — Deceleration emphasis | Low-velocity throws, rebounder at 20–30° | 10 reps × 2–3 sets | 4–5× per week | Scapular control maintained throughout |
| 3 — Plyometric work | Bilateral reactive catches, rebounder at 30–45° | 10–15 reps × 3 sets | 3–4× per week | No fatigue-related form breakdown |
| 4 — Integrated arm care | Rebounder + band work + hip flow circuit | Full circuit, under 25 min | 3× per week | Ready for interval throwing program |
Stage 4 is where the rebounder earns its place in a broader kinetic chain routine. RPP’s six-exercise post-pitching routine includes scapular-focused band work and a hip flow circuit alongside rebounder reps, because the shoulder does not recover in isolation. Coaches who skip the hip and scapular components and only do rebounder tosses are leaving recovery on the table.
Pro Tip: During Stage 2 and beyond, watch for scapular winging on the catch. If the shoulder blade lifts off the ribcage during the return catch, the athlete is not ready for that angle. Drop back to flat and add scapular stability work before progressing.
Pain monitoring is non-negotiable throughout. Any sharp or new pain during a rep is a stop signal, not a push-through moment. Dull fatigue is expected; joint pain is not.
For youth pitchers, arm recovery fundamentals apply at every stage. Young arms need longer recovery windows between rebounder sessions, and the volume targets above should be reduced by roughly one-third for players under 14.
Safety rules and when to stop rebounder training
Most rebounder injuries in baseball training come from skipping the progression, not from the device itself. These rules keep athletes safe.
- Check load limits before every athlete uses the device. A rebounder rated for 200 lbs should not be used by a 220-lb high-school pitcher, regardless of how light the throws feel.
- Inspect the frame, bungee cords, and springs before each session. A frayed cord or cracked spring can fail mid-drill and send the ball unpredictably.
- Never start with high-velocity throws. The rebounder is a low-intensity tool. Full-effort throws into a rebounder defeat the purpose and increase injury risk during early rehab.
- Supervise youth players at all times. Kids will experiment with angles and velocities that are not appropriate for their stage. A coach or parent needs to be present.
- Avoid rebounder work during acute inflammation. If the arm is swollen, hot to the touch, or painful at rest, the rebounder stays in the bag.
Red flags that require stopping immediately and consulting a clinician:
- Sharp or shooting pain during or after a drill
- New swelling in the elbow or shoulder joint
- Loss of grip strength or numbness in the fingers
- A feeling of instability or “looseness” in the shoulder
Return-to-play criteria before an athlete moves from rebounder work to full interval throwing include: full, pain-free range of motion in all planes, strength comparable to the non-throwing side, no pain with sport-specific functional tests, and clinician sign-off. Mangiarelli Rehabilitation lists these as distinct stage goals, not a single checkbox. Rushing any one of them is how pitchers re-injure.
What does a baseball rebounder cost, and what should you check before buying?
Pricing for baseball-specific mini rebounders runs from around $40 for basic entry-level models to well over $160 for clinic-grade units with adjustable frames and replacement part programs. The mid-tier range, roughly $80–$160, covers most team and travel-ball budgets without sacrificing the angle adjustability that makes the device useful for actual rehab.
Warranty and return policy are the two most overlooked specs in rebounder buying. A one-year warranty on the frame is standard; anything shorter is a red flag. More importantly, check whether the manufacturer sells replacement bungee cords or springs separately. A rebounder that cannot be serviced is a single-season tool at best.
Shipping times vary by retailer. Clinic suppliers and specialty baseball vendors typically ship within 3–5 business days; general sporting goods retailers may stock models locally. If you are buying for a team, confirm that the retailer accepts returns on unused equipment, since sizing and bounce-tension preferences vary by coaching context.
Portability specs worth checking: folding frame vs. fixed frame, carry bag included or sold separately, and assembled weight (anything over 15 lbs becomes a real logistics issue for coaches moving between fields).
What clinicians and researchers say about rebounder use for pitchers
The clinical case for rebounder use in throwing rehabilitation is consistent across multiple sources, and it centers on one principle: the rebounder provides a graded plyometric stimulus that bridges the gap between passive recovery and active throwing.
Mangiarelli Rehabilitation uses rebounder therapy as part of a multi-step return-to-throw progression, with specific stage goals that include restoring range of motion, regaining baseline strength and muscular endurance, achieving dynamic stabilization, and reestablishing neuromuscular control, all before the athlete begins interval throwing.
Rockland Peak Performance takes a similar position, placing rebounder reps at the start of their post-pitching arm-care circuit. Their rationale is that the rebounder teaches the elbow and shoulder to absorb force during rapid deceleration, which is the highest-stress moment of the throwing motion. Treating that deceleration demand as a trainable quality, rather than just a consequence of pitching, is the core insight behind rebounder-based arm care.
The Kinetic Performance Institute (KPIMH) also addresses post-pitching arm care and the role of targeted recovery work in managing the shoulder’s internal rotation loss that follows high-intensity outings.
Key clinical points that coaches should carry into practice:
- Rebounder therapy is most effective when combined with manual therapy, strengthening, and a structured interval throwing program, not used in isolation.
- Reactive neuromuscular training principles underpin rebounder drills: the unpredictable return angle forces the arm to respond dynamically, which rebuilds proprioceptive feedback faster than static exercises.
- Progressive angle adjustment, from flat to 45°, is a clinical technique, not just a convenience feature. It controls task difficulty without requiring the athlete to throw harder.
- Eccentric loading during the catch phase is the primary training stimulus; the throw is secondary.
Key Takeaways
A mini rebounder belongs in every pitcher’s arm-care toolkit, but only when used inside a structured progression with clinician oversight for injured athletes.
| Point | Details |
|---|---|
| Start with rebounder, not full throws | Rebounder reps are the first step in post-pitching arm care, placed before interval throwing in clinical protocols. |
| Angle adjustability is non-negotiable for rehab | Flat-to-45° adjustment controls task difficulty safely; fixed-angle models limit the progression. |
| Integrate the full kinetic chain | Pair rebounder work with scapular band exercises and hip mobility drills for complete post-pitching recovery. |
| Watch for red flags and respect load limits | Sharp pain, swelling, or instability means stop immediately and consult a physical therapist or sports medicine physician. |
| Pitchtrainingbaseball complements rebounder work | Pitching target nets and practice balls from Pitchtrainingbaseball pair directly with rebounder sessions for mechanics and accuracy training. |
The rebounder is a tool, not a protocol
The conventional wisdom in youth baseball coaching treats the rebounder as a warm-up novelty, something to toss a ball into before practice starts. That framing undersells it badly and, more importantly, misses where it actually earns its keep.
The rebounder’s real value shows up after the outing, not before it. A pitcher who has thrown 80 pitches in a game has a shoulder that is measurably different from the one that warmed up three hours earlier. Internal rotation is reduced. Proprioceptive feedback is degraded. The posterior shoulder is fatigued in a way that static stretching alone does not address. Rebounder drills, done at low velocity with attention to the catch phase, start rebuilding that system within minutes of the final out.
What coaches often underestimate is how much the catch matters more than the throw during rebounder work. The throw is just a delivery mechanism. The training stimulus is the return: an unpredictable ball coming back at the arm, forcing a reactive catch that loads the decelerators and rebuilds the neuromuscular loop. Coaches who watch only the throw are watching the wrong half of the drill.
For youth pitchers specifically, the rebounder is one of the few tools that gives a coach something productive to do with a pitcher’s arm on the day after a start, when full throwing is off the table—that window matters enormously for arm health across a long season. Pair it with rest and workload management and you have a recovery system that actually fits how youth baseball is played.
Pitchtrainingbaseball gear that works alongside your rebounder
Rebounder work builds force acceptance and neuromuscular control. What it does not build is accuracy, zone awareness, or the mechanical feedback a pitcher needs to develop command. That is where Pitchtrainingbaseball’s equipment fills the gap.

The Pitching Target Net with Strike 9-Zone gives pitchers a visual target to throw at during the later stages of rebounder progressions, once they have moved from reactive catches to low-velocity throws. Set up the net alongside the rebounder and you have a two-station drill: rebounder reps for arm care, then target throws for command work, all in under 30 minutes. Pitchtrainingbaseball’s practice baseballs are built for exactly this kind of controlled, repetitive training, with construction that holds up to high-rep sessions without the wear on young arms that a regulation ball can cause.
Shipping is straightforward, and the product pages include clear return and support information so coaches and parents can order with confidence. If you are building out a complete arm-care station for a youth pitcher, start with the target net and a set of practice balls, then add the rebounder once you have the throwing mechanics dialed in.
Useful sources for coaches and clinicians
These are the primary clinical and expert sources behind the recommendations in this article.
- Return to Throwing Using the Rebounder for Shoulder Rehabilitation — Mangiarelli Rehabilitation’s detailed breakdown of rebounder use in multi-stage return-to-throw progressions, including stage goals and angle-adjustment protocols.
- Post-Pitching Arm Care Routine for Pitchers at KPIMH — Kinetic Performance Institute’s arm-care guidance, covering internal rotation loss and targeted recovery exercises for pitchers.
- Why Eccentric Loading Builds Explosiveness in Athletes — Training science context on eccentric loading, directly relevant to understanding why the catch phase of rebounder drills is the primary training stimulus.
- Reactive Neuromuscular Training: A Complete Guide — Explains the neuromuscular principles that make rebounder drills effective for restoring proprioceptive feedback after high-stress throwing.