


For most young pitchers, the three-finger changeup is the easiest grip to learn and control, while the circle change becomes the better option once hands grow and finger dexterity improves. The vulcan grip works for a smaller group of older, more coordinated kids. Whichever grip you pick, the rule never changes: the arm moves exactly like a fastball, and only the grip slows the ball down.
TL;DR:
- Smaller hands and young age (around 8-10) favor starting with the three-finger changeup for immediate control and minimal force.
- Transition to circle change should be based on hand growth and comfort, offering more fade and sink as skill develops.
- Consistent arm speed and relaxed grip are crucial; arm deceleration and tight gripping are common mistakes to correct early.
- Drills like towel work, targeted toss, and short-distance long toss build feel, control, and reliable command within a few weeks.
- The changeup is safer than breaking pitches, generating about 25% less elbow stress, making it ideal for youth pitchers following safety guidelines.
Table of Contents
- What Is the Best Changeup Grip for Kids?
- How Do You Teach a Changeup Grip Step by Step?
- What Drills Build a Reliable Changeup?
- Is the Changeup Safe for a Young Pitcher’s Arm?
- What Equipment Helps Kids Practice Changeups Safely?
- Coaching Confidence Into Young Pitchers
- A Kid-First Take on Teaching the Changeup
- Gear That Makes Changeup Practice Easier at Home
- Sources
What Is the Best Changeup Grip for Kids?
A changeup grip for kids has to solve one problem before anything else: small hands don’t wrap around a baseball the way a grown pitcher’s hands do. That’s why grip choice matters more for an 8-year-old than for a high schooler, and why a one-size-fits-all approach usually backfires.
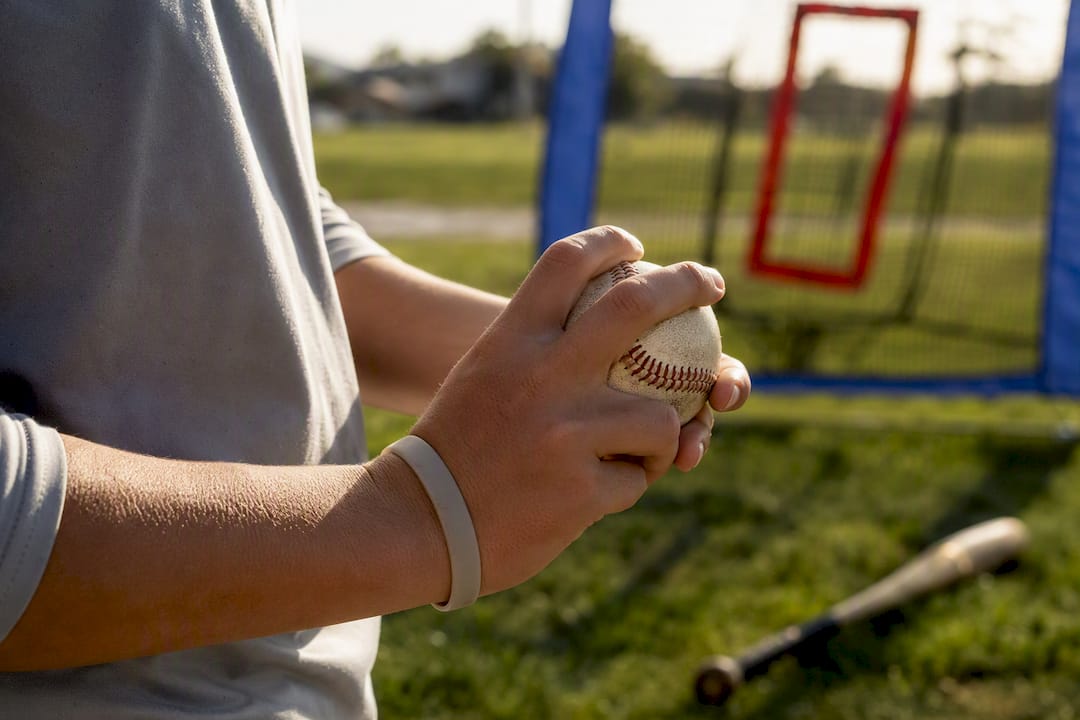
Three-finger change. The ball rests against three fingers (index, middle, ring) with the thumb underneath, pushed slightly deeper into the palm than a fastball grip. This is the go-to youth baseball grip because it doesn’t require much finger spread or hand strength. Kids with smaller hands can control it almost immediately. Expect a modest velocity drop, usually somewhere in the range of a fastball minus a few miles per hour, with mild sinking action as the ball comes off more fingers than usual.
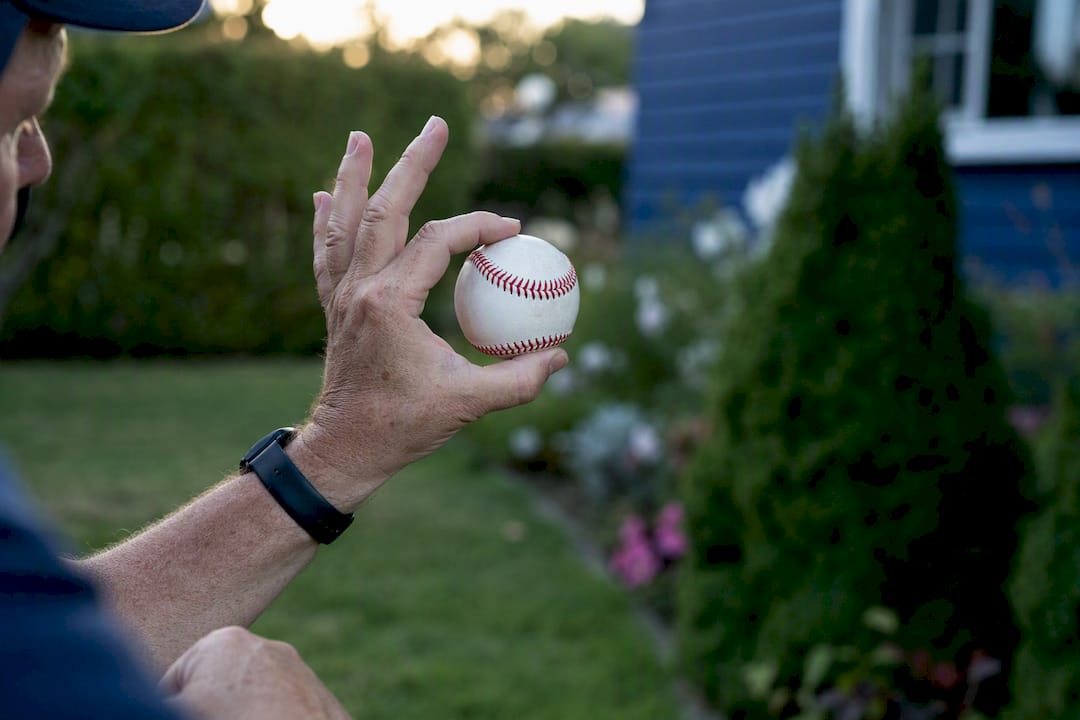
Circle change. This is what most coaching resources call the gold standard once a kid’s hand has grown enough to make an “OK” sign with the thumb and index finger against the ball’s side, while the remaining three fingers do the throwing. Baseball America recommends it as one of the first grips to experiment with when teaching a young pitcher a secondary pitch. Done correctly, it produces more fade and sink than the three-finger version, and pitchers often describe the ball “dying” as it nears the plate. It takes longer to feel comfortable, though, because the circle requires finger independence that not every 9-year-old has yet.
Vulcan grip. Borrowed from the Star Trek hand sign, this splits the middle and ring fingers on top of the ball with the index and pinky supporting the sides. It’s an advanced changeup technique for children with above-average hand size and coordination, usually kids in the 12–14 range. The pitch can tumble and dive sharply, but the grip is unforgiving. Get the finger spacing wrong and the ball sails or spins like a fastball, which defeats the entire purpose.
Palmball (quick note). Worth mentioning because some coaches teach it as a bridge grip: the ball sits deep in the palm with all fingers wrapped loosely around it. It’s simple but tends to produce less deception than the three-finger or circle change, so most youth programs treat it as a backup rather than a primary option.
Here’s a simple way to sort kids into the right starting grip:
- Smaller hands, younger age (roughly 8–10): start with the three-finger change.
- Growing hand size, decent ball feel: transition to the circle change.
- Older, coordinated, already comfortable with circle change: experiment with vulcan.
- Struggling with finger independence on any grip: fall back to palmball temporarily, then retry.
Grip selection isn’t permanent. A kid who starts on three-finger at age 9 might move to circle change by 11 without anyone forcing the switch. Let hand size and control drive the timeline, not the calendar.
How Do You Teach a Changeup Grip Step by Step?
Teaching a changeup pitch for young players works best as a slow build, not a single lesson. Rushing straight to a mound and expecting a kid to nail the grip and deception at once sets up bad habits that are hard to undo later.
- Start with grip-only catch. No mound, no windup. Just have the kid hold the grip and play catch from 30 to 45 feet, focusing entirely on finger placement and ball feel. This removes pitching stress while the hand learns the shape.
- Add the towel drill. Have the pitcher grip a hand towel the same way they’d grip the changeup and go through a full arm action, snapping the towel at release point. It isolates the arm motion without a ball in play, so a coach can spot arm slowdown immediately.
- Layer in identical arm speed. This is the single most important coaching cue in this entire guide. Say something like, “Same fastball arm, different grip” or “Throw it like a fastball you’re lying to.” Kids often try to slow their arm down to slow the pitch, which is exactly backwards and the fastest way to tip the pitch to hitters.
- Move to flat-ground bullpens. Once the grip feels natural and the arm action matches the fastball, bring in a mound or flat-ground surface and start throwing changeups at moderate effort, watching for consistent release point.
- Introduce it in live or simulated at-bats. Only after the first four steps are solid should a changeup show up against a live hitter, and even then, coaching literature suggests starting in low-pressure counts, like ahead in the count, rather than in critical situations.
Common mistakes show up early and repeat if nobody corrects them. Gripping the ball too tight is the biggest one. A death grip kills feel and often causes the ball to sail high. The second is arm deceleration, where a kid consciously slows their arm to slow the pitch instead of trusting the grip to do that work. Watch for a hitch or a dip in the delivery. That’s usually the tell.
Pro Tip: Have your pitcher throw a fastball and a changeup back to back from the same distance, and time how long each takes to reach you (or just watch the sound off a glove). If the arm action looks identical but the ball clearly arrives slower, they’ve got it. If the arm looks different, go back to the towel drill.
On timeline, most coaches see meaningful grip comfort within 2 to 3 weeks of short, regular sessions, and useful command within a full season of repetition. There’s no shortcut here. A kid who throws the towel drill and grip-only catch 3 to 4 times a week for 10 minutes will progress faster than one who tries a single 45-minute changeup lesson once a month.
What Drills Build a Reliable Changeup?
Short, structured reps beat long, unfocused sessions every time with young pitchers. These four drills cover the core progression most coaches and coaching resources recommend for building feel without overloading a growing arm.
- Towel drill. Three sets of 10 reps, full arm speed, no ball. Focus purely on matching the changeup arm action to the fastball motion. This drill can run daily since there’s zero throwing stress involved.
- Bucket or target toss. Set a bucket or small target 30 to 40 feet away and have the pitcher throw 15 to 20 changeups aiming for it. This builds depth control, which matters more for a changeup than raw velocity separation.
- Long toss (modified). Regular long toss builds arm strength, but change up-specific long toss should stay shorter, around 60 feet max, with the emphasis on keeping identical arm action rather than stretching distance. This is not the drill to chase max distance with.
- Game-situation practice. During scrimmages or live batting practice, call for a changeup in a defensive count (ahead 0-2 or 1-2) so the pitcher gets game-speed reps without the pressure of a full-count situation.
A workable 15-minute practice plan between games might look like this: 3 minutes of towel drill warmup, 5 minutes of bucket toss for command, 5 minutes of modified long toss to reinforce arm action, and a final 2 minutes throwing changeups to a catcher or into a target net to simulate real accuracy demands. Run that twice a week and most kids show visible improvement within a month.
Is the Changeup Safe for a Young Pitcher’s Arm?
Yes, and this is one of the more reassuring facts in youth pitching. Some data suggests changeups generate roughly 25% less elbow varus torque than four-seam fastballs, which is a big part of why it’s considered a safer secondary pitch than a breaking ball for a developing arm.
That safety edge is exactly why Pitch Smart, the guideline set from MLB, recommends that pitchers in this age group stick to fastballs and changeups and avoid breaking pitches entirely. Pitch Smart also sets pitch-count limits and mandatory rest days by age group, and following those limits matters just as much as grip choice when it comes to protecting a young arm. If you haven’t reviewed how often youth pitchers should throw based on age, that’s worth doing before building out a weekly practice schedule.
Nationwide Children’s Sports Medicine reinforces this from a medical angle, recommending that curveballs and other breaking pitches wait until a pitcher is closer to finished growing and has built adequate arm strength and control. The changeup fills that gap perfectly. It gives a young pitcher a second pitch to disrupt timing without the joint stress that comes with breaking-ball spin.
Before adding a changeup to a kid’s arsenal, run through this readiness checklist:
- Can they hold the grip comfortably without straining fingers to reach around the ball?
- Do they already have a repeatable fastball delivery?
- Are they pitching without pain in the elbow, shoulder, or forearm?
- Is a coach or parent supervising reps to catch bad habits early?
If pain shows up at any point, the response is simple: stop throwing immediately, assess where the discomfort is coming from, and consult a doctor if it doesn’t resolve with rest. No drill or grip fix is worth pushing through arm pain.
What Equipment Helps Kids Practice Changeups Safely?
The right gear takes some of the physical stress out of high-rep practice and makes repetition less of a grind for parents running sessions in a backyard or driveway.
- Softer practice balls, like pickeballs, reduce impact stress during high-volume grip work, which matters since changeup feel comes from repetition, not max-effort bullpens.
- A pitching target net with marked zones gives instant visual feedback on command, which is especially useful for the bucket toss drill described above.
- A sliding mitt keeps whoever’s catching protected during fielding and short-toss reps, since a parent catching barehanded for 20 minutes straight isn’t sustainable.
- Distance markers (cones, chalk, tape) at 30, 45, and 60 feet keep sessions consistent without needing a full mound setup.
Ten to fifteen reps per drill segment is plenty for most sessions. Kids lose focus fast past that point, and quality reps beat quantity every time with a pitch this dependent on feel.
Coaching Confidence Into Young Pitchers
Confidence in a changeup builds through small, specific wins, not a single breakthrough session. When a kid throws one with matching arm speed and it dips or fades even slightly, name exactly what happened: “That’s it, same arm, the ball just died at the plate.” Vague praise like “good job” doesn’t stick the way specific feedback does.
Avoid piling on corrections in one session. Pick the single biggest issue, usually grip tension or arm deceleration, and fix that before mentioning anything else. Kids tune out after two or three corrections in a row.
If your program has a parent or player willing to share how this progression worked for their pitcher, a short, specific note about grip comfort or in-game results adds real credibility here. A general “it helped a lot” doesn’t do much, but a concrete detail, like a kid finally trusting the pitch in a game situation after weeks of towel drills, does.
A Kid-First Take on Teaching the Changeup
Most changeup advice online skips the part that actually matters for youth players: hand size dictates grip choice far more than age does. A strong, coordinated 9-year-old with big hands might handle a circle change before a smaller 11-year-old ever can. Coaches who force every kid into the same grip because “that’s what the pros throw” are setting up frustration that has nothing to do with effort or coachability.
The bigger gap in conventional advice is how loosely it treats safety guidance. Pitch Smart and Nationwide Children’s aren’t optional context tacked onto a grip tutorial. They should shape the entire teaching order: changeup before breaking balls, pitch limits respected regardless of how good a kid’s stuff looks, rest days non-negotiable. Skip that framework and you’re optimizing for a pitch that looks good in July and an arm that’s compromised by September.
If you take one thing from this guide, prioritize the towel drill and grip-only catch over mound reps for the first few weeks. Feel comes before velocity, and velocity comes before game use. Reversing that order is the most common mistake in youth pitching.
— Albert
Gear That Makes Changeup Practice Easier at Home
Every drill in this guide gets easier with the right equipment on hand, and that’s exactly the gap Pitchtrainingbaseball’s product lineup is built to close for parents running practice without a full coaching staff behind them.

For high-rep grip work, 5 Pickeballs hold up to daily towel and bucket drills without the arm stress of a full-weight ball, which matters when a kid is throwing 15 to 20 reps a session. For command work, the Pitching Target Net with Colorful Strike 9-Zone gives instant, visible feedback on where a changeup is landing, so parents don’t have to guess whether the pitch is finding the zone. Add the America Sliding Mitt for anyone catching reps barehanded, and you’ve got a full at-home setup that turns scattered practice into a repeatable routine. Check out the pickeballs product page to see what fits your next session.
This article is general information, not a substitute for advice from a qualified doctor. Consult a qualified healthcare professional about your own circumstances before acting on anything here.
Sources
- Play ball | Nationwide Children’s Sports Medicine
- Pitching Guidelines Ages 9-12 | Pitch Smart
- For young pitchers, learning a changeup is key | Baseball America
- How to throw a changeup: Grip, mechanics, and drills | BattingLeadoff