


Most parents watching their kid on the mound assume the harder the grip, the harder the throw. It feels logical. Squeeze tight, throw fast, hit the strike zone. But that instinct is exactly backwards. A death grip on the baseball actually kills velocity, wrecks accuracy, and puts unnecessary strain on a young arm that’s still growing. The good news? Learning the right pitching grip is simpler than most people think, and the payoff is immediate. This guide walks you through every grip a youth pitcher aged 8 to 14 needs, with step-by-step instructions, drills, and honest advice on what to skip until they’re older.
Table of Contents
- Why pitching grip matters for young players
- The fundamentals of a proper pitching grip
- Comparing common youth pitching grips
- Teaching and reinforcing proper grip: Drills and troubleshooting
- Avoiding common pitching grip mistakes
- A coach’s perspective: What really matters for young pitchers
- Making practice easy: Tools to support young pitchers
- Frequently asked questions
Key Takeaways
| Point | Details |
|---|---|
| Proper grip basics | Mastering a simple four-seam grip provides the foundation for all future pitching. |
| Gentle grip wins | A relaxed, controlled grip improves accuracy and reduces fatigue or injury risk. |
| Drills reinforce habits | Frequent, fun practice with feedback helps young players build muscle memory for the correct grip. |
| Avoid complexity early | Young pitchers should first focus on one or two grips before adding advanced pitches. |
Why pitching grip matters for young players
The way a young pitcher holds the baseball sets off a chain reaction that affects everything else. Finger placement changes how the ball spins. Spin changes movement. Movement determines whether the pitch lands in the zone or sails wide. Before a pitcher even thinks about mechanics, footwork, or arm angle, the grip is already shaping the outcome.
Grip also plays a direct role in arm health. When a young pitcher squeezes too hard, the muscles in the forearm tense up and stay tense through the entire throwing motion. That tension reduces the natural whip in the arm, which actually slows the pitch down. Worse, it adds stress to the elbow and shoulder joints that young players simply aren’t built to handle yet. Proper improve baseball throwing technique starts at the fingertips, not the legs or the hip rotation.
Here’s what goes wrong when youth pitchers use an improper grip:
- Wild throws that frustrate both the pitcher and the catcher
- Inconsistent ball release, making it impossible to repeat good mechanics
- Arm fatigue that sets in earlier than it should during a game or practice
- Slowed skill development because bad habits get reinforced with every throw
- Increased risk of elbow and shoulder strain over time
One of the most common mistakes we see is young players copying the grips they watch professional pitchers use on TV. A major league pitcher has a hand large enough to wrap around the ball with control and strength built over years of training. A 10-year-old does not. Trying to mimic an advanced grip before the hand size and strength are there leads directly to the problems listed above. Addressing youth pitching mistakes early is far easier than trying to undo ingrained bad habits at age 15.
“The grip is the first conversation between the pitcher and the ball. Get that conversation right, and everything else in the delivery has a better chance of falling into place.”
Mastering a basic, correct grip early in a player’s development builds the foundation for every pitch they’ll ever throw. It’s not glamorous, but it’s the single most important mechanical habit a young pitcher can build.
The fundamentals of a proper pitching grip
The four-seam fastball is where every young pitcher should start. It’s the most straightforward grip to learn, the easiest to control, and the safest for developing arms. Before worrying about movement pitches or off-speed options, get this one locked in.
Here’s how to teach the four-seam fastball grip step by step:
- Find the horseshoe seam. Hold the ball and rotate it until you find the U-shaped or horseshoe-shaped seam on one side. This is your starting position.
- Place the index and middle fingers. Lay them across the top of the horseshoe seam, side by side, with the seam running perpendicular (at a right angle) to the fingers. Both fingertips should rest on the seam itself, not beside it.
- Position the thumb. Place the thumb directly underneath the ball, resting on the smooth leather between the seams. It should sit roughly below the gap between the index and middle fingers.
- Tuck the ring finger and pinky. These two fingers curl lightly against the side of the ball. They’re not gripping, just resting. Think of them as stabilizers.
- Check the gap. There should be a small gap between the palm and the ball, sometimes called the “circle” or “horseshoe gap.” If the ball is pressed into the palm, the grip is too deep.
- Apply gentle but firm pressure. The fingertips do the work. Grip pressure should feel like holding a small bird firmly enough that it won’t fly away, but gently enough that you won’t hurt it.
That last point about pressure is where most young pitchers struggle. The instinct is to squeeze. Resist it. A relaxed grip allows the wrist to snap naturally at release, which generates spin and velocity far more efficiently than a tight grip ever could. Teaching fix pitching mistakes like over-gripping starts with helping kids feel the difference between tense and relaxed in their hand.
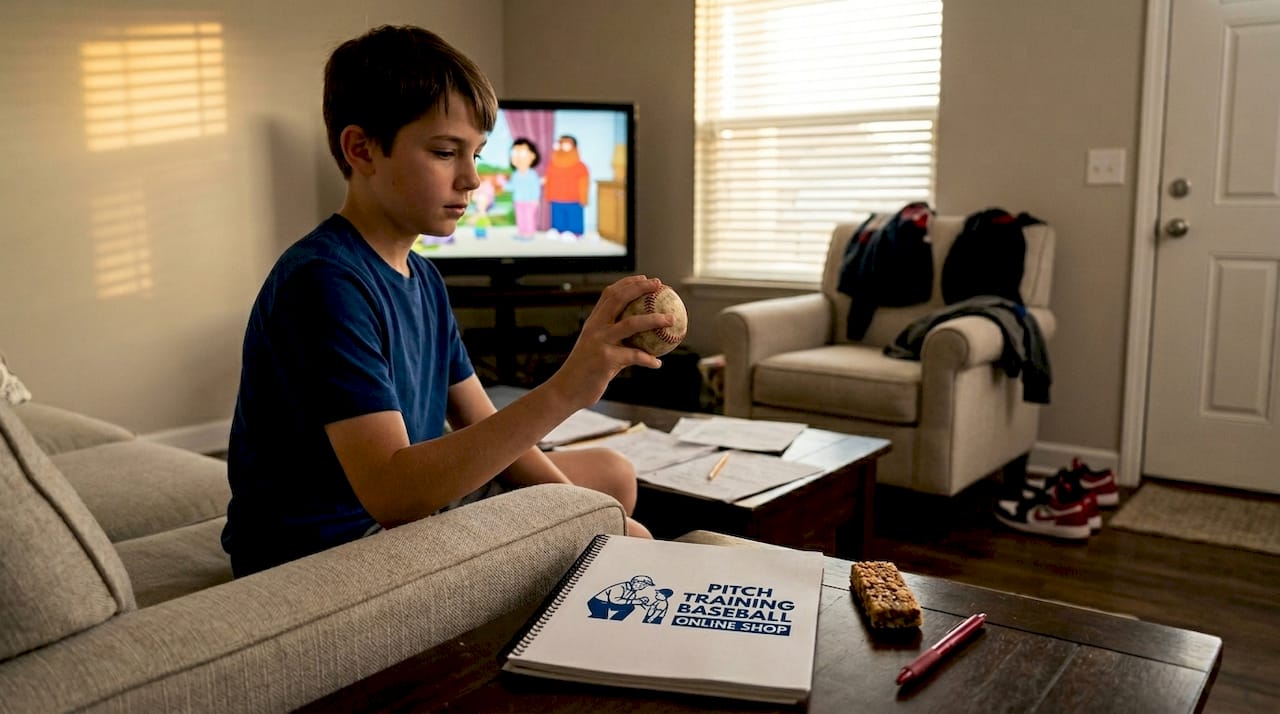
Pro Tip: Have your child practice the grip while watching TV or riding in the car. Repetitive grip practice away from the mound builds muscle memory without adding throwing volume or arm stress.
Here’s a quick reference table for finger placement and common errors:
| Finger | Correct position | Common mistake | Effect of mistake |
|---|---|---|---|
| Index finger | Across top seam | Placed beside seam | Reduced spin, less control |
| Middle finger | Across top seam | Pressed into palm | Ball too deep, velocity drops |
| Thumb | Under ball, on leather | Under seam | Alters ball rotation |
| Ring finger | Curled on side | Pressing into ball | Adds unwanted grip tension |
| Pinky | Curled on side | Hanging off ball | Disrupts release point |
Getting these positions right doesn’t happen overnight. But with consistent repetition and a parent or coach checking the grip before each practice throw, kids can build the right habit within a few weeks.
Comparing common youth pitching grips
Once the four-seam fastball grip feels natural and repeatable, it’s worth introducing a couple of variations. Youth pitchers aged 10 and up can begin experimenting with the two-seam fastball and a basic changeup. These three grips cover everything a young pitcher needs to be effective and competitive without putting their arm at risk.
Here’s how each grip works and what it does:
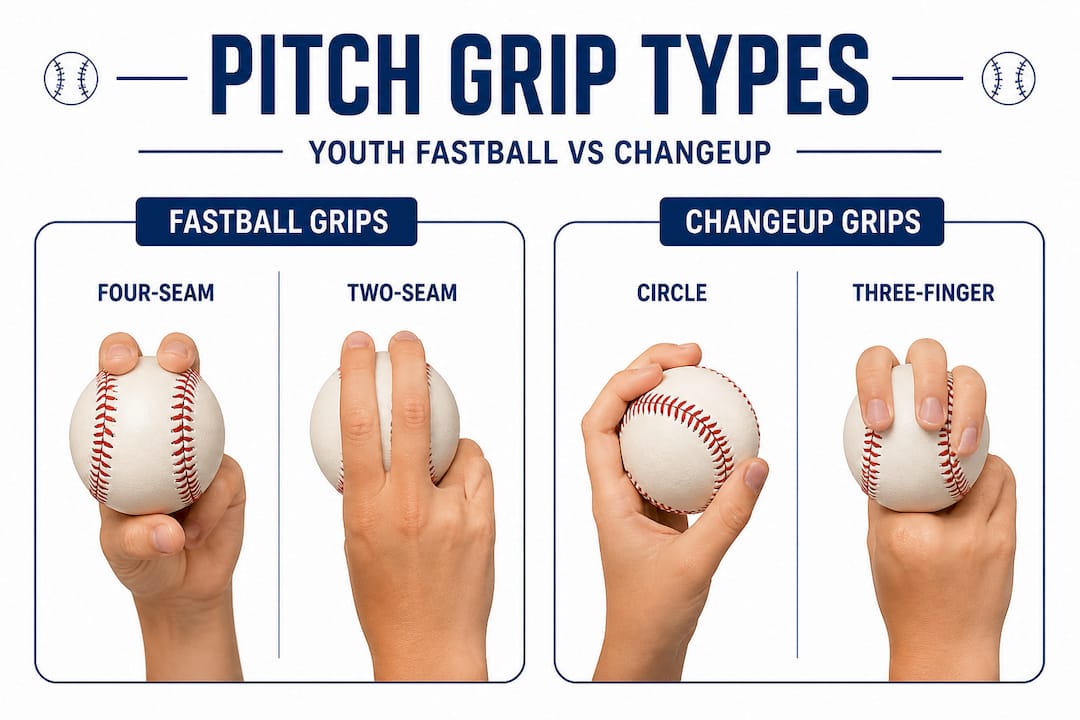
Four-seam fastball: As described above, fingers across the horseshoe seam. This grip produces the straightest, fastest pitch with the most backspin. It’s the easiest to control and the best choice for throwing strikes consistently. For pitching zone knowledge, this is the grip that teaches a pitcher where the ball is going and why.
Two-seam fastball: Index and middle fingers rest along the two narrow seams that run parallel to each other, rather than across them. The thumb stays underneath. This grip produces a slightly slower pitch with natural movement, usually running in toward a same-handed batter. It’s a great second pitch for youth players because the grip change is small but the effect on batters is real.
Changeup: The most common youth changeup is the circle change. Form a circle or “OK” sign with the thumb and index finger on the side of the ball. The middle, ring, and pinky fingers rest across the top seam. The key is to throw it with the same arm speed as a fastball. The deep grip naturally slows the ball down. A good pitching grips tutorial can walk through the exact finger placement with illustrations.
Here’s a side-by-side comparison of these three grips:
| Grip | Finger placement | Ball movement | Best age to introduce | Difficulty level |
|---|---|---|---|---|
| Four-seam fastball | Across horseshoe seam | Straight, fast | 8 and up | Beginner |
| Two-seam fastball | Along parallel seams | Slight run/sink | 10 and up | Intermediate |
| Circle changeup | Deep grip, circle with thumb/index | Slower, drops | 11 and up | Intermediate |
| Curveball | Tucked middle finger | Sharp downward break | 14 and up | Advanced |
| Slider | Off-center pressure | Late lateral break | 14 and up | Advanced |
Notice that curveballs and sliders don’t appear until age 14 in that table. That’s not arbitrary. Grip effects on movement for breaking pitches require the pitcher to apply significant torque to the ball, which stresses the ulnar collateral ligament (UCL) in the elbow. Youth arms are still developing bone density and ligament strength. The American Sports Medicine Institute and multiple orthopedic researchers consistently recommend delaying breaking balls until the growth plates in the elbow have matured, which typically happens around age 14.
The three grips listed for younger players are genuinely enough to keep a batter guessing. A fastball with good location, a two-seam that moves, and a changeup that disrupts timing is a legitimate arsenal at any level of youth baseball.
Teaching and reinforcing proper grip: Drills and troubleshooting
Knowing the correct grip is one thing. Building it into automatic habit is another. The drills below are designed for parents to run at home with minimal equipment. Consistency matters far more than volume here.
Drill 1: The grip and show drill Before every practice session, have your child grip the ball correctly, then hold it up for you to check. You look at finger placement, thumb position, and palm gap. If it’s right, they throw. If not, you reset together. This takes 30 seconds and trains the habit of checking grip before every pitch.
Drill 2: Wall toss with focus on release Stand about 10 feet from a smooth wall. Grip the ball correctly and make short, easy tosses, focusing on how the ball feels leaving the fingertips. The goal is to feel the spin generated by the seam grip. This drill builds sensory awareness of what a correct release feels like.
Drill 3: Target zone practice Using a pitching target net, have your child throw 20 to 30 pitches per session aiming at specific zones. The visual feedback of hitting or missing a target zone reinforces the connection between grip, release, and accuracy. This is one of the most effective ways to build repeatable mechanics at home.
- Set up the target at regulation distance for your child’s age group
- Call out a zone before each pitch (high inside, low outside, etc.)
- After each throw, discuss what the grip felt like and whether it matched the result
- Track hits per session over several weeks to measure improvement
Here are the most common grip problems parents spot during practice, and how to fix them:
- Ball too deep in the palm: Reposition by placing the ball on the fingertips first, then closing the hand around it gently
- Fingers bunched together: Remind the pitcher to keep a small, natural gap between index and middle fingers
- Thumb pressing too hard: Loosen thumb contact to a resting position rather than an active grip
- Grip changing between pitches: Use the grip-and-show drill before every throw until consistency builds
Working on pitching balance alongside grip creates a more complete mechanical foundation. Balance and grip work together: a pitcher who wobbles on the mound will compensate by squeezing the ball harder, which undoes all the grip work you’ve done.
Pro Tip: A baseball training glove designed for grip training can help young pitchers feel the correct finger positioning more clearly than bare-hand practice alone, especially for kids who are tactile learners.
Short, focused sessions beat long, exhausting ones every time. Fifteen minutes of intentional grip practice three times a week produces better results than an hour of unfocused throwing once a week. Young arms also recover better with shorter, more frequent sessions.
Avoiding common pitching grip mistakes
Even when parents and coaches teach the right grip, certain mistakes keep showing up. Knowing what to watch for helps you catch problems before they become habits.
Here are the most frequent grip errors in youth pitchers and why they matter:
- Gripping too tightly: This is the number one mistake. A tight grip tenses the entire forearm, restricts wrist snap at release, reduces spin rate, and slows the pitch. It also causes fatigue faster and increases injury risk over time. The fix is conscious relaxation before and during the windup.
- Fingers not crossing the seams: For a four-seam fastball, if the fingers aren’t actually on the seam, the ball won’t spin correctly. The result is a flat pitch with less predictable movement. Always check seam contact before throwing.
- Changing grip on every throw: Some kids fidget with the ball constantly between pitches, never settling into a consistent grip. This leads to inconsistent results and makes it impossible to build muscle memory. Establish a pre-pitch routine that ends with a confirmed grip.
- Copying advanced grips too early: Curveballs, sliders, and splitters look impressive. They’re also dangerous for developing arms. The torque required to throw these pitches correctly puts stress on growth plates that aren’t fully formed yet. Stick to age-appropriate grips until the body is ready.
- Ignoring finger pressure distribution: Many young pitchers apply equal pressure with all fingers, but the index and middle fingers should do most of the work. Uneven pressure awareness takes time to develop, but it’s worth focusing on.
Addressing fix youth pitching mistakes consistently is how good coaches and parents separate players who plateau from players who keep improving. None of these mistakes are permanent. They’re just habits, and habits can be changed with patient, consistent correction.
Building muscle memory for the correct grip takes roughly three to four weeks of daily repetition. That means gripping the ball correctly even when not throwing, during warm-ups, during catch, and during bullpen sessions. The more often the correct grip is repeated, the faster it becomes automatic.
A coach’s perspective: What really matters for young pitchers
Here’s an opinion that might surprise you: most youth pitchers between ages 8 and 14 do not need more than two or three grips. Not five. Not ten. Two or three, thrown with confidence and control, are more effective than a full arsenal thrown inconsistently.
We’ve seen parents get excited about teaching their 11-year-old a curveball after watching a YouTube video. The kid throws it a few times, gets some movement, and everyone gets excited. But two months later, that same kid is complaining about elbow soreness and his fastball command has gotten worse because he’s been neglecting the fundamentals in favor of the flashy pitch. This pattern repeats itself constantly in youth baseball.
The research on pitching zone understanding consistently shows that location beats velocity at the youth level. A pitcher who can throw a four-seam fastball to four different spots in the strike zone with confidence is far more effective than a pitcher who can throw six different pitch types but can’t locate any of them. Batters at this age can’t handle a well-located fastball. They don’t need to be fooled with breaking balls.
There’s also the psychological dimension that often gets overlooked. A young pitcher who masters one grip and starts seeing results builds real confidence. That confidence carries into every aspect of their game. A pitcher who’s constantly experimenting with grips they can’t control loses confidence quickly, and lost confidence is much harder to rebuild than a missed strike.
Fun matters too. Kids who enjoy practice show up consistently. Kids who feel frustrated or overwhelmed find reasons to quit. Keeping grip learning simple, celebrating small wins, and making sessions feel like play rather than work is what keeps young athletes engaged long enough to develop real skill.
Patience is the most underused tool in youth baseball development. The kids who stick with the basics, build them deeply, and stay healthy are the ones still playing at 16, 17, and beyond.
Making practice easy: Tools to support young pitchers
Knowing the right grip is only half the equation. The other half is having the right setup at home to practice it consistently, without frustration.

A starter training baseball designed specifically for youth grip development gives young pitchers tactile feedback that a standard baseball can’t provide. Paired with a target net for grip drills that shows exactly where each pitch lands, home practice sessions become focused and measurable instead of just throwing into the backyard hoping for improvement. For parents who want a complete visual reference for every grip covered in this article and more, the pitching grips eBook at Pitch Training Baseball walks through 12 grips with clear illustrations, making it easy to teach and check grip at home without needing a coach present.
Frequently asked questions
What is the easiest pitching grip for beginners?
The four-seam fastball is the easiest and safest grip for young pitchers to learn first, offering the most control and the straightest ball flight.
How hard should a child grip the baseball?
A child should hold the ball firm but relaxed, much like holding an egg. Grip pressure that’s too tight causes control issues and arm fatigue.
At what age can pitchers try breaking pitches?
Most sports medicine experts suggest waiting until at least age 14 before introducing breaking balls, as younger arms have growth plates that are vulnerable to the torque these pitches require.
What are signs my child is using an incorrect grip?
Wild throws, frequent hand or elbow discomfort, and inconsistent results across practice sessions often signal that grip needs to be checked and corrected.
Recommended
- Fix youth pitching mistakes for better performance – Pitch Training Baseball
- Game-like pitching practice: Raise youth baseball skills fast – Pitch Training Baseball
- Pitching balance: Boost control and power in young players – Pitch Training Baseball
- How to improve baseball throwing: techniques and tools – Pitch Training Baseball