


Most parents and coaches assume the fastest kid on the mound has the best mechanics. That assumption quietly causes more arm injuries and stunted development than almost anything else in youth baseball. Defining youth pitching mechanics correctly means shifting focus away from velocity and toward the repeatable physical habits that actually protect young arms and build long-term performance. This guide breaks down the core elements of sound pitching form, the drills that reinforce them, and the science that explains why they work, whether you are coaching an 8-year-old for the first time or developing a serious teenage pitcher.
Table of Contents
- Key takeaways
- Defining youth pitching mechanics: the core elements
- Building mechanics through drills
- Lower body mechanics and stride length
- Workload management and injury prevention
- Weighted balls and pitch speed nuance
- My take on coaching youth pitching mechanics
- Train smarter with the right tools
- FAQ
Key takeaways
| Point | Details |
|---|---|
| Mechanics before velocity | Balance, stride direction, and arm path matter far more than speed at the youth level. |
| Drills build lasting habits | Five foundational drills practiced consistently create repeatable mechanics that hold up under game pressure. |
| Lower body drives the arm | Ankle stability and proper stride length directly affect how efficiently force transfers from the legs to the throw. |
| Workload rules protect arms | Pitch count limits and mandatory rest days are non-negotiable for preventing overuse injuries in youth pitchers. |
| Slow-motion video accelerates learning | Recording and reviewing pitching sessions helps coaches catch mechanical flaws that are invisible at full speed. |
Defining youth pitching mechanics: the core elements
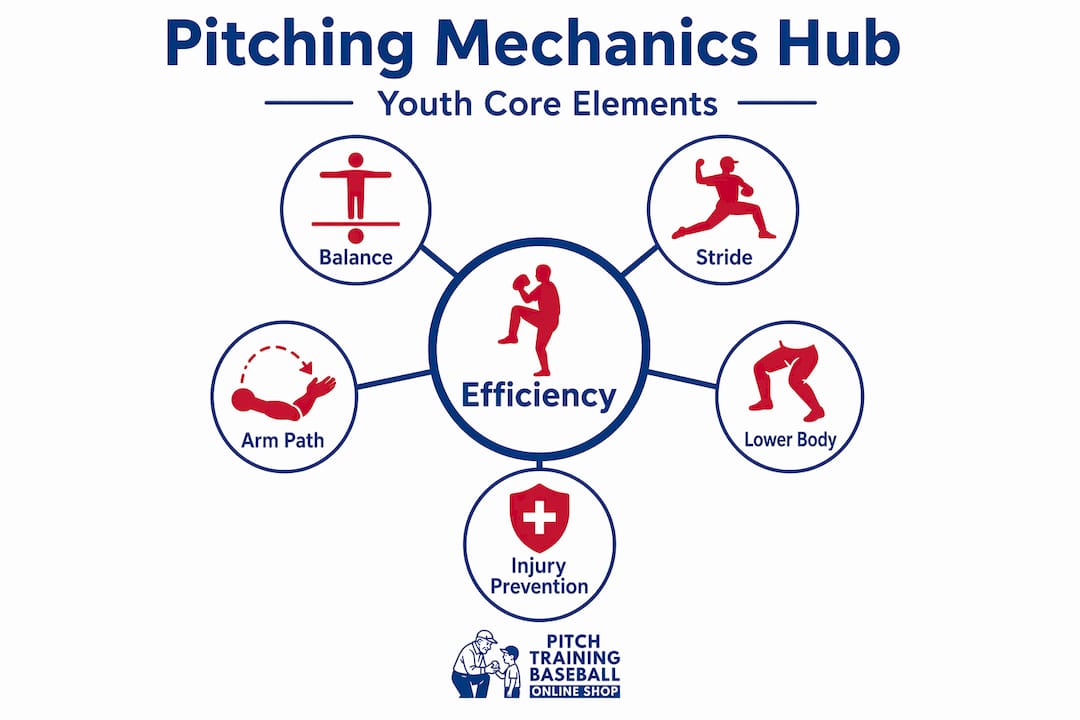
In coaching circles, the formal term for what most people call “pitching mechanics” is pitching biomechanics, which refers to the full chain of body movements that produce a pitched ball. For youth athletes, three elements within that chain carry the most weight: balance, stride direction, and arm path. According to youth pitching research, these three priorities reduce arm stress and improve delivery consistency more than any other single variable.
Balance point: the foundation of everything
The balance point is the moment during the leg lift when a pitcher has one foot on the ground and the raised knee is near its peak. It sounds simple, but rushing through this moment is one of the most common mistakes young pitchers make. When a kid hurries past the balance point, the hips and arm stop working in sync. The result is a delivery that looks different on every pitch, which means both poor command and added stress on the elbow and shoulder.
Coaches should watch for the pitcher’s head staying centered over the standing foot. If the head drifts forward or to the side during the leg lift, the balance point is already compromised. A steady head position is the simplest visual cue available.
Stride direction: where the foot lands changes everything
Stride direction refers to where the stride foot lands relative to the target. An ideal landing is slightly closed, meaning the foot points just inside the target line rather than directly at it or across it. This position sets up efficient hip rotation, which is where a significant portion of pitching power originates.
- Stride foot landing too open: hips fire too early, the arm trails behind, and command suffers
- Stride foot crossing over: hip rotation is blocked, increasing arm stress as the shoulder compensates
- Correct landing: hips and shoulders rotate in sequence, the arm follows naturally, and force transfers efficiently to the ball
Pro Tip: Place a piece of tape on the mound or flat ground showing the ideal landing spot. Have the pitcher practice the stride without throwing until foot placement becomes automatic before adding the throw.
Arm path: protecting the arm while maximizing efficiency
Arm path describes the arc the throwing arm takes from the glove break to release. A clean arm path keeps the elbow at or above shoulder height at the point where the ball comes out of the glove. Two patterns that cause problems are “cutting across the body,” where the arm swings inward before release, and “elbow drop,” where the elbow falls below the shoulder, placing torque on the ligaments inside the joint. Both patterns increase joint loading without adding velocity, a losing trade at any age.
Building mechanics through drills
The best way to wire mechanical habits into a young pitcher is through isolated, progressive drills that break the full delivery into manageable pieces. Five foundational drills cover balance, arm path, stride, command, and fielding position, with each segment taking roughly 8 to 10 minutes per practice. Here is how to sequence them effectively.
-
Balance point hold drill. The pitcher lifts to the balance point, holds for a count of three, and then steps down without throwing. This sounds almost too simple, but it forces the body to find stability before anything else happens. Start this with players as young as 8, and do not add the throw until the hold feels natural.
-
Towel drill for arm path. The pitcher holds a small towel in the throwing hand instead of a ball. They go through the full throwing motion and try to pop the towel against a target (a partner’s glove or a cone) at release point. Because there is no ball, the focus is entirely on arm extension and path. This drill removes throwing risk while giving instant feedback on whether the arm is working correctly.
-
Stride direction drill. Set a target or a piece of tape at the correct landing spot. The pitcher practices the stride and leg lift, landing the foot on the mark, without throwing. A coach watches from the front to check foot angle. Once the foot lands correctly ten times in a row, add a throw at half speed.
-
Flat ground command drill. Move the pitcher off the mound to flat ground and have them throw at a specific target (a pitching target net works well here) from 40 to 50 feet. Flat ground removes the mound’s slope and forces the pitcher to create their own momentum, which reinforces hip drive and arm path simultaneously. This is also the right environment for pitchers who are still refining their mechanics before regular mound work.
-
Fielding position drill. After releasing the ball, the pitcher should end in an athletic fielding stance. Many young pitchers end off-balance, either falling toward first or third base. Finish each drill rep by holding the follow-through position for two seconds. This trains deceleration and readiness in one motion.
Pro Tip: Film every drill session from the side and behind. Slow-motion footage reveals elbow height and arm path details that no coach can see at full speed. Review with the pitcher right after the session so corrections link directly to what they just felt.
Lower body mechanics and stride length
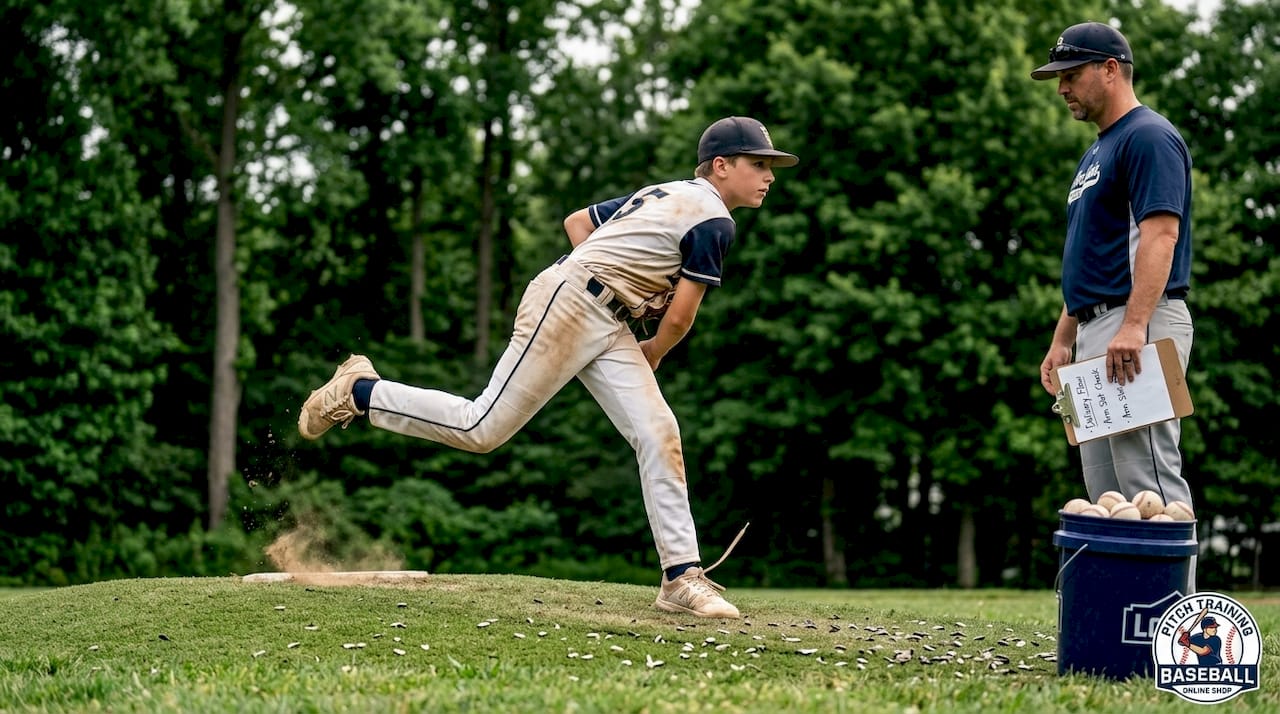
Here is something most arm-focused coaches miss: the lower body is doing the majority of the work in a well-executed pitch, and problems that start in the feet and ankles ripple all the way up to the shoulder. Full-body pitching mechanics rely heavily on lower body function, and improving ankle and foot stability produces cascading benefits for arm timing and power.
Why stride length matters
Research shows that optimal stride length sits at roughly 80 to 87 percent of a pitcher’s height. A pitcher who is five feet tall should stride approximately 48 to 52 inches toward the plate. Too short, and the pitcher does not generate enough forward momentum. Too long, and the front leg cannot brace properly, which causes energy to leak out rather than transfer into the throw.
The following table shows approximate stride length targets by height:
| Pitcher height | Target stride length |
|---|---|
| 4 feet 6 inches | 43 to 47 inches |
| 5 feet 0 inches | 48 to 52 inches |
| 5 feet 6 inches | 53 to 57 inches |
| 6 feet 0 inches | 58 to 62 inches |
Foot control and ankle mobility
Two movement errors at the foot level create problems throughout the entire chain:
- Overpronation: The foot rolls inward during the stride, which destabilizes the ankle and knee, cutting off efficient hip rotation before it starts.
- Supination: The foot rolls outward, reducing ground contact and making it harder to brace the front leg at foot strike.
Ankle mobility and balance exercises, including resistance band stretches and single-leg balance work, can meaningfully improve stride length within just a few weeks of consistent training. Think of small foot instabilities as a timing ripple. A wobble that starts at the ankle shows up later as a late arm or dropped elbow, which coaches often misdiagnose as an arm problem when it is actually a foot problem.
Workload management and injury prevention
Mechanics coaching works best when it runs in parallel with strict workload management. Great form reduces stress on the arm, but it does not make a young pitcher immune to overuse injury. The two work together.
Youth pitch count guidelines mandate rest days that scale with the number of pitches thrown, and they prohibit pitching on three consecutive days for athletes 14 and under. The rest requirements are not optional suggestions. They exist because young arms are structurally different from adult arms. Growth plates are still open, and repeated stress without adequate recovery can cause lasting damage.
Key workload rules to follow:
- Zero rest days required if a pitcher throws fewer than 21 pitches in a day (ages 14 and under)
- One rest day required for 21 to 35 pitches
- Two rest days required for 36 to 50 pitches
- Three rest days required for 51 to 65 pitches
- Four rest days required for 66 pitches or more
Mechanical flaws also compound injury risk. Elbow drop increases valgus stress on the UCL. An open stride causes the shoulder to work harder to compensate for lost hip rotation. When coaches monitor mechanics alongside workload, they get a much clearer picture of overall arm stress than pitch counts alone provide. A pitcher throwing 60 pitches with solid mechanics faces a different risk profile than one throwing 60 pitches with an elbow drop every rep.
Coaches should also watch for signs of cumulative fatigue: velocity drops, a visibly slower arm, complaints of arm heaviness, or sudden command loss. Any of these signals means the pitcher needs rest before mechanics instruction, not instead of it. You can review more on how to recognize and fix pitching mistakes before they become chronic patterns.
Weighted balls and pitch speed nuance
Weighted ball programs have gained popularity in youth development circles, but the science behind them is more complicated than most marketing suggests. Research on joint loading in youth pitchers using weighted balls shows that differences in elbow and shoulder stress across ball weights are largely mediated by pitch speed, not just the ball’s mass alone.
In practical terms, this means a pitcher throwing a heavier ball faster may place more stress on the elbow than a pitcher throwing a lighter ball at the same speed. The weight of the ball is only part of the equation.
“When evaluating weighted ball training effects on mechanics, pitch speed is a confounding variable. Coaches must account for effort and velocity changes before concluding that any mechanical improvement is real and not just a product of throwing harder or softer.” — Weighted-ball throwing in youth pitchers
The practical takeaway is straightforward. If you use weighted balls with youth pitchers, measure pitch speed at every session and track fatigue markers carefully. Do not interpret a mechanical change as a true improvement unless you can confirm it holds at consistent effort levels. And for most players under 14, mastering standard-weight mechanics is a far higher priority than any weighted ball program.
My take on coaching youth pitching mechanics
I’ve worked with enough young pitchers to say this with confidence: the biggest mistake coaches make is adding complexity before the foundation is solid. I’ve seen 10-year-olds being drilled on breaking ball grips when they cannot hold a balance point for two seconds. That is not development. That is noise.
In my experience, staging the process works every time. Start with balance. Spend two or three weeks on nothing but the balance point hold drill and stride direction. Add arm path work once the lower body feels automatic. Only then does it make sense to move to full deliveries and command work. Repeatable mechanical habits built this way hold up under game pressure in a way that rushed mechanics never do.
What I’ve learned from video review has genuinely changed how I coach. I used to give verbal corrections and trust that pitchers understood them. Now I film every session, and I watch it back with the pitcher immediately. When a kid sees their elbow dropping on screen, they feel it differently. The correction sticks in a way that “keep your elbow up” never does on its own.
My other strong opinion: mechanics instruction and workload management should never be treated as separate conversations. I’ve seen coaches obsess over a pitcher’s arm path while ignoring the fact that the kid threw three days in a row. That is a recipe for an injury that sidelines a young athlete for months. Pair the two. When the arm is fatigued, rest comes first. Mechanics work resumes when the arm is fresh. That pairing is what actually builds durable, high-performing youth pitchers.
— Albert
Train smarter with the right tools
Good mechanics need good practice conditions, and the right equipment makes a measurable difference in how fast skills develop. At Pitchtrainingbaseball, you will find training aids built specifically for the drills described in this article.

The Strike 9-Zone pitching net gives pitchers a clear visual target for flat ground command work, making every rep purposeful rather than aimless. For pitchers working on grip and feel, the official training baseball is weighted and sized to match game conditions while keeping practice safe and productive. Pitchtrainingbaseball also offers resources to help coaches plan effective practice sessions that tie mechanics, drills, and workload management into a single, coherent workflow. Whether you are starting from scratch or helping a pitcher break through a plateau, the right tools make each rep count.
FAQ
What are the most important mechanics for youth pitchers?
Balance at the leg lift, correct stride foot landing, and a clean arm path are the three most critical mechanics for youth pitchers. These three elements reduce arm stress and build the consistency needed for long-term development.
How many pitches can a youth pitcher throw per day?
Pitch count limits vary by age, and rest requirements scale with the number of pitches thrown. For pitchers 14 and under, mandatory rest days range from zero to four depending on pitch volume, and pitching on three consecutive days is not permitted.
What is the ideal stride length for a youth pitcher?
Research shows that optimal stride length is approximately 80 to 87 percent of a pitcher’s height. A five-foot-tall pitcher should aim for a stride of roughly 48 to 52 inches toward the plate.
Are weighted balls safe for youth pitchers?
Weighted ball training requires careful monitoring because joint loading differences depend heavily on pitch speed, not just ball weight. For most pitchers under 14, developing sound standard-weight mechanics should take priority over weighted ball programs.
How can video review improve pitching mechanics?
Recording sessions and reviewing slow-motion footage helps coaches identify mechanical flaws like elbow drop and arm path issues that are nearly impossible to see at full speed. Sharing the footage with the pitcher immediately after the session makes corrections far more concrete and easier to apply.
Recommended
- Top pitching workouts for youth baseball: build skill safely – Pitch Training Baseball
- How to assess youth pitching performance step by step – Pitch Training Baseball
- How to throw a baseball: proven youth coaching tips – Pitch Training Baseball
- Fix youth pitching mistakes for better performance – Pitch Training Baseball