


The pivot foot decides whether a pitch is legal, not the free foot. For a right-handed pitcher, that’s the right foot; for a left-hander, it’s the left. It must stay in contact with the pitching rubber until the pitcher starts the delivery, and it can never replant or “crow hop” forward before the ball is released. If you remember one thing about pitcher foot placement, remember it.
TL;DR:
- The pivot foot, which matches the pitcher’s throwing hand, must stay in contact with the rubber until the delivery begins and cannot replant or “crow hop” before releasing the ball.
- Umpires primarily judge legality based on the pivot foot’s position, not the free foot, allowing more movement and common misconceptions about foot placement.
- Errors like turning the front foot too early or replanting the pivot foot before the pitch can reduce velocity or result in balk calls, emphasizing proper foot alignment during drills.
- Correct setup involves engaging the rubber with the pivot foot, placing the free foot in front, and maintaining a visible stop before driving forward, supported by verbal cues like “connect, drive, land.”
- League rules vary on foot disengagement and leaping, so coaches should verify their specific league guidelines and regularly check pitchers’ foot placement during warmups and game prep.
Table of Contents
- Legal Pitching Positions: What Windup and Set Actually Require
- Pivot Foot vs. Free Foot: Why One Matters More Than the Other
- Foot-Placement Mistakes That Cost Speed or Draw a Flag
- How to Set Up Correct Foot Placement, Step by Step
- Drills That Fix Foot Turn, Crow Hops, and Balance Problems
- How Rules Differ by League and How to Confirm Yours
- Six Checks to Run on the Mound Before First Pitch
- Practicing the Progression Safely at Home or in the Cage
- Coach’s Note: Teach Legal First, Fast Comes Later
- Build the Habit With the Right Practice Gear
- Sources
- FAQ
Legal Pitching Positions: What Windup and Set Actually Require
Every legal delivery starts from one of two positions, and both hinge on pivot foot placement. UmpireBible’s breakdown of legal pitching positions makes the point bluntly: the rulebook cares far more about where the pivot foot sits on the rubber than what the free foot is doing.
In the windup, the pivot foot must be in contact with or directly in front of the rubber, and the free foot has more freedom of movement, including a step back or to the side before the pitcher commits forward. In the set position (also called the stretch), the pivot foot stays in contact with the rubber, the free foot plants in front of it, and most rulebooks require a discernible, complete stop before the pitcher starts the throwing motion.
Rule triggers that turn foot placement into a balk or illegal pitch:
- Pivot foot loses contact with the rubber before the delivery begins in the set position.
- No visible stop happens in the set position before the pitcher moves toward the plate.
- The pivot foot replants or slides off the rubber’s edge during the push, rather than dragging or pivoting cleanly.
- A pickoff attempt happens without the pitcher stepping toward the base they’re throwing to, a constraint Baseball Rules Academy ties directly to foot orientation.
Pro Tip: A “discernible stop” doesn’t need to be long. Coaches can teach a one-second pause in the set position as a rhythm cue rather than a technical hurdle, and it clears up most balk calls tied to timing.
Pivot Foot vs. Free Foot: Why One Matters More Than the Other
The pivot foot is whichever foot matches the pitcher’s throwing hand, and it’s the one that stays anchored to the rubber. The free foot is everything else. Confusion usually comes from parents and even some coaches assuming both feet carry equal legal weight. They don’t.
Umpires watch the pivot foot almost exclusively when judging legality, a pattern UmpireBible’s rules officials confirm applies across amateur levels. That means a pitcher can plant the free foot at an odd angle or slightly off the intended line and still throw a completely legal pitch, as long as the pivot foot behaves.
Quick ways to teach pitchers to feel their pivot foot:
- Have them stand on the rubber and press down through the pivot foot heel to sole before doing anything else.
- Ask them to name their pivot foot out loud before every bullpen rep until it’s automatic.
- Use a strip of tape on the rubber as a visual anchor point for where the pivot foot should sit.
Once that foot’s job is clear, everything else in the delivery gets easier to coach.
Foot-Placement Mistakes That Cost Speed or Draw a Flag
Three errors show up over and over in youth practices, and they carry different consequences. Some just cost velocity. Others cost the pitch entirely.
Turning the front foot too early, before the hips and torso rotate, is the most common issue. Coaching resources that focus on correcting foot turn in pitching identify premature foot rotation as a leading cause of lost velocity, because it opens the hips before the arm and torso are ready to transfer force, which usually shows up as heel drag or an early, weak release.
Then there’s the crow hop, which is legally distinct from a leap. A crow hop happens when the pivot foot replants on or near the rubber before delivery, and it’s illegal in essentially every rulebook. Leaping, where the pivot foot drags but never fully replants, is now allowed in several fastpitch categories after rule updates. Referee is clear that the replant, not the airtime, is what makes a crow hop illegal.
- Premature foot turn: reduces leg drive, causes heel drag, lowers velocity.
- Crow hop (replant before delivery): illegal under virtually every rulebook.
- Leaping without replant: legal in many fastpitch leagues since 2022.
- Pivot foot off the rubber’s edge or not parallel to it: draws balk calls from umpires watching for illegal starts.
Forum threads among fastpitch families, including a long-running discussion on heel placement in front of the rubber, show how often simple positioning confusion, not bad mechanics, causes illegal-pitch calls. A five-minute check at practice usually prevents it.
How to Set Up Correct Foot Placement, Step by Step
Getting foot alignment for pitchers right isn’t complicated, but it does need to be rehearsed in order, not just talked about once.
- Engage the rubber. The pivot foot should contact the rubber with the inside edge of the foot roughly parallel to it, not perpendicular and not floating off the front edge.
- Place the free foot and settle weight. In the set position, plant the free foot comfortably in front of the rubber, distribute weight evenly, and hold the visible stop before starting the delivery.
- Drive and stride without replanting. The pivot foot can drag or pivot across the rubber as the body drives forward, but it cannot lift and land again in a new spot before release. That’s the line between a legal drive and a crow hop.
- Run a legality self-check. After the stride foot lands, ask: did the pivot foot stay connected through the drive, and did the front foot land closed rather than opening early?
Pro Tip: Have pitchers say “connect, drive, land” out loud during early reps. Verbal cues sound simple, but they slow the body down just enough to catch bad habits before they get grooved into muscle memory.
Coaches working through a full youth pitching mechanics guide will notice this sequence lines up with how force actually transfers through the body, from the rubber, through the hips, into the release.
Drills That Fix Foot Turn, Crow Hops, and Balance Problems
Improving pitcher footwork usually comes down to isolating one variable at a time instead of running full-speed bullpens and hoping the fix sticks.
For premature foot turn, try a tall-drag drill: the pitcher holds a slow, controlled drag of the pivot foot across the rubber while keeping the front foot closed until the arm catches up. A shoebox or cone placed where the front foot should land gives a visual target that stops early opening.
For crow hops, a power-push drill works well. The pitcher pushes off the rubber with a short, controlled stride, focusing on keeping the pivot foot connected through the whole push rather than picking it up and setting it down again. Shortening the stride temporarily removes the temptation to replant.
Balance and landing drills matter just as much. A balance and coordination drills list built for athletes offers useful cross-training options, since a wobbly landing foot often traces back to weak single-leg stability rather than a mechanics flaw.
- Tall-drag drill: fixes premature foot turn using a slowed, exaggerated pivot drag.
- Power-push drill: trains drive without replanting the pivot foot.
- Single-leg balance holds: stabilize the landing (stride) foot.
- Toe-marker throws: reinforce consistent front-foot angle at landing.
A structured coaching progression, moving from stance drills without a ball to constrained-stride throws before full-speed delivery, tends to produce cleaner foot placement faster than unstructured bullpen sessions alone, according to guidance on youth pitching mechanics fundamentals.
How Rules Differ by League and How to Confirm Yours
Rules on foot placement aren’t identical everywhere, and assuming your league follows the same standard as a rulebook you read online is a common mistake.
- NFHS-aligned rules, as reported through the HHSAA’s 2023 rule update coverage, now allow pitchers to disengage both feet from the surface as long as the pivot foot isn’t replanted before delivery.
- USA Softball and Junior Olympic divisions permit certain leaping motions under the post-2022 changes, provided no replant occurs.
- Little League’s own guidance clarifies that pitchers don’t have to throw to a base after disengaging the rubber, and umpires weigh intent when a motion is borderline.
The fastest way to confirm what applies to your team: pull your league’s actual pitching rule section, not a generic summary, and ask your umpire crew or league director directly if anything looks ambiguous. Local modifications happen more often than most parents expect.
Six Checks to Run on the Mound Before First Pitch
Run through this fast, either during warmups or between innings when a new pitcher takes the circle.
- Confirm the pivot foot has full contact with the rubber, not just a toe touching the edge.
- Check the free foot lands in front of the rubber’s front edge, not straddling or behind it.
- Watch the front foot’s toe direction for any early outward turn before the hips rotate.
- Practice one clean step-off so disengaging the rubber looks smooth and clearly intentional.
- Verify the set position includes a visible stop before any forward motion starts.
- Ask the pitcher to name their pivot foot out loud. If they hesitate, spend two more minutes on it before the game starts.
Practicing the Progression Safely at Home or in the Cage
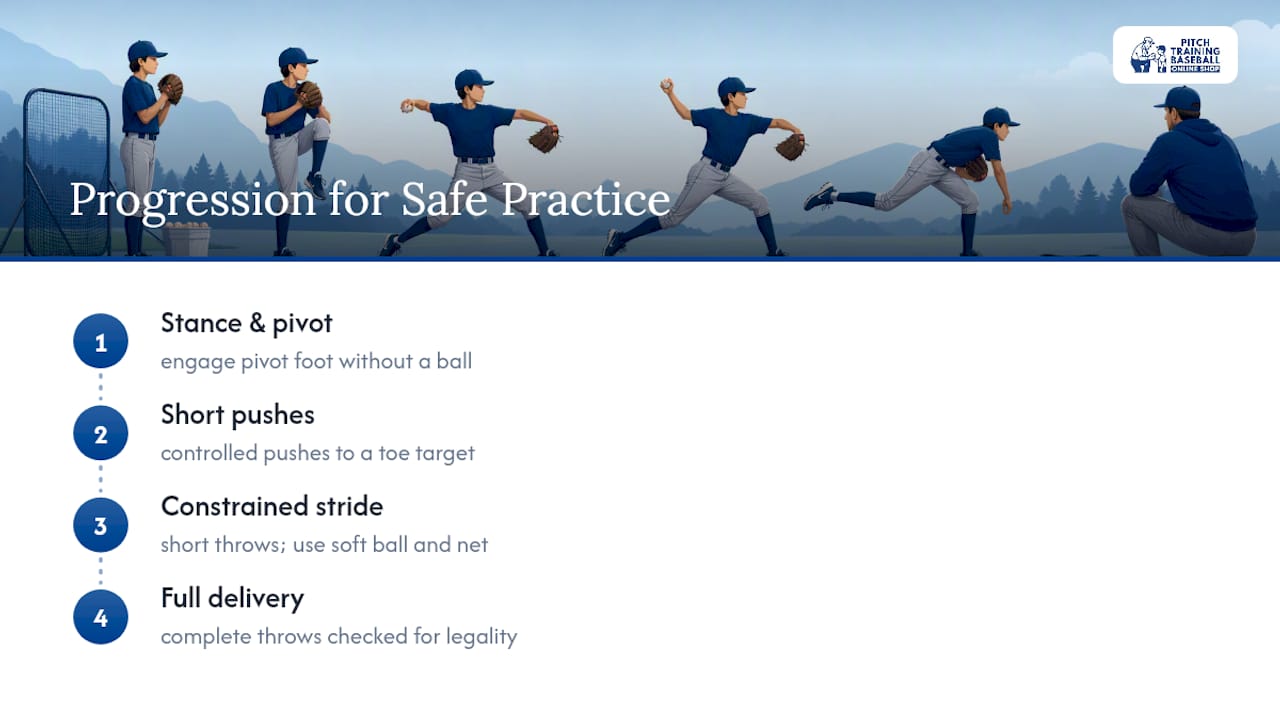
The safest way to build good foot placement is in stages: stance and pivot-foot engagement without a ball, short controlled pushes using a toe target, constrained-stride throws, then full deliveries checked against legality standards. A soft training ball and a fixed target net let pitchers repeat this progression at higher volume without the fatigue or space demands of a full bullpen. Matching the right drill to the right stage of the youth pitching mechanics guide keeps reps purposeful instead of random.
Coach’s Note: Teach Legal First, Fast Comes Later
Pitchers who learn legal foot placement before chasing velocity end up with fewer setbacks. A kid who’s spent months grooving an illegal crow hop has to unlearn that habit under game pressure, which is a much harder fix than starting clean.
Small, repeated habits build this faster than long lecture sessions ever will. Five focused minutes on pivot foot contact, three times a week, beats one long technical talk before a game. Coaches should also treat their own league’s rulebook as a living document. Check it each season, since rule updates like the 2023 disengagement change show these standards do shift.
— Albert
Build the Habit With the Right Practice Gear
Legal, repeatable foot placement gets built through short, high-frequency reps, not marathon bullpen sessions, and specialized training kits are designed around this principle. The PITCH TRAINING BASEBALL KIT™ pairs a durable training ball with drill-ready accessories so a pitcher can rehearse pivot foot engagement and drive without needing a full field or a catcher.

For a simple pre-practice routine, spend 10 to 15 minutes on stance drills and toe-target pushes before throwing at full speed. A strike-zone target net gives pitchers a fixed aim point during those constrained-stride reps, which makes it easier to isolate foot mechanics without worrying about where the ball ends up. Families working with younger or newer pitchers may prefer the SOFT PITCH TRAINING BASEBALL KIT™, priced at a moderate price, since a softer ball lowers the stakes while the foot-placement habits are still forming. Browse the full training kit collection to match the right gear to your pitcher’s current stage.
Sources
- Legal Pitching Positions - UmpireBible
- Referee
- NFHS softball rule change reported by HHSAA
- Rule 8.00: The Pitcher FAQs - Little League
FAQ
What Is the Ohtani Rule?
The “Ohtani Rule” lets a player serve as both starting pitcher and designated hitter for the full game, staying in the batting lineup after leaving the mound. It doesn’t change any foot placement or pitching-position rules; it’s strictly a lineup and substitution rule adopted at the MLB level and mirrored in some amateur leagues.
Does a Pitcher’s Foot Have to Be on the Rubber?
Yes, the pivot foot must be in contact with the pitching rubber when starting either the windup or set position, according to UmpireBible’s rules on legal pitching positions. The free foot has more flexibility, but the pivot foot’s contact is what umpires check first.
What Does 5-4-3 Mean in Baseball?
That’s a fielding notation, not a pitching rule. It describes a double play where the ball goes from the third baseman (5) to the second baseman (4) to the first baseman (3), unrelated to pitcher foot mechanics.
Why Is the Mound 60 Feet 6 Inches?
That mound distance has been a long-standing standard in professional baseball, though it isn’t the distance used in most youth leagues. Younger divisions typically pitch from shorter, age-scaled distances, so coaches should confirm the exact figure in their own league’s rulebook rather than assume the professional standard applies.