


Set the net so home plate sits 30 to 45 feet from the rubber for most youth pitchers, with the strike zone’s center matched to the batter’s chest height using a bat or broom handle as a stand-in. Level ground and secure anchoring matter as much as the number on the tape measure. Test the setup with three or four full-effort throws before running a real session, and keep pitch counts inside MLB’s Pitch Smart limits for the pitcher’s age.
TL;DR:
- For most youth pitchers, the net should be set 30 to 45 feet from the rubber, with vertical zone markings aligned to the batter’s chest height for proper target feedback.
- Shorter distances for ages 7 to 9 focus on mechanics and release points rather than velocity, while ages 10 to 12 should gradually progress toward regulation mound distances for command development.
- The net frame must be level and securely anchored with stakes or weights, and rechecked with full-effort throws to prevent drift that can affect accuracy and safety.
- Using the correct size, target zones, and setup ensures meaningful command drills, especially when progressing from easier pocket targets to nine-hole divisions and rebound nets.
- Avoid moving the net closer to manufacture strikes; focus instead on proper placement, vertical alignment, and consistent maintenance to support accurate, game-like pitching development.
Table of Contents
- Age- and Skill-Based Distance and Net Height Targets
- Choosing the Right Net for Your Placement Goals
- Step-by-Step Setup and Anchoring Checklist
- Drills and Progression That Depend on Correct Placement
- Safety and Maintenance Tied to Net Placement
- What Field Testing Actually Shows About Placement
- Best Lighting and Time of Day for Pitching Net Placement
- How Wind and Ground Slope Affect Net Stability
- Why the “Move the Net Closer” Instinct Gets Placement Backwards
- How Pitchtrainingbaseball’s Products Fit This Setup
- Sources
- FAQ
Age- and Skill-Based Distance and Net Height Targets
Distance should track a pitcher’s age, mechanics, and how close they are to mound work, not just what fits in the backyard. A 7 or 8-year-old working on arm slot and follow-through gets more value from a shorter distance where every throw actually reaches the target with room to spare. A 12-year-old prepping for a 46 or 50 foot mound needs reps at something closer to real game distance so the arm and eyes learn the actual trajectory they’ll face on the mound.
- Ages 7 to 9: 30 to 35 feet, focused on mechanics and repeatable release point rather than velocity.
- Ages 10 to 12: 35 to 46 feet, gradually stepping toward regulation mound distance as command improves.
- Ages 13 and up: 46 to 60 feet, simulating actual game or mound distance for command and velocity work.
Height alignment matters just as much as distance. Measure a real batter’s strike zone (roughly armpit to kneecap for that player) and mark the top and bottom on the net with tape or a permanent marker, then confirm the net’s frame sits low enough that the bottom of the zone lines up with the ground, not floating a foot above it. Setting the net too close feels like a shortcut to more strikes, but it teaches a shortened, “short-arm” release that doesn’t hold up once the pitcher moves back to real distance. A full, natural arm path only develops when the throw has enough room to extend the way it would in a game.
Choosing the Right Net for Your Placement Goals
Not every net serves the same purpose, and picking the wrong one undercuts even perfect placement. A single large strike-zone target is the most forgiving option for a beginner still learning to throw strikes at all. Once a pitcher can consistently hit the zone, a divided target sharpens things further.
- Single-zone targets give beginners one big forgiving area, which builds confidence before precision matters.
- 9-hole pocket targets break the zone into nine sections, and research on strike-zone equipment shows this pocket-level feedback speeds up location training once basic accuracy is in place.
- Rebounder or combo nets catch the ball and kick it back, which adds solo fielding reps without moving the net at all.
Size matters too. A 7 by 7 foot net covers most youth needs, while an 8 by 8 foot frame handles higher-velocity bullpen sessions better because it gives the ball more room before it reaches the frame or backing. A flimsy frame will hold a strike zone in place for exactly one session before it starts to sag.
Step-by-Step Setup and Anchoring Checklist
Getting placement right is a sequence, not a single decision. Skip a step here and the “placement” you carefully measured will drift within a few pitches.
- Pick a flat, level site with at least 10 to 15 feet of clear space behind the net for rebounds and ball retrieval.
- Assemble the frame fully before attaching the net, tightening every joint so nothing shifts once the strike zone insert goes on.
- Attach the strike-zone insert or 9-hole panel, pulling it taut so the pockets stay square and don’t sag into odd shapes.
- Anchor the base with ground stakes on soft turf or sandbags on hard surfaces, and add weight to any crossbar prone to lifting in wind.
- Check for lean or tip by pushing on the top corners; a properly anchored frame shouldn’t rock more than an inch.
- Measure the centerline from the pitching rubber to the middle of the net to confirm lateral alignment, not just distance.
- Verify vertical alignment using the visual stack method: stand a bat vertically at the batter’s position and match its height range to the marked zone.
- Throw three to five full-effort test pitches before starting real work, watching for any shift in the frame or sag in the pocket.
Pro Tip: Do the lean test and the throw test every single session, not just the first time you set up. Ground softens after rain, stakes loosen after a windy week, and a net that was perfectly square on Monday can be two inches off by Thursday.
For a specific alternate setup, Pitchtrainingbaseball’s guide on how to position a net for a lefty pitcher at 45 feet walks through flipping the cutout so the zone still reads correctly from the opposite throwing side.
Drills and Progression That Depend on Correct Placement
A net placed correctly is only useful if the drills built around it actually train command. The most efficient sequence starts simple and adds difficulty in layers.
- Paint-the-corner reps: ten throws targeting only the outer edges of the zone, rewarding a pitcher for hitting the corner, not just the general area.
- Low and high location reps: alternating sets aimed at the bottom third versus the top third of the zone to build vertical control.
- Nine-pocket sequencing: calling out a specific pocket before each pitch, forcing the pitcher to locate on command instead of grooving one spot.
The feedback loop is what actually converts placement into improvement. A pitcher throws, sees exactly where the ball landed in the zone, and adjusts the next throw. That loop breaks down if the net has shifted or the zone markings have faded, which is why the setup checks above aren’t optional.
Progression should follow control, not the calendar. Once a pitcher hits the target pocket eight or nine times out of ten from the shorter practice distance, move the net back toward game distance rather than adding velocity at the same spot. A rebounder panel lets the same setup double as fielding practice, since the ball comes back for a quick glove-side rep without touching the net’s position at all.
Safety and Maintenance Tied to Net Placement
Good placement protects arms as much as it improves accuracy. Keep every net session inside the pitch-count and rest guidelines in MLB’s Pitch Smart program for the pitcher’s age. A net drill still counts as pitching workload, even though it feels like “just practice.”
- Never place a person directly behind the net unless it’s rated as a protective screen. Balls can deflect unpredictably off frames and pocket dividers.
- Uneven footing near the rubber causes inconsistent mechanics that look like a placement problem but are really a ground problem.
- Setting the target too close trains short-arm mechanics that won’t transfer to real mound distance.
- Check pocket seams and netting for tears before each session, and watch for sag developing in the zone panel over weeks of use.
- Retest stake tension after wind or rain, and store the frame folded and dry between sessions to protect the joints.
What Field Testing Actually Shows About Placement
The distance and height numbers above aren’t guesses. They match how Pitchtrainingbaseball’s own setup guides, including the lefty-specific 45-foot configuration, map placement to real coaching sessions rather than theoretical geometry. The Pitching Target Net with Colorful Strike 9-Zone is built around exactly this kind of pocket-level alignment, giving a visual reference that supports the vertical stack method described above.
The recurring lesson from real setups: the frame has to be level and anchored before anything else matters. A perfectly measured distance means nothing if the net leans two inches after five pitches. Confirm placement with full-effort throws, not soft tosses, since velocity changes how a loose frame behaves.
Best Lighting and Time of Day for Pitching Net Placement
Late morning to early afternoon, roughly 10 a.m. to 2 p.m., gives the most even natural light for outdoor sessions, with the sun high enough that shadows don’t cut across the zone markings. Early morning and late afternoon throw long shadows that can make a pocket look darker or shifted, which throws off a young pitcher’s read on where the ball actually landed.
Facing direction matters more than most coaches realize. Set up so the pitcher throws with the sun behind or to the side, never directly into it. A pitcher squinting into afternoon glare will start guessing at the target instead of actually seeing it, and that guessing shows up as scattered, inconsistent throws that have nothing to do with mechanics.
For evening or indoor sessions, overhead lighting needs to hit the zone evenly rather than lighting the pitcher’s half of the space and leaving the net in shadow. A single side-mounted light source creates the same shadow problem the sun does outdoors, just at a shorter range. If the only available light is a garage or driveway fixture, angle the net so light falls across the face of the zone rather than behind it.
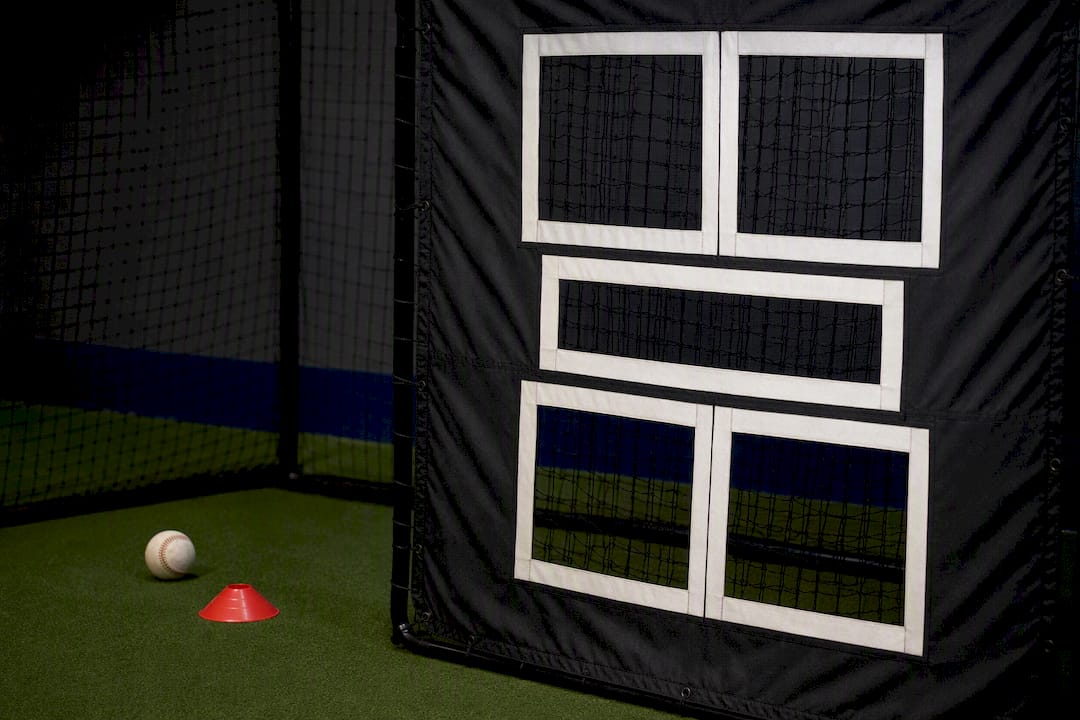
Color contrast plays a role too. A net with a dark background and bright zone markings reads clearly in almost any light, which is part of why colored 9-hole targets tend to outperform plain white or gray backgrounds for younger pitchers still learning to pick up a target quickly. If glare off a phone screen, windshield, or reflective siding lands anywhere near the zone during setup, move the net a few feet rather than working around it. Consistent visibility session to session is what lets a pitcher trust the feedback they’re getting instead of second-guessing every miss.
How Wind and Ground Slope Affect Net Stability
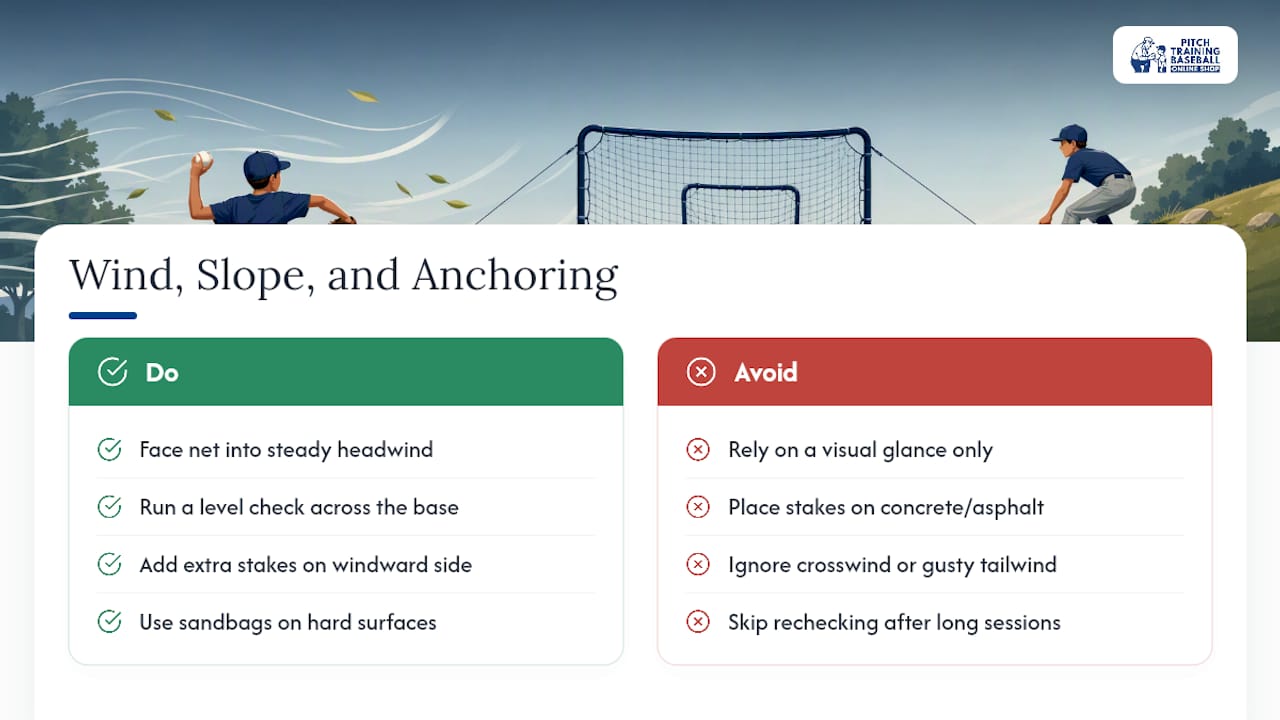
Wind direction changes how a net behaves more than most coaches expect. A net facing into a steady headwind actually holds its position better, since the airflow presses the frame back against its anchors. A crosswind or a gusty tailwind is the real problem, catching the flat face of the net like a sail and rocking the frame side to side, which shifts the zone markings out of true alignment mid session.
Terrain slope is the quieter issue. Even a gentle grade, the kind that’s barely noticeable standing on it, can tilt a net enough to skew where “belt height” actually falls relative to the ground. A net set on a slope that drops toward the pitcher makes low pitches look higher than they are, and a slope that rises does the opposite. Always run a level check across the base, not just a visual glance, before locking in a distance measurement.
On soft grass or dirt, standard ground stakes handle most conditions, but add extra stakes on the windward side if a session runs through gusty conditions. On hard surfaces like concrete or asphalt driveways, stakes aren’t an option, so sandbags or weighted plates on every leg of the frame do the job instead. Either way, recheck the frame for lean after quantity throws to catch any drift, since even a well-anchored net can inch out of position over a long session.
Why the “Move the Net Closer” Instinct Gets Placement Backwards
Most placement advice online treats distance as a knob to turn down whenever a young pitcher is missing the zone. That instinct is understandable and mostly wrong. Moving the net closer manufactures strikes without building the mechanics that actually produce them, and the short-arm habits it creates take longer to unlearn than the accuracy problem ever took to fix.
The better approach flips the priority: hold distance at whatever the pitcher’s age and mechanics genuinely support, and let accuracy catch up through reps and pocket-specific drills rather than through a shorter throw. Coaches who default to close-range training because it “feels productive” are often trading a good week for a worse season. The reader’s actual first move should be measuring the batter’s real strike zone height and marking it precisely, since vertical misalignment quietly wrecks more sessions than distance ever does. Get that number right, anchor the frame so it stays right, and the rest of the placement advice in this guide does its job.
— Albert
How Pitchtrainingbaseball’s Products Fit This Setup
Pitchtrainingbaseball built its equipment around the exact placement principles covered above, so you’re not translating generic advice into your own DIY rig. The Pitching Target Net with Colorful Strike 9-Zone is the right pick for pocket-command drills like the nine-pocket sequencing described earlier, with color-coded zones that stay visible in the lighting conditions covered above.

If your pitcher is younger or just starting out, the SOFT PITCH TRAINING BASEBALL KIT™ at $29.99 pairs a softer ball with backyard-safe progression drills, useful before moving to full-effort reps against a rigid net. For pitchers ready to work at higher velocity, the PITCH TRAINING BASEBALL KIT™, also $29.99, is built for that stage. Whichever kit you choose, pair it with ground stakes or sandbags for outdoor anchoring, and check the product page for exact net dimensions before ordering to confirm it fits your available space. Teams assembling full practice kits can also check custom uniform options through our partners at Capra Sports while they’re at it. Head to the product page now to check sizing and place an order.
Sources
- Pitch Smart — Pitching Guidelines (Ages 9–12)
- Pitching Targets & Nets (2026) — Diamond Sports Equipment
- Pitching Targets & Rebounders (2026) — Diamond Sports Equipment
FAQ
How Do You Put Together a Pitching Net?
Assemble the frame completely, attach the net and strike-zone insert with tension pulled evenly across the panel, then anchor the base with stakes or sandbags before running test throws to confirm nothing shifts.
What Colors Should Pitchers Avoid Wearing?
Pitchers generally avoid all white uniforms or gloves, since a white jersey or glove blends into a white baseball and makes it harder for a batter to pick up the release point; many leagues restrict this for safety.
Which 9-Hole Pitching Net Works Best?
A 9-hole net with a sturdy frame, taut pocket dividers, and clear color contrast against the zone gives the most reliable pocket-level feedback; Pitchtrainingbaseball’s Colorful Strike 9-Zone target net is built specifically for this kind of pocket command work.
What’s the Best Net for Both Hitting and Pitching?
A rebounder-style net that returns the ball works for both purposes, since it can absorb batted balls for hitting drills and bounce pitches back for solo fielding reps between throws.
How Far Should a Youth Pitching Net Be Placed?
Most youth pitchers do well starting at 30 to 35 feet for mechanics work, then progressing to 45 to 60 feet as control improves and mound distance approaches.