


A youth pitcher needs three things before throwing a single competitive pitch: 3 to 5 minutes of dynamic movement, 6 to 9 minutes of shoulder, scapular, and core activation, and a gradual throwing progression from short toss to a light bullpen. Run correctly, this 10 to 15 minute sequence takes about the same time as an infield warm-up, and a randomized controlled trial tied a structured version of it to a real drop in shoulder and elbow injuries. This guide was built around that evidence and the pitch-count and rest guidelines that go with it.
TL;DR:
- Warm-up routines that include dynamic movement, neuromuscular activation, and gradual throwing reduce shoulder and elbow injuries by approximately 45 percent in young pitchers.
- Key areas to activate before pitching are hips, thoracic spine, core, glutes, scapula, rotator cuff, wrist, and forearm, using light resistance like bands.
- Proper warm-up timing, avoiding rushes and high effort early, and tracking every throw are critical to preventing overuse injuries.
- Cold weather requires extending warm-up time and adding layers, while hot weather emphasizes hydration and shaded drills to prevent heat stress.
- Signs of fatigue or injury during warm-up, such as decreased range of motion or reluctance to throw, warrant scaling back or stopping the session.
Table of Contents
- Why Pitching Warm Up Drills Matter More Than Coaches Think
- What Needs to Wake Up Before a Kid Throws a Pitch
- The Step-by-Step Warm Up Routine, Start to Finish
- The Mistakes That Undo a Good Warm Up
- Building the Routine Into Team Habits
- What the Evidence and Coaching Consensus Actually Say
- Adjusting the Routine for Cold or Hot Weather
- Warning Signs to Catch Before the First Pitch
- Three Habits Worth Starting This Week
- Equipment That Makes These Drills Easier to Run
- Sources
Why Pitching Warm Up Drills Matter More Than Coaches Think
The case for pitching warm-up drills isn’t theoretical. A randomized controlled trial tracking 9 to 11-year-old players found that a structured warm-up program combining stretching, dynamic mobility, and balance work cut shoulder and elbow injuries from 3.1 down to 1.7 injuries per 1,000 athlete-exposures, roughly a 45 percent reduction.
That number holds up because of what warm-ups actually do to a young arm. Dynamic movement raises blood flow to muscle tissue, wakes up the nervous system’s control over joint stability, and extends range of motion right before it gets tested under load. Skip that step and a pitcher’s first few throws are asking cold tissue to do a hot-tissue job. Warm-ups also double as the first checkpoint in workload management. Pair them with pitch-count and rest guidance, and you get a system that protects the arm on both ends of an outing, not just the front.
What Needs to Wake Up Before a Kid Throws a Pitch
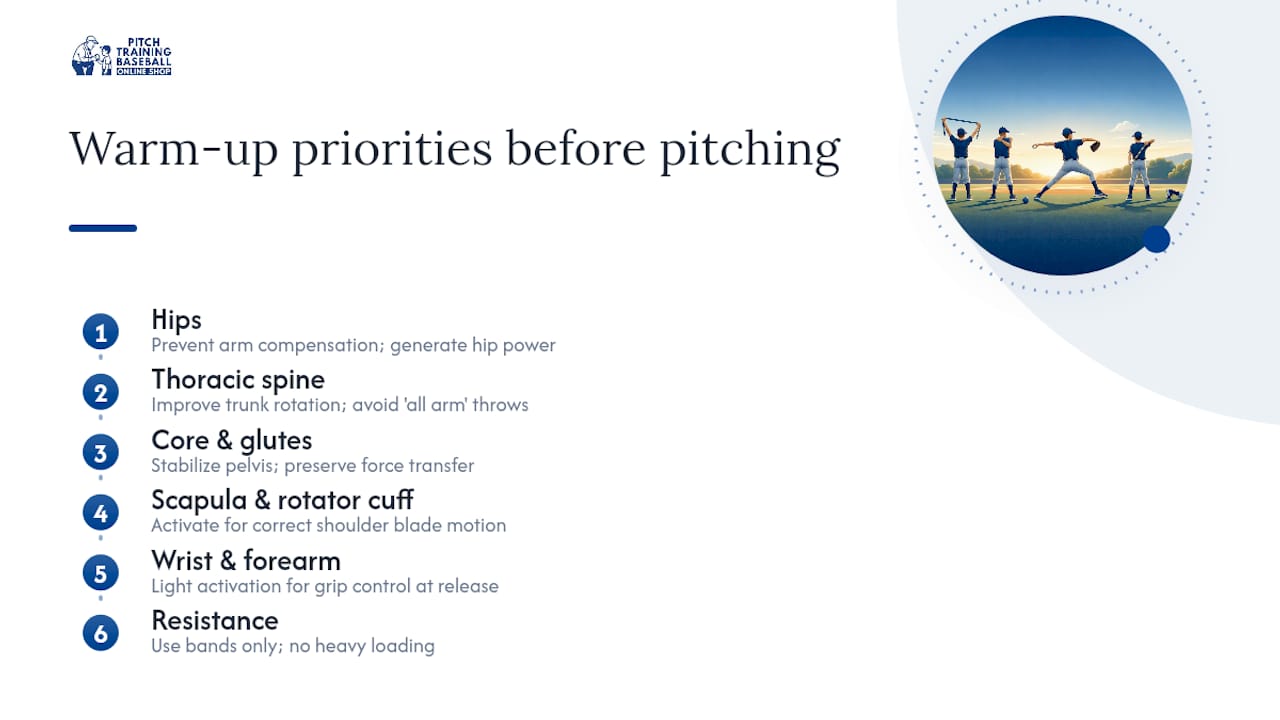
Pitching is a full-body chain reaction that ends at the fingertips, so a proper pitcher stretching routine covers more than the shoulder. Prioritize these areas, in roughly this order of importance:
Hips. Stiff hips force the arm to compensate for power the lower body should be generating, which is one of the more overlooked drivers of arm overuse in young throwers, according to pediatric sports medicine guidance on pitching injury prevention.
Thoracic spine. Rotational stiffness here limits trunk rotation, and a pitcher who can’t rotate through the torso ends up throwing “all arm.”
Core and glutes. These stabilize the pelvis during the stride and rotation phases, keeping force transfer efficient instead of leaking energy the shoulder has to make up for.
Scapula and rotator cuff. These need direct activation, not just stretching, so the shoulder blade moves correctly during the throwing motion.
Wrist and forearm. Often skipped, but light activation here helps with grip control on release.
Use light resistance only. Bands, not weighted balls or heavy tubing. Youth joints and growth plates don’t need loading, they need waking up.
The Step-by-Step Warm Up Routine, Start to Finish
Here’s a full pitching practice warm up you can run before a game or bullpen session, broken into four stages.
Pro Tip: Keep a stopwatch or phone timer visible during warm-ups. Coaches consistently underestimate how fast a “quick warm-up” turns into three minutes of standing around.
1. Dynamic movement (3 to 5 minutes)
- Light jog: 1 to 2 minutes, easy pace
- High knees: 20 to 30 yards
- Butt kicks: 20 to 30 yards
- Carioca (lateral crossover steps): 20 yards each direction
- World’s greatest stretch: 5 reps per side
2. Shoulder and scapular activation (4 to 5 minutes)
- Band pull-aparts: 2 sets of 12 to 15
- Face pulls: 2 sets of 10 to 12
- Y and T holds: 8 to 10 reps each position, 2 to 3 second hold
- Internal and external rotation with light band: 10 reps each direction
3. Core and glute activation (2 to 4 minutes)
- Dead bugs: 8 to 10 reps per side
- Glute bridges: 12 to 15 reps
- Mini-band lateral walks: 10 steps each direction
4. Throwing progression (5 to 8 minutes)
Static stretching has no place here, progressive dynamic mobility and a real throwing buildup work better than standing and holding a stretch cold.
- Short toss at 30 to 40 feet: 5 to 10 throws, focus on grip and release
- Mid-distance at 60 to 90 feet: 10 to 12 throws, building arm speed gradually
- Optional long toss for older, conditioned arms
- Finish with 8 to 12 bullpen throws at increasing intensity, never max effort
For 10u players, shorten every distance and cut reps by roughly a third. A 30 to 40 foot short toss might become 20 to 25 feet, and the bullpen finish drops to 6 to 8 throws. For 12 to 14-year-olds with more throwing experience, the progression above works as written, and some can handle a light long toss extension before the bullpen.
Quick checklist: timer set, bands packed, throwing partner ready, distances marked, pitch count tracker in hand.
The Mistakes That Undo a Good Warm Up
Most warm-up failures aren’t about missing drills, they’re about how the drills get rushed or misapplied.
- Rushing the whole thing. Fix it by enforcing a hard 10-minute minimum with a visible timer, not a “we’ll get to it” mentality.
- Max effort too early. Fix it with clear intensity cues from short toss to bullpen, something as simple as “50 percent, 70 percent, 90 percent.”
- Heavy bands or adult-sized equipment. Fix it by keeping resistance light. This is activation work, not strength training for a growing arm.
- Ignoring total workload. A kid who threw 20 pitches at infield practice and 15 more warming up before a game has already logged 35 throws before the first inning. Fix it by tracking every throw, not just game pitches.
Building the Routine Into Team Habits
The best pitching warm up exercises fail without a system behind them. For team settings, run activation drills as a group led by a coach, then shift to individual arm-care stations for the throwing progression so pitchers can move at their own pace. That combination gets the whole team moving together while still respecting that a 10u arm and a 14u arm need different volumes.
Build a short daily arm-care habit, 5 minutes of band work and mobility, separate from the full pre-game routine. That daily habit keeps the shoulder primed even on non-pitching days. Watch for pull-back signals during warm-ups themselves: noticeable soreness, visible fatigue in throwing mechanics, or a drop in effortless velocity are all reasons to shorten the session, not push through it.
None of this works in isolation from pitch-count limits and mandatory rest days. A warm-up prepares the arm for that day’s work. It doesn’t cancel out the need for rest between outings.
What the Evidence and Coaching Consensus Actually Say
A structured warm-up combining stretching, dynamic mobility, and balance training dropped shoulder and elbow injuries in 9- to 11-year-old players from 3.1 to 1.7 per 1,000 athlete-exposures, a reduction most youth sports interventions never come close to matching.
Clinical guidance built around Little League elbow prevention backs the same conclusion: dynamic warm-ups paired with neuromuscular training and trunk strengthening reduce overuse injury risk in young throwers. Programs aligned with USA Baseball’s Pitch Smart guidance echo the same priorities: lower-body mobility first, light resistance only, and consistency over intensity. The coaching content around these same benchmarks treats the warm-up as the first line of defense in a season-long arm-care plan.
Adjusting the Routine for Cold or Hot Weather
Temperature changes how long a youth pitcher’s body needs to prepare, and skipping that adjustment is where a lot of early-season injuries start.
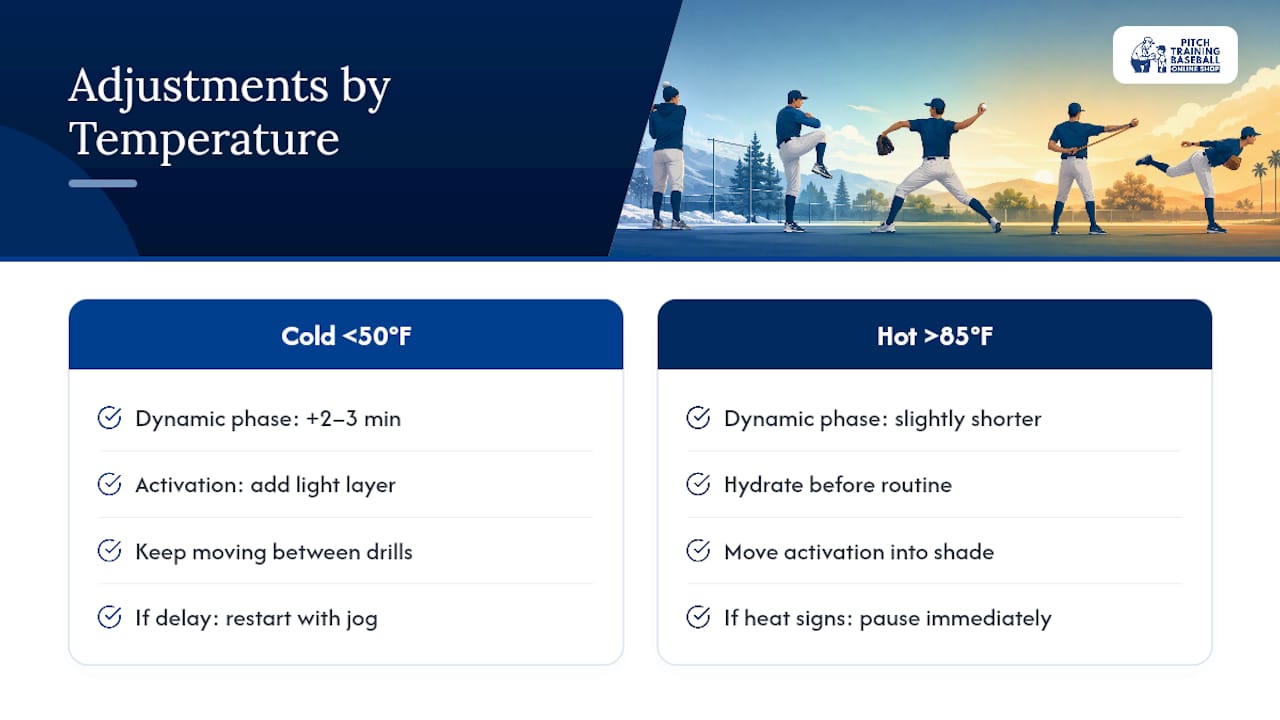
Cold weather (below 50°F). Extend the dynamic movement phase by 2 to 3 minutes. Cold muscle and connective tissue take longer to reach working temperature, and rushing into throws before that happens raises strain on the elbow and shoulder. Add a layer during the activation phase, sweatshirts or long sleeves are fine as long as they don’t restrict the throwing motion, and keep the pitcher moving between drill stations instead of standing still. If the throwing progression stalls for any reason, like waiting on a field or lineup, restart with a short burst of jogging before resuming.
Hot weather (above 85°F). The warm-up itself can shrink slightly on the dynamic movement side since the body reaches working temperature faster, but hydration becomes the priority. Get water into pitchers before the routine starts, not after. Watch for early signs of heat stress, flushed skin, unusual fatigue, or complaints of dizziness, and treat any of those as a reason to pause, not push through. Move activation drills into shade if the field allows it, and shorten rest intervals between throwing-progression steps only if the pitcher is handling the heat well.
In both extremes, the four-stage structure stays the same. Only the timing and hydration habits around it should shift.
Warning Signs to Catch Before the First Pitch
A warm-up is also a screening tool. If a pitcher can’t move well during activation drills, they shouldn’t be pitching that day, full stop.
Watch for these signals during the dynamic movement and activation phases:
- Grimacing or hesitation during arm circles or band work, which often points to lingering soreness from a prior outing.
- Noticeably shorter stride or stiff hip rotation during the dynamic movement portion, a sign the lower body hasn’t recovered from recent activity.
- Reduced range of motion in the shoulder compared to the pitcher’s normal baseline, especially during Y and T holds.
- Unusual quietness or reluctance to throw hard during the mid-distance toss, kids rarely announce pain directly, they just avoid it.
- Velocity that doesn’t build through the throwing progression the way it normally does, even at low effort levels.
Any one of these on its own might mean nothing. Two or more together are a real signal to shut the session down or scale back to activation-only work. Coaches and parents who track these signs consistently across a season catch overuse patterns weeks before they become actual injuries, and that’s a far better outcome than diagnosing a sore elbow after the fact.
Three Habits Worth Starting This Week
Run the same 10 to 15 minute warm-up every single time, no shortcuts on game day. Log every throw, not just pitch counts in the box score, so you know the real workload. Enforce rest days even when a kid says the arm feels fine, because it usually doesn’t feel like anything until it does. Coaches who build these three habits into a weekly rhythm see fewer sore-arm conversations by midseason.
— Albert
Equipment That Makes These Drills Easier to Run
None of the drills above require gear, but the right tools make the throwing progression and target work faster to set up and easier to repeat. A pitching target net with a marked strike zone turns the bullpen-finish stage of the routine into focused, accuracy-driven reps instead of throws into open space, which matters when the goal is control at increasing intensity, not raw velocity.

For the short-toss and mid-distance stages, soft training balls let younger pitchers work through the progression without the sting of a regulation ball on early throws, useful in cold weather especially. Parents running warm-ups at home with a softball-playing athlete can find comparable training balls built for that setup as well. None of this replaces good coaching or a proper progression, gear only supports the technique described above, it doesn’t substitute for it. If you’re ready to set up a warm-up station that holds up practice after practice, browse Pitchtrainingbaseball’s training equipment and get one on order before your next practice.
Sources
- Throwing Injuries in Youth Baseball Players: Can a Prevention Program Help? A Randomized Controlled Trial
- Little League Elbow: Risk Factors and Prevention Strategies
- How rest and pitch limits help your young baseball pitcher avoid injury
This article is general information, not a substitute for advice from a qualified doctor. Consult a qualified healthcare professional about your own circumstances before acting on anything here.