


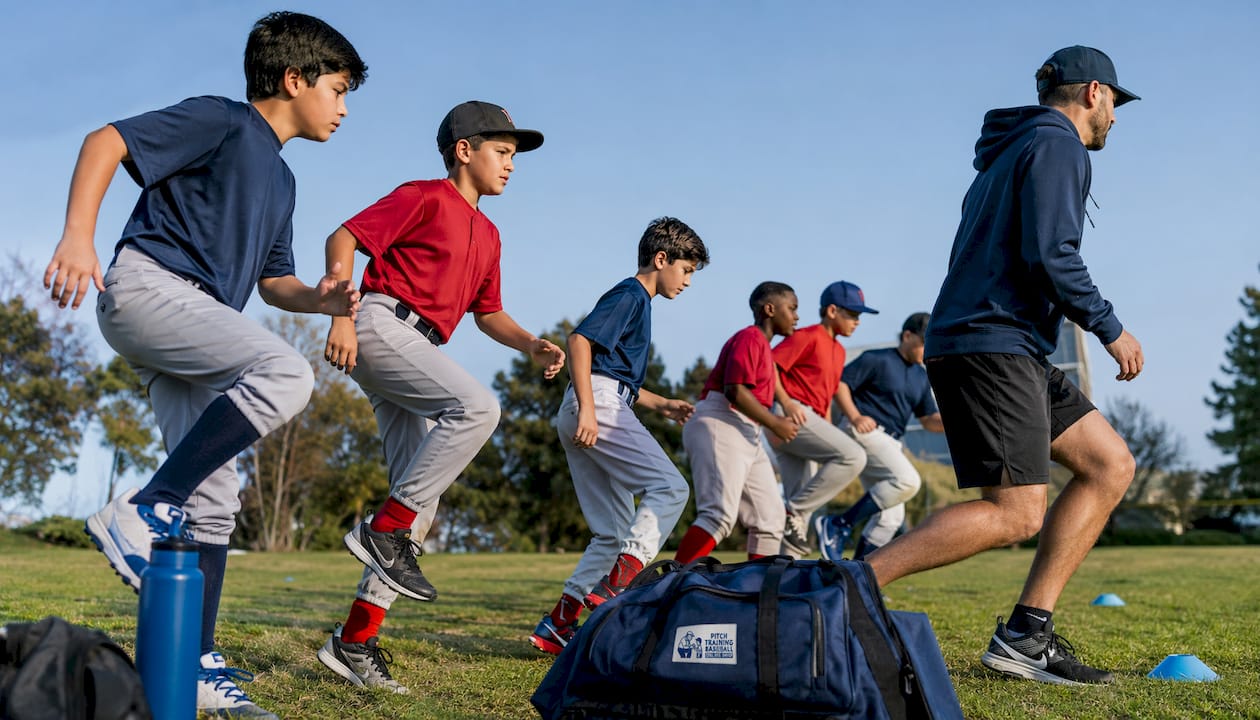
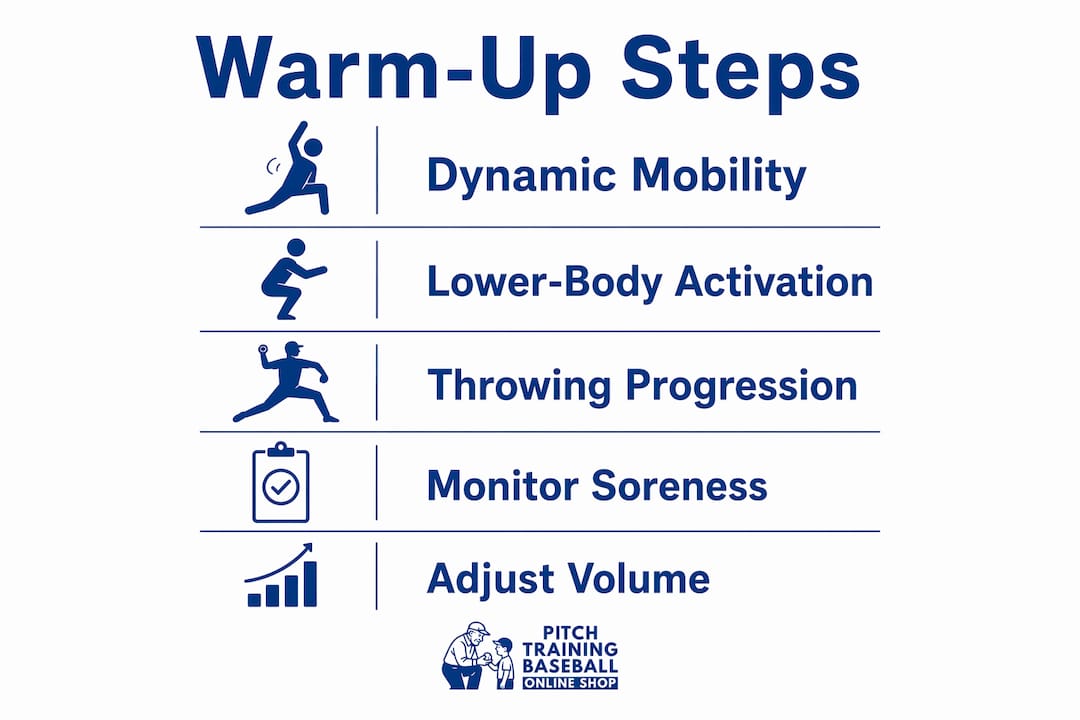
Warm-up exercises do three things for a youth pitcher: they reduce injury risk, prepare the neuromuscular system for explosive movement, and create the movement consistency that carries over into every pitch of the game. Before any practice or game, run a brief light aerobic activity followed by dynamic mobility and lower-body activation, then shoulder and scapular activation, finishing with a progressive throwing build-up starting at a short distance.
Every session needs three elements:
- Cardio raise such as jogging, high knees, or lateral shuffles to elevate core temperature
- Dynamic mobility and activation including hip openers, thoracic rotations, and glute bridges with emphasis on lower body first
- Progressive throwing starting with short tosses that gradually step back, avoiding full distance throws with a cold arm
Pro Tip: Apply the soreness rule from the first throw. If discomfort persists through the first 15 throws, stop. Two days off, then return at a shorter distance.
Table of Contents
- Why warm-up exercises cut injury risk in youth pitchers
- Age-appropriate warm-up principles for youth development stages
- Core components every pitcher warm-up should include
- Three ready-to-use warm-up routines by age group
- Common warm-up mistakes and warning signs to watch for
- How long to warm up and how often to run structured routines
- Key Takeaways
- Why consistent warm-ups are the foundation of long-term pitching development
- Practice smarter after every warm-up with Pitchtrainingbaseball
- Useful sources and further reading
Why warm-up exercises cut injury risk in youth pitchers
Cold muscle tissue behaves differently than warm tissue. Susanne Washburn, NP, an orthopaedics specialist at Carilion Clinic, puts it plainly:
That analogy matters most for pitching, where the shoulder and elbow absorb explosive, repetitive force on every throw. A 52-week randomized controlled trial with 237 youth players (ages 9–11) found that a structured 10-minute prevention warm-up reduced throwing injuries by roughly 50%, with the intervention group showing ~22% injury incidence versus ~38% in controls.
The physiology behind that result comes down to neuromuscular readiness. Dynamic mobility drills activate the motor pathways that coordinate shoulder rotation, hip drive, and trunk stability before a pitch is thrown. Static stretching held for 30+ seconds before throwing actually blunts that activation, which is why dynamic tubing exercises and movement-based drills are preferred pre-throw. Save the long static holds for after practice.
Age-appropriate warm-up principles for youth development stages
The biggest mistake coaches make is running the same warm-up for an 8-year-old and a 14-year-old. The goals are genuinely different at each stage.
Ages 8–10: Movement literacy first. The primary goal is teaching the body how to move, not how hard to throw. Focus on coordination, balance, and body awareness. Proper pitching posture habits built here compound for years.
- Do: simple skips, slow hip circles, single-leg balance holds, underhand toss
- Avoid: max-effort throws, weighted balls, any drill that rewards speed over form
Ages 11–13: Mobility and balance under load. Brian Cammarota, a movement specialist who works with youth athletes in this age range, emphasizes that movement quality, posture, and balance should drive every warm-up decision, not velocity targets. Growth spurts in this window create temporary mobility deficits that, left unaddressed, shift workload to the elbow and shoulder.
- Do: lateral lunges with a twist, hip 90/90 stretches, band pull-aparts, controlled step-back toss
- Avoid: long toss beyond 60 feet until full warm-up is complete, skipping lower-body work
Ages 14–16: Stability and controlled power. The focus shifts toward building the hip and core stability that generates pitching force without overloading the arm. Thoracic spine mobility becomes critical here.
- Do: dead bugs, bird dogs, hip flexor stretches, rotator cuff band work, full interval throwing progression
- Avoid: skipping the aerobic raise because “it feels unnecessary,” jumping straight to bullpen work
Pro Tip: For any age group, watch foot and knee alignment during lunges and shuffles. Poor lower-body mechanics in the warm-up predict poor mechanics on the mound.
Core components every pitcher warm-up should include
A well-structured warm-up follows a clear progression from general to specific. Skipping stages is where most arm problems start.
-
General aerobic raise (2–4 minutes). Jog the basepaths, do high knees, or run lateral shuffles. The goal is raising core temperature and heart rate, not conditioning. Keep intensity at 50–60% effort.
-
Dynamic lower-body mobility (3–4 minutes). Hips, thoracic spine, and glutes generate pitching force. When these are stiff, the arm compensates, and cumulative wear on the shoulder and elbow follows. Exercises: walking lunges with a twist, lateral lunges, hip openers, glute bridges.
-
Shoulder and scapular activation (2–3 minutes). Low-load band work targeting the rotator cuff and scapular stabilizers. Throwers’ 10-style movements — external rotation at 90°, shoulder flexion, low-row pulls — activate the muscles that protect the joint before any ball is thrown. Rotator cuff activation and core engagement are the two most skipped steps in youth warm-ups.
-
Progressive throwing build-up. Start at 30–40 feet, 10–15 throws at 50–60% effort. Step back to 45–60 feet over the next 10–12 throws. Follow the soreness rule at every step: discomfort that persists past the first 15 throws means stop, rest two days, and return at the shorter distance.
-
Cooldown and post-throw stretching. This is where static stretching belongs. Cross-body shoulder stretch, sleeper stretch, and hip flexor holds after the session help restore range of motion and reduce next-day soreness.
Pro Tip: A 10-minute prevention program also improved ball speed and range of motion in teams that used it consistently. The warm-up is not just protection — it is preparation.
Three ready-to-use warm-up routines by age group
Ages 8–10 (total: 8–10 minutes)
| Exercise | Reps / Time | Purpose |
|---|---|---|
| Jog or skip around bases | 2 min | Aerobic raise |
| Hip circles (each leg) | 10 reps | Hip mobility |
| Single-leg balance hold | 20 sec each | Balance and stability |
| Arm circles (small to large) | 10 each direction | Shoulder prep |
| Underhand toss at 20–30 ft | 10–12 throws | Progressive arm activation |
Ages 11–13 (total: 10–12 minutes)
| Exercise | Reps / Time | Purpose |
|---|---|---|
| Lateral shuffles + high knees | 2–3 min | Aerobic raise |
| Walking lunge with twist | 10 reps | Hip and thoracic mobility |
| Hip 90/90 stretch | 30 sec each side | Hip internal rotation |
| Band pull-aparts | 15 reps | Scapular activation |
| Step-back toss (30 → 50 ft) | 15–20 throws | Progressive arm load |
Ages 14–16 (total: 12–15 minutes)
| Exercise | Reps / Time | Purpose |
|---|---|---|
| Jog + dynamic leg swings | 3 min | Aerobic raise |
| Lateral lunge + hip opener | 10 reps each | Lower-body mobility |
| Dead bug or bird dog | 8 reps each side | Core activation |
| Band ER at 90° + low rows | 15 reps each | Rotator cuff activation |
| Step-back toss (40 → 60 ft) | 20 throws | Full arm warm-up |
For players returning from elbow or shoulder issues, cut throwing volume by half and stay at the shortest distance until two consecutive sessions are pain-free. Arm strength progressions should always follow the soreness rule before advancing a step.
Common warm-up mistakes and warning signs to watch for
Most arm injuries in youth pitchers trace back to a handful of repeated errors, not a single bad throw.
Mistakes that increase risk:
- Static stretching as the first warm-up activity (blunts neuromuscular activation)
- Skipping lower-body work and going straight to arm circles
- Throwing at full effort before completing the progressive build-up
- Using the same warm-up intensity for a Tuesday practice and a Saturday tournament game
Red flags that require stopping:
- Sharp or localized pain in the elbow or shoulder during any throw
- Soreness that persists past the first 15 throws (apply the soreness rule immediately)
- Numbness or tingling in the hand or fingers
- A noticeable drop in velocity or control mid-warm-up
When a red flag appears, stop throwing, apply ice for 15–20 minutes, and rest for 48 hours minimum. If pain returns on the next session or does not resolve within a week, consult a sports medicine physician or orthopedic specialist. Keep a simple log: date, distance thrown, soreness level (1–10), and any symptoms. That record helps a clinician identify patterns quickly. For broader safe training practices, consistent documentation is one of the most underused tools coaches have.
Pro Tip: Pain and soreness are not the same thing. Mild muscle fatigue after a full session is normal. Sharp, localized joint pain is not. Teach players the difference early.
How long to warm up and how often to run structured routines
For most youth pitchers, 8–12 minutes covers a complete warm-up before practice. Pre-game warm-ups for older or more competitive players can run 12–15 minutes because competition intensity demands more preparation.
Pre-practice and pre-game warm-ups differ: before a game, the progressive throwing build-up should reach the intended game distance before play begins. Before practice, shorter starts are acceptable, with gradual build during the session.
The RCT evidence supports running a structured prevention program roughly 1–2 times per week. Real-world implementation data shows teams averaged 1.6 sessions per week with 73% compliance, which still produced measurable injury reduction. Daily warm-ups are ideal, but consistent routines twice per week are more effective than longer but sporadic sessions.
Pitch counts and warm-up volume should move together. A pitcher at or near their weekly pitch-count limit needs a shorter, lower-intensity warm-up, not a full progressive build-up that adds to cumulative arm stress. Managing practice time around pitch counts is one of the most practical ways coaches protect arms across a full season.
Key Takeaways
A structured warm-up that includes dynamic mobility, lower-body activation, and a progressive throwing build-up is the single most evidence-backed step coaches can take to reduce youth pitching injuries.
| Point | Details |
|---|---|
| Warm-ups cut injury risk by ~50% | A 52-week RCT with 237 youth players showed structured warm-ups reduced throwing injuries by roughly half. |
| Lower body comes before the arm | Stiff hips and thoracic spine force the shoulder and elbow to compensate, increasing cumulative wear. |
| Apply the soreness rule every session | If discomfort persists past the first 15 throws, stop and rest two days before returning at a shorter distance. |
| Age-specific focus matters | Ages 8–10 need movement literacy; 11–13 need mobility and balance; 14–16 need stability and controlled power. |
| Pitchtrainingbaseball supports safe practice | After a proper warm-up, tools like the Pitching Target Net and pickeballs let players build accuracy and arm strength at controlled intensity. |
Why consistent warm-ups are the foundation of long-term pitching development
Most coaches focus on mechanics, pitch selection, and velocity. The warm-up gets treated as a formality. That is backwards. A pitcher who warms up well throws with better mechanics from the first pitch, not the fifth inning. The habits built in warm-up, specifically the lower-body activation, the scapular engagement, the progressive throwing, are the same movement patterns that hold up under fatigue late in a game.
Tracking warm-up adherence is simpler than most coaches think. A one-line note after each session, soreness level and whether the full routine was completed, gives you a season-long picture of arm health that no pitch-count app captures alone. Athletic metrics for high school athletes increasingly include readiness and recovery data alongside performance numbers, and youth coaches would do well to adopt the same mindset early.
The players who stay healthy across a full season are rarely the most talented. They are the ones whose coaches built the warm-up into the culture of every practice, not just the days before a big game.
Practice smarter after every warm-up with Pitchtrainingbaseball
Once your pitcher has completed a proper warm-up, the quality of practice depends on the tools in front of them. Pitchtrainingbaseball builds training equipment specifically for youth pitchers who need safe, focused repetition without the pressure of live at-bats.

The Pitching Target Net with 9-Zone Strike Zone gives pitchers an immediate visual target for every post-warm-up throw, reinforcing location habits at controlled intensity. For players scaling back after soreness or returning from a minor issue, pickeballs reduce arm stress while keeping the throwing motion intact. The full Pitch Training Baseball system pairs these tools with instructional resources so coaches and parents have everything needed for a complete, safe session. Browse the full lineup and find the right setup for your player’s age and skill level.
Useful sources and further reading
The claims in this article draw from peer-reviewed research, sports medicine guidance, and youth baseball coaching resources. Here are the primary sources worth bookmarking:
- Throwing Injuries in Youth Baseball Players: Can a Prevention Program Help? (PubMed RCT) — The 52-week randomized controlled trial with 237 players; the core evidence for structured warm-up programs.
- Baseball Basics: Why Pitch Counts and Warm-Ups Matter (Carilion Clinic) — Susanne Washburn, NP, on tissue physiology and the rubber-band analogy.
- Baseball Prevention Programs Prevent Poor Performance and Injury (SportsMedRes) — Implementation data on compliance rates and ball-speed improvements.
- Interval Throwing Program for Adolescent Baseball Pitchers (Connecticut Children’s) — The soreness rule and step-back progression protocol used by sports medicine clinicians.
- Youth Baseball Pre-Game Mobility (Philadelphia Baseball Review) — Movement quality principles for ages 8–13 and the lower-body compensation argument.
- Baseball Arm Care Pre-Season Training Guide (InMotion PT NY) — Rotator cuff activation drills and Throwers’ 10-style pre-throw protocols.
- Pitchtrainingbaseball.com — Training equipment, eBooks, and educational resources for youth pitching development.
Recommended
- Recommended Daily Pitching Habits for Youth Players – Pitch Training Baseball
- Top pitching workouts for youth baseball: build skill safely – Pitch Training Baseball
- Why Pitcher Recovery Is Important for Young Arms – Pitch Training Baseball
- Managing Practice Time for Pitchers: 2026 Youth Guide – Pitch Training Baseball