


Building real arm strength in baseball is not about throwing as hard as you can every single day. That approach leads to tired arms and injured pitchers, not stronger ones. These arm strength tips baseball coaches and youth players actually need combine safe workload management, targeted exercises, and consistent arm care routines. Use this guide to build a stronger, more durable throwing arm without cutting corners on health.
Table of Contents
- Key takeaways
- 1. Understand what arm strength development actually means
- 2. Follow age-based pitch count guidelines
- 3. Count every single throw, not just game pitches
- 4. Use interval throwing programs to build arm strength progressively
- 5. Build arm strength with these targeted exercises
- 6. Structure your warm-up to prepare the arm, not just loosen it
- 7. Do not skip the cool-down and after pitching arm care
- 8. Avoid these common mistakes that stall arm strength gains
- 9. Build a weekly training schedule that includes all the pieces
- My take on what actually moves the needle for youth arm strength
- Take your arm training further with Pitchtrainingbaseball
- FAQ
Key takeaways
| Point | Details |
|---|---|
| Track total throwing volume | Count warm-up, bullpen, and practice throws, not just game pitches, to avoid overload. |
| Follow age-based pitch limits | Use pitch count guidelines to manage daily volume and required rest days by age group. |
| Train the full kinetic chain | Leg, hip, and core strength contribute directly to pitching velocity and arm durability. |
| Prioritize arm care routines | Consistent pre-throw and post-throw routines reduce injury risk and improve arm longevity. |
| Progress throwing distance gradually | Long toss should build incrementally from short distances to strengthen the arm safely. |
1. Understand what arm strength development actually means
Most youth players think arm strength means throwing harder, more often. That is only part of the picture. True arm strength development means building the muscles that accelerate and decelerate the ball, training the body to support every throw, and managing workload so the arm grows stronger instead of breaking down.
The shoulder and elbow absorb enormous force with every pitch. The real goal is training the muscles around those joints to handle that force repeatedly without injury. That means rotator cuff strength, scapular stability, forearm endurance, and core power all matter just as much as raw arm speed.
When coaches understand what arm strength in baseball actually involves, they set up their players for long-term gains instead of short-term effort that burns out young arms.
2. Follow age-based pitch count guidelines
This is one of the most concrete and non-negotiable arm strength tips for baseball coaches to follow. Pitch count limits by age reduce overuse injury risk, with maximum daily pitches set at 50 for ages 7 to 8, 75 for ages 9 to 10, 85 for ages 11 to 12, and 95 for ages 13 to 14.
Rest days matter just as much as the pitch limits themselves. Pitching 21 to 35 in a day requires at least one rest day. Throw 66 or more and you need four full rest days before pitching again. These are not suggestions. They are grounded in what it takes for young arm tissue to recover from microtrauma.
Coaches who ignore these numbers are not building stronger players. They are shortening careers before they begin.
3. Count every single throw, not just game pitches
Here is where most well-intentioned coaches miss it. Total throwing volume includes warm-up throws, bullpen sessions, infield practice, and any other throw made on that day. A pitcher might throw 60 game pitches and then another 40 in warm-ups and pre-game bullpen, putting the actual arm workload well above 100 throws.
“Feeling good” is not a reliable indicator of arm fatigue. The arm can feel fine while microtrauma is accumulating under the surface. Tracking the real number protects against the overload that builds quietly and shows up as an injury weeks later.
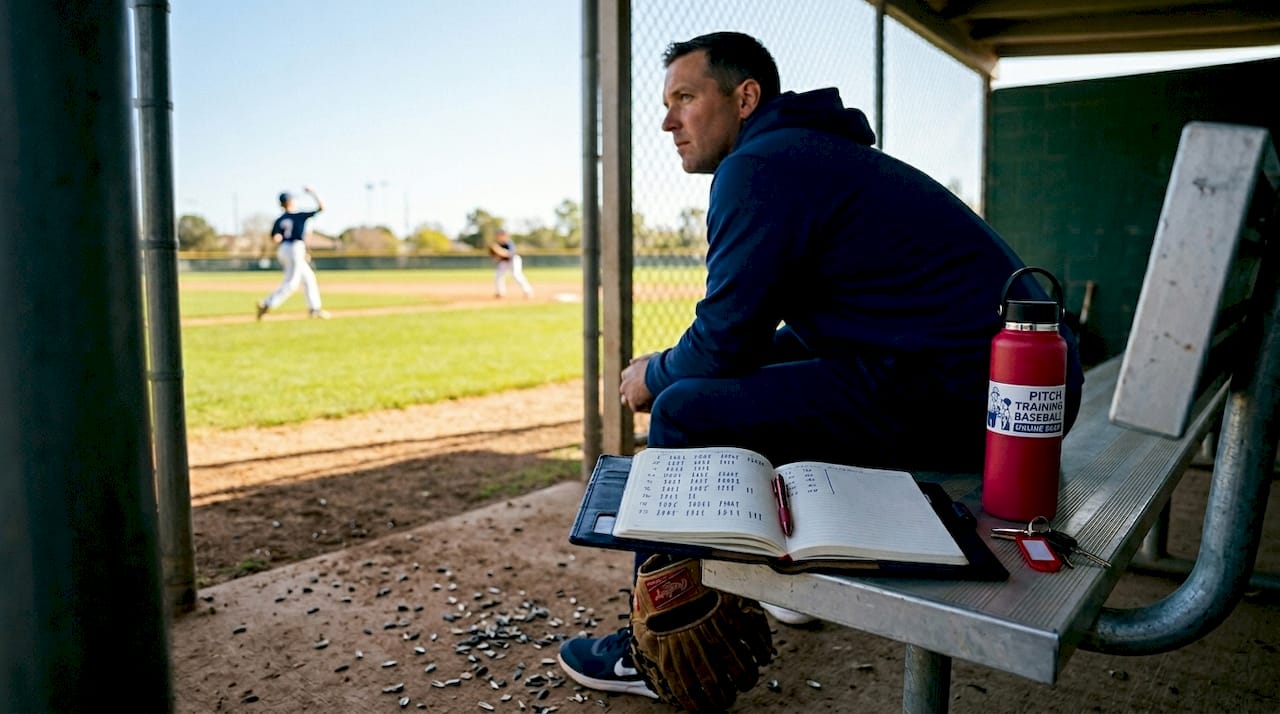
Build a simple tracking habit. A phone note, a small notebook in the dugout, or a free pitch tracking app gets the job done. The specifics do not matter. The consistency does.
Pro Tip: Assign one parent volunteer per game to count and log every single throw, including warm-up pitches in the bullpen and between-inning tosses. This takes the burden off coaches mid-game and creates an accurate record.
4. Use interval throwing programs to build arm strength progressively
Random throwing is not a training program. Interval throwing programs structure the volume and intensity of throwing over weeks so the arm adapts without being overwhelmed. Programs that maintain an Acute:Chronic Workload Ratio between 0.7 and 1.3 effectively reduce injury risk while building arm strength. Well-designed programs keep throwing volume within this ratio more than 95 percent of the time.
In practice, this means you do not spike throw volume suddenly. If a player averaged 60 throws per day over the past few weeks, jumping to 120 throws the next day is a workload spike that the arm is not prepared for. A well-structured bullpen routine for youth pitchers builds volume week by week so the arm keeps up.
This is the difference between training smart and just putting in time. The ratio concept sounds technical, but the application is simple: increase throwing load gradually and never make sudden jumps.
5. Build arm strength with these targeted exercises
This is the practical heart of the pitcher arm strength guide. These exercises train the specific muscles that protect and power the throwing arm.
- Band external rotation. External rotation with a resistance band at 90-degree elbow abduction targets the infraspinatus and teres minor, the muscles responsible for decelerating the arm after release. Do 3 sets of 12 to 15 reps. This single exercise is the most important in any arm care for pitchers program.
- Band internal rotation. The mirror movement to external rotation. Trains the subscapularis and builds balance in the shoulder. Same protocol: 3 sets of 12 to 15 reps.
- Prone Y-T-W raises. Scapular stabilizers form the foundation of the throwing chain. Weak scapular control forces the rotator cuff to compensate and increases injury risk. Lying face down on a flat surface, lift the arms into Y, T, and W positions to target the lower and middle trapezius. Use no weight or very light weight. Youth players should never go heavy here.
- Wrist curls and pronation/supination. Forearm and wrist exercises act as dynamic stabilizers of the elbow, directly protecting the UCL. Use light dumbbells or a resistance band for 3 sets of 15 reps.
- Planks and dead bugs. Core strength is not optional if you want to gain pitching velocity. Every throw transfers force through the core. Two to three sets of 30-second planks and dead bugs per session build the stability that connects lower body power to the arm.
- Lunges and single-leg squats. Legs and hips generate the majority of force in a pitch. Kinetic chain development with lower body exercises directly supports velocity gains that no arm exercise alone can produce.
Pro Tip: Youth players should use resistance bands for shoulder exercises rather than dumbbells. Bands provide consistent tension through the full range of motion, which is safer and more effective for rotator cuff training than free weights in young athletes.
6. Structure your warm-up to prepare the arm, not just loosen it
A proper warm-up does more than get the blood moving. It primes the nervous system, lubricates the joint, and prepares the specific muscles that will work under load. Here is what an effective pre-throw warm-up looks like for youth pitchers:
- Start with two to three minutes of light jogging or jumping jacks to raise core body temperature
- Follow with arm circles, both forward and backward, starting small and gradually widening the arc
- Add shoulder rolls, cross-body arm swings, and wrist circles
- Move into dynamic movements like hip circles and leg swings to activate the kinetic chain
- Begin throwing at a short distance of 30 to 40 feet with easy, loose throws
Long toss builds arm strength when distance is progressed gradually from around 40 feet up to 90 to 100 feet, depending on the player’s age and arm development. Easy and accurate throws with an extended arm path are the goal, not max-effort distance throws.
This kind of warm-up takes about 10 minutes. Youth teams that build it into every practice as a non-negotiable routine see measurable improvements in arm readiness and far fewer arm complaints throughout the season.
7. Do not skip the cool-down and after pitching arm care
After pitching arm care is where a lot of youth teams drop the ball. Players throw their last pitch, grab their gear, and head to the car. That is a missed opportunity for arm recovery that compounds over an entire season.
Here is what an effective post-throw routine looks like:
- Light jogging for three to five minutes to flush metabolic waste from the muscles
- Gentle arm swings and shoulder rolls to maintain blood flow
- Sleeper stretch: Lie on the throwing side, arm out at shoulder height, and gently rotate the hand toward the ground. Hold for 30 seconds. This targets the posterior shoulder capsule, which tightens with repeated throwing.
- Cross-body stretch: Pull the throwing arm across the chest with the opposite hand. Hold for 30 seconds on each side.
- Icing for 10 to 15 minutes post-throw can help manage inflammation after heavy outings, particularly for pitchers who threw near their pitch count limit.
Consistency in arm care and volume control prevents major throwing injuries and extends playing careers. Teams that build cool-down routines into the culture treat arm care as a sign of professionalism, not weakness.
8. Avoid these common mistakes that stall arm strength gains
Youth players and coaches with the best intentions still fall into these traps regularly:
- Throwing more without structure. The belief that throwing more automatically builds arm strength is not wrong. It is incomplete. Volume without load management leads to overuse injuries, not gains.
- Skipping warm-up and cool-down. Warm-up throws add significant arm workload and must count toward daily limits. Skipping cool-downs leaves the arm stiff and more vulnerable the next day.
- Playing on multiple teams simultaneously. Multi-team participation dramatically increases total arm workload beyond what any single coach can monitor. This is one of the biggest risk factors for youth arm injuries.
- Ignoring pain signals. Youth players often play through arm soreness because they want to compete. Coaches need to create a culture where reporting arm pain is expected and never penalized.
- Returning too quickly after injury. A phased return-to-throwing program starting with just 25 throws at 45 feet, three times per week, over six to eight weeks, is the standard after injury. Rushing back without full pain resolution risks a worse setback.
“The arm that throws the most as a kid is not the arm that throws the best at 18. The arm that is managed the best as a kid is.”
9. Build a weekly training schedule that includes all the pieces
This is where the arm strength development tips above come together into an actual program. A well-structured week for a youth pitcher balances throwing days, strength training, rest, and arm care.
| Day | Activity | Notes |
|---|---|---|
| Monday | Arm care exercises + light catch | 20 minutes of band work and scapular exercises |
| Tuesday | Pitching session or bullpen | Track all throws, full warm-up and cool-down |
| Wednesday | Full body strength training | Core, legs, and upper body; no pitching |
| Thursday | Light long toss | Progressive distance, easy effort |
| Friday | Rest or active recovery | Walk, stretch, mobility work only |
| Saturday | Game or practice | Count all pitches including warm-ups |
| Sunday | Complete rest | Full recovery before the next week |
This template adapts by age and experience. Younger players in the 9 to 10 range should reduce throwing days and add more rest. Players in the 13 to 14 range can handle the full structure. The key principle stays the same regardless of age: no two consecutive high-volume throwing days.
Pro Tip: Review the previous week’s total throw count before planning the next week. If a game day pushed the arm near the pitch limit, adjust the next throwing session downward to stay within a safe workload ratio.
Coaches who pair this kind of planning with regular conversations with players and parents about pain reporting create safe baseball training practices that protect athletes for the long haul. Progress assessments every four to six weeks also help you see if a player’s arm is responding well or showing signs of accumulated fatigue.
My take on what actually moves the needle for youth arm strength
I have seen coaches run conditioning programs full of arm exercises, and I have seen teams where kids just throw every day with no plan. Neither approach builds arm strength consistently. Here is what I have found actually works.
The total workload number is the most underused tool in youth pitching. I am not talking about official game pitch counts. I mean every throw. The two warm-up tosses before the inning, the 15 pitches in the pre-game bullpen, the 10 throws during infield practice. When I started counting those honestly, I realized players were frequently at or past safe limits before a game even started.
Scapular stability training changed outcomes more than any other single addition in my experience. The prone Y-T-W series takes five minutes. Players hate it because it burns in the boring muscles, not the flashy ones. But shoulder complaints dropped noticeably in players who did this consistently.
My honest take on how to increase pitch velocity: most youth players are leaving velocity on the table in their legs and hips, not their arms. Kinetic chain exercises for the lower body pay off in pitching speed faster than more arm work will. Coaches who treat pitching as a full-body skill instead of an arm skill see better results.
The cultural piece is real too. When arm care is built into team culture, players do not skip it. When it is optional, they skip it. Make the warm-up and cool-down as non-negotiable as batting practice. The teams that do this consistently are the ones with healthy rosters at the end of the season.
— Albert
Take your arm training further with Pitchtrainingbaseball
Every arm strength routine needs the right tools to back it up. Pitchtrainingbaseball offers training equipment designed specifically for youth baseball players who want to build arm strength, improve accuracy, and practice consistently.

The pitching target net with a 9-zone strike zone gives pitchers immediate visual feedback on every throw, which makes each repetition more purposeful during arm-strengthening sessions. The pitch training baseball is built for youth mechanics training, pairing well with the workload-managed programs covered in this guide. Whether you are a coach building a weekly arm care program or a parent setting up backyard practice, Pitchtrainingbaseball has tools that make every session count without wasting a throw.
FAQ
What are the best arm strength tips for youth baseball pitchers?
Focus on rotator cuff band exercises, scapular stability work, forearm strengthening, and progressive long toss while strictly managing pitch counts and rest days based on age.
How do I gain pitching velocity safely?
Velocity gains come from developing the full kinetic chain, including legs, hips, and core, combined with proper mechanics and consistent arm care rather than simply throwing harder.
What is arm care for pitchers?
Arm care for pitchers is a structured routine of pre-throw warm-ups, post-throw cool-downs, rotator cuff and scapular exercises, and workload tracking designed to build arm strength while preventing injury.
How many pitches should a youth player throw per day?
Age-based pitch count guidelines cap daily pitches at 50 for ages 7 to 8, 75 for ages 9 to 10, 85 for ages 11 to 12, and 95 for ages 13 to 14, with mandatory rest days based on how many pitches were thrown.
Should youth pitchers ice their arm after pitching?
Icing for 10 to 15 minutes after high-volume outings can help manage inflammation, but it should be part of a broader after pitching arm care routine that also includes light movement and stretching to maintain blood flow.
Recommended
- How to Increase Arm Strength for Baseball Athletes – Pitch Training Baseball
- What is arm strength in baseball? Boost pitching power safely – Pitch Training Baseball
- How to throw a baseball: proven youth coaching tips – Pitch Training Baseball
- How to improve baseball throwing: techniques and tools – Pitch Training Baseball