


Most youth pitchers walk into a bullpen session with no plan. They grab a ball, throw until their arm feels warm, and call it productive. The result? A step by step bullpen routine that actually builds skill never gets established, performance plateaus appear, and the arm pays the price. Coaches see it constantly. A pitcher with real talent throws fifty pitches with no purpose, no mechanical focus, and no recovery strategy. This guide gives you the exact routine to fix that. From warm-up through recovery, you will leave with a structured, repeatable session that develops command, protects the arm, and creates measurable progress.
Table of Contents
- Key Takeaways
- Step by Step Bullpen Routine: Getting It Right
- Before you throw: the bullpen warm-up routine
- The throwing routine: phases, pitch counts, and focus
- Mechanical focus and the mental approach
- Post-bullpen recovery and workload management
- My take on what actually makes a bullpen work
- Train smarter with the right tools from Pitchtrainingbaseball
- FAQ
Key Takeaways
| Point | Details |
|---|---|
| Warm up before every throw | Spend 10-15 minutes on cardio, dynamic movement, and band work before picking up a ball. |
| Follow a phased throwing plan | Divide every bullpen into windup, stretch, and simulated batter phases with set pitch counts. |
| Focus on mechanics over results | Prioritize delivery and arm slot consistency rather than pitch outcome during most sessions. |
| Track every pitch thrown | Count all warm-up and bullpen pitches as part of total workload to protect the arm. |
| Recover actively, not passively | Do light aerobic movement within 30 minutes after pitching instead of sitting still or icing. |
Step by Step Bullpen Routine: Getting It Right
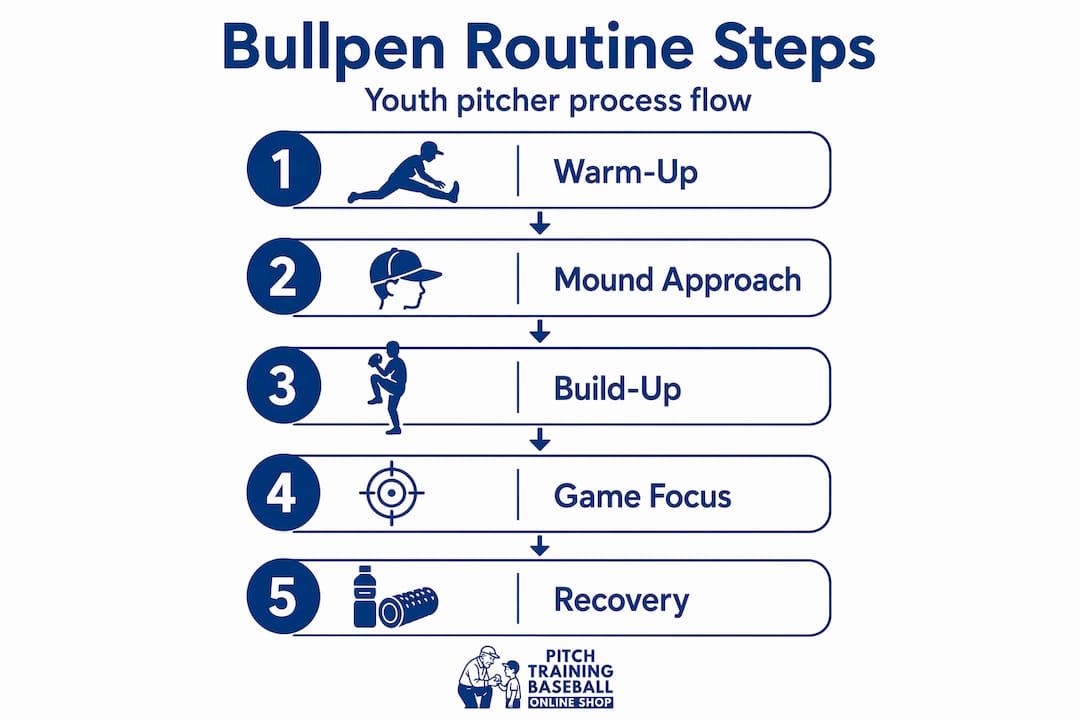
Many youth pitchers treat the bullpen like a casual throwing session. That mindset is the first problem. A proper step by step bullpen routine has five distinct stages: physical preparation, the throwing warm-up, the structured bullpen itself, mechanical evaluation, and post-session recovery. Skip any stage and the whole session loses its value.
The most important thing to understand before we break down each part? A clear bullpen plan transforms sessions from simply throwing to purposeful developmental work. That single shift in thinking separates pitchers who improve every week from those who spin their wheels for an entire season.
Let’s walk through exactly how to build and execute this routine from start to finish.
Before you throw: the bullpen warm-up routine
The arm does not wake up ready to throw at full intensity. Neither does the shoulder, the thoracic spine, or the hip flexors. Skipping a proper warm-up is one of the most common ways youth pitchers accumulate arm stress without realizing it.
According to current arm care guidelines, a proper warm-up for youth pitchers must include 10 to 15 minutes of preparation, starting with five minutes of light cardio and followed by three minutes of resistance band work targeting the rotator cuff and scapular muscles. That is not optional. It is the minimum.
Here is what a complete bullpen warm-up routine looks like:
- Light jogging or jump rope (4 to 5 minutes): Get the heart rate up and blood moving to the extremities.
- Arm circles and cross-body shoulder stretches (2 minutes): Dynamic, never static. Hold nothing longer than two seconds.
- Hip circles and leg swings (2 minutes): The legs and hips generate most pitching power.
- Thoracic spine rotations (1 to 2 minutes): Sit on the ground, rotate the upper body side to side with hands behind the head. This directly supports arm slot consistency.
- Resistance band pull-aparts and external rotations (3 minutes): Activate the rotator cuff before a single baseball is thrown.
- Wrist circles and finger spreads (1 minute): Overlooked by most youth pitchers. The hand and wrist transfer energy at release.
One critical rule: avoid heavy static stretching before throwing. Targeted mobility work protects the shoulder far better than aggressive generic stretching, which can create unwanted instability in the joint before high-stress activity.
Pro Tip: Keep a resistance band in your bag at all times. Two to three minutes of band work before every session builds cumulative rotator cuff strength over a season and significantly reduces soreness between outings.
The throwing routine: phases, pitch counts, and focus
This is the core of the step by step bullpen routine. The session breaks into three distinct phases. Each phase has a specific purpose, a pitch count, and a mechanical or command focus. Do not mix them. Treat each phase as its own mini-session within the larger workout.
Here is the sequence:
- Long toss warm-up (45 to 60 feet, 10 to 12 throws): Start at conversational distance. Focus on easy, loose arm action. No effort above 60 percent.
- Mound approach throws (8 to 10 pitches): Step onto the mound. Throw from a shortened wind-up at half effort. Feel the slope under your feet. This is not counted in your official bullpen pitch count.
- Wind-up phase (15 pitches): Full delivery from the stretch with both feet on the rubber. Focus on delivery mechanics only. No concern about location. Throw to a target but do not chase corners.
- Stretch phase (9 pitches): Simulate pitching from the stretch as if runners are on base. Mix fastballs and one secondary pitch. Focus on hip-to-shoulder separation and repeatable release point.
- Simulated batter phase (4 to 6 pitches): Set up with a real or imagined batter in the box. Throw with full game intensity. Now location matters. This is your command check.
- Rest and evaluation (2 to 3 minutes): Step off the mound. Take notes. Check in with your coach or catcher on what you felt and what they observed.
This structure mirrors in-season bullpen guidelines that recommend 20 to 25 pitches at submaximal intensity with a specific mechanical or command focus. The phased approach here keeps you inside that safe range while covering all the ground a productive session needs.
Pitch count and focus summary
| Phase | Pitch count | Primary focus | Intensity |
|---|---|---|---|
| Mound approach | 8 to 10 | Comfort and feel | 50 to 60% |
| Wind-up | 15 | Delivery mechanics | 70 to 75% |
| Stretch | 9 | Hip separation, release point | 75 to 80% |
| Simulated batter | 4 to 6 | Command and location | 85 to 90% |
Pro Tip: Write your session goal on a piece of tape and stick it to your hat brim or glove before you start. Something as simple as “Keep my elbow up through release” gives your brain one job and stops you from chasing irrelevant outcomes.
Pitching practice steps like these work because they give your nervous system a specific task. Research on delivery-first bullpen planning consistently shows that mechanics improve faster when pitchers focus on how the ball is thrown rather than where it goes, especially early in a session.
Mechanical focus and the mental approach
Here is where most youth sessions fall apart even when the pitch counts are right. A pitcher can follow the phases perfectly and still waste the session by thinking about the wrong things. The mental approach is not soft advice. It is a technical requirement for skill development.
Before every bullpen session, write down one to two mechanical goals. Not vague goals like “throw strikes.” Specific ones, such as “land my stride foot in line with the target” or “keep my glove arm closed until hip rotation.” These are the targets your brain needs to build new motor patterns.
The key mechanical focus points every youth pitcher should track:
- Arm slot: Where does your elbow arrive at the moment your stride foot lands? Consistent arm slot improves deception and reduces shoulder strain over time.
- Release point: Are you releasing the ball at the same point every pitch? Inconsistent release creates wild patterns that no amount of repetition will fix without correction.
- Hip to shoulder separation: Your hips should rotate before your shoulders. This sequence generates velocity and protects the arm from overload.
- Stride length and direction: A short or misdirected stride forces the arm to compensate. Everything downstream from the stride either helps or hurts the arm.
- Follow-through: Does your throwing hand finish past your hip toward the opposite knee? Short follow-throughs indicate deceleration problems that stress the elbow.
The mental side of a productive bullpen session comes down to one concept: pitching with intent. That means every pitch has a specific purpose, even if it ends up in the dirt. A pitch thrown with clear mechanical intent and bad location is more valuable than a perfect strike thrown on autopilot.
Pro Tip: After each phase, ask your catcher one question: “What did you see?” Catchers watch mechanics from the front and often catch release point issues that pitchers cannot feel themselves. Their feedback is free coaching.
Coaches who want to improve how they track sessions should look into youth pitching performance assessment, which provides structured methods for evaluating bullpen outcomes and tracking pitcher progress over time.
Post-bullpen recovery and workload management
The session does not end when the last pitch is thrown. What you do in the 30 minutes after pitching determines how your arm recovers and how ready you will be for the next session. Most youth pitchers skip this part entirely. That is a mistake with real consequences.
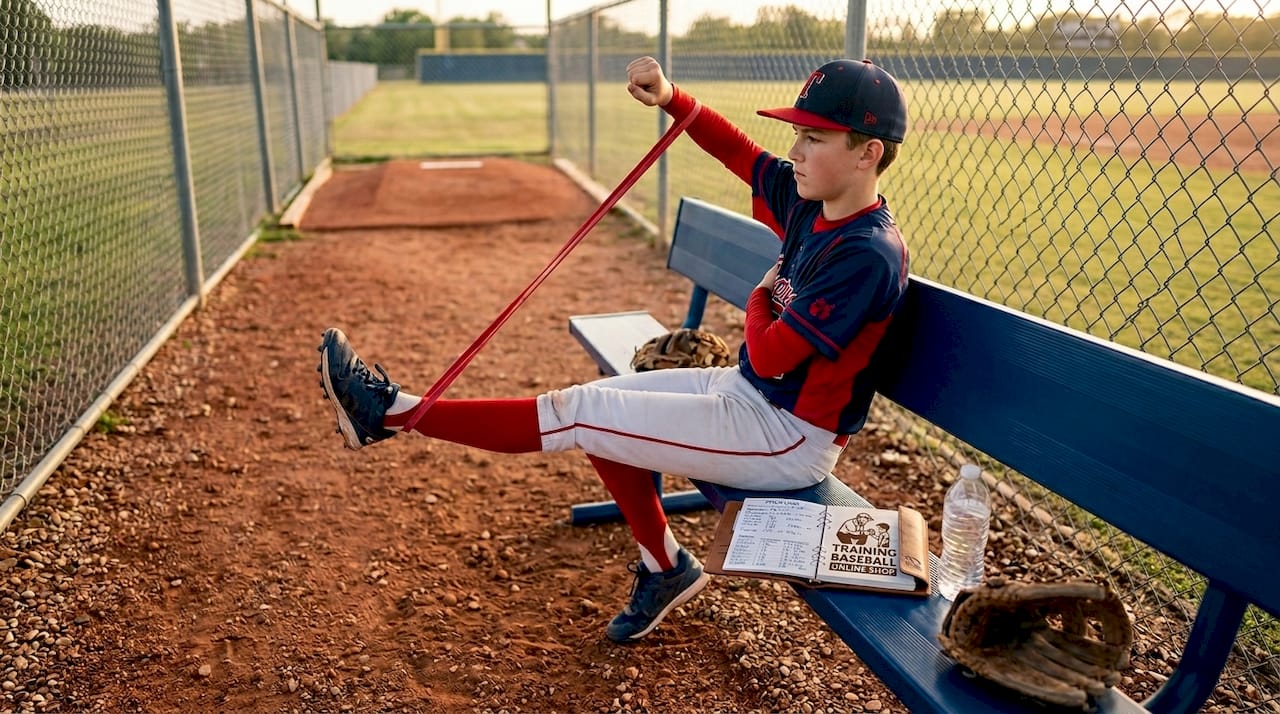
Modern sports therapy has moved away from routine icing after pitching. Active recovery over icing is now the standard recommendation, with ice reserved only for situations involving acute pain or suspected injury. Instead, the research points to movement.
Within 30 minutes after your last pitch, do 10 to 15 minutes of light aerobic activity such as jogging or biking at low intensity. This flushes metabolic waste from the muscles and speeds up tissue recovery. Follow it with gentle band work for the rotator cuff at very low resistance.
Here is what workload management looks like in practice:
- Track every pitch in the bullpen, including warm-up throws. All pitches count toward cumulative arm stress. Warm-up pitches contribute to fatigue just like competition pitches do.
- Follow recommended rest guidelines. Youth pitchers aged 13 to 16 generally need one to four days of rest depending on pitch count. Bullpen sessions count.
- Watch for fatigue signals. Velocity drops, loss of command, elbow or shoulder soreness after sessions, and unusual arm heaviness are all signs the workload needs to drop.
- Space bullpen sessions 2 to 3 days before scheduled game appearances. This timing protects arm readiness and aligns with established in-season bullpen guidelines for submaximal intensity sessions.
The data on why this matters is stark. Pitchers who appear on consecutive days or exceed 25 pitches in relief show measurable declines in both velocity and command, with injury and performance risks climbing significantly. Youth arms are not immune to those patterns. They are more vulnerable to them.
A simple notebook or phone app works fine for pitch tracking. The goal is a running weekly total that coaches and parents can use to make smart decisions about practice and game schedules. Step by step bullpen charting like this does not have to be complicated. It just has to be consistent.
My take on what actually makes a bullpen work
I have watched a lot of youth pitchers go through the motions in the bullpen. They show up, throw hard, and leave thinking they did the work. In my experience, those sessions do almost nothing for long-term development. The pitcher who throws 22 focused pitches with a written goal, specific phase structure, and five minutes of post-session movement will outpace the pitcher who throws 60 pitches with no plan. Every time.
The mistake I see most often is treating the bullpen as a place to practice results instead of a place to practice process. A youth pitcher should almost never walk off the mound after a bullpen asking “how many did I throw for strikes?” The better question is “did I do the thing I came here to work on?”
What I have learned from coaching pitchers through consistent routines is that the physical structure matters less than the mental contract a pitcher makes with themselves before each session. When a young pitcher writes down one mechanical goal, follows the phased sequence, and tracks their pitches honestly, they stop wasting sessions. Progress becomes visible in two to three weeks. Not months.
My honest advice: start simpler than you think you need to. One mechanical focus per session. One phase at a time. Nail the warm-up. Do the recovery. Build the habit before you build the complexity. The pitchers who stick with a disciplined youth pitching workout plan develop faster and stay healthier than those who improvise their way through every session.
— Albert
Train smarter with the right tools from Pitchtrainingbaseball
Knowing the routine is step one. Having the right training environment to execute it is step two.

Pitchtrainingbaseball offers training aids built specifically for youth pitchers who want to practice with purpose. The 9-zone pitching target net gives pitchers a real, visual strike zone to work with during the command phase of their bullpen routine. Hitting specific zones during the simulated batter phase becomes measurable instead of guesswork. Pair it with a pitch training baseball designed for youth development, and every rep in your routine becomes more intentional. Coaches and parents looking to support skill development at home or at the field will find these tools genuinely useful, not just decorative equipment. Check the full lineup at Pitchtrainingbaseball and give your pitcher the setup that matches their work ethic.
FAQ
What should a youth bullpen session include?
A complete youth bullpen session includes a 10 to 15 minute warm-up, a phased throwing routine of 20 to 28 pitches across wind-up, stretch, and simulated batter phases, a brief mechanical evaluation, and 10 to 15 minutes of active recovery afterward.
How many pitches should a youth pitcher throw in a bullpen?
Youth pitchers should throw 20 to 25 pitches in a structured bullpen session, not counting warm-up mound throws. This aligns with submaximal intensity guidelines designed to develop mechanics without creating excessive arm fatigue.
Should you ice your arm after a bullpen session?
Current sports therapy guidance recommends against routine icing after pitching. Light aerobic activity within 30 minutes of the session is more effective for recovery and is now the preferred approach unless acute pain is present.
How do you track pitches across bullpen sessions?
Use a notebook or phone app to log every pitch thrown in warm-ups, bullpen phases, and games. All pitches count toward cumulative workload, and tracking them weekly allows coaches to spot overuse patterns before they become injuries.
How often should a youth pitcher do a bullpen session?
Most youth pitchers benefit from one structured bullpen session every four to five days, timed 2 to 3 days before any scheduled game appearance. Frequency should decrease if the pitcher is showing signs of arm fatigue between outings.
Recommended
- How to assess youth pitching performance step by step – Pitch Training Baseball
- Top pitching workouts for youth baseball: build skill safely – Pitch Training Baseball
- How to throw a baseball: proven youth coaching tips – Pitch Training Baseball
- Game-like pitching practice: Raise youth baseball skills fast – Pitch Training Baseball