


A typical strike zone net goes from box to backyard-ready in under 15 minutes when one person follows the manufacturer’s ordered steps and skips no fasteners. The two rules that matter most: set the strike-zone insert to the pitcher’s own knee-to-shoulder height, and stop the session the moment a young arm reports pain. Get those two right and the rest is just poles and sleeves.
TL;DR:
- Proper frame labeling and a stable base design cut assembly time in half and reduce setup errors, ensuring safety and performance.
- Adjust the strike zone to match the pitcher’s body by measuring from ground to knee and chest to set the insert accurately within two minutes.
- Use appropriate anchors such as stakes on dirt, weight bags on turf or indoors, and ratchet straps in windy areas to maintain frame stability during practice.
- Always inspect poles, sleeves, and fasteners for damage before assembly, and loosen tension straps before storage to prolong the net’s lifespan.
- Stop pitching immediately if a player experiences arm pain, and track pitch counts and rest periods to prevent injury and promote long-term arm health.
Table of Contents
- What Do You Need Before Starting Strike Zone Net Assembly?
- How Do You Assemble a Strike Zone Net Step by Step?
- How Do You Set the Strike Zone to the Right Height?
- How Do You Anchor a Strike Zone Net So It Doesn’t Tip?
- What Safety Steps Matter Most for Youth Pitchers?
- How Do You Maintain and Store a Strike Zone Net?
- Two-Minute Checklist Before Every Practice Session
- What I’ve Learned Setting Up Nets for Real Practice Sessions
- Why a Strike Zone Net with Color-Coded Frame Pieces and a Nine-Zone Insert Cuts Setup Time in Half
- Sources
- FAQ
What Do You Need Before Starting Strike Zone Net Assembly?
Most missing-parts frustration happens before anyone touches a pole. Spread everything out on the grass or garage floor first and match it against the manual’s parts list.
A standard strike-zone net kit typically includes:
- Frame bars and vertical support poles (often color-coded or numbered by length)
- The main net panel
- A strike-zone insert or target panel with the nine-zone grid
- Corner sleeves or hook attachments that connect net to frame
- Base legs, ground stakes, and fasteners (clips, pins, or straps)
- A carry bag for transport and storage
Beyond what ships in the box, a rubber mallet makes stake-driving faster on hard ground, work gloves protect hands from fiberglass splinters, and a couple of sandbags add insurance on turf or concrete where stakes won’t hold. Before assembly, run a 60-second damage check: flex each pole gently for cracks, check net sleeves for tears, and confirm no fasteners are missing from the bag. A five-dollar clip missing on day one becomes a torn net panel by week three.
How Do You Assemble a Strike Zone Net Step by Step?
Assembly order matters more than speed. Skip the sequence and you’ll be re-threading a net you already tensioned.
- Lay out and inspect. Unroll the net and lay all frame pieces on flat ground so nothing gets stepped on or lost in grass.
- Build the base first. Connect base legs and lower frame bars before anything stands upright. A wobbly base ruins every step after it.
- Raise the vertical poles. Slide upper poles into the base connections, one side at a time, so the frame stays balanced while you work.
- Thread and attach the net. Feed the net panel through its sleeves or clip it onto frame hooks, working corner to corner rather than one side all at once.
- Install the strike-zone insert. Center the nine-zone panel inside the frame opening and secure it per the product’s clip or Velcro system.
- Tension evenly. Pull slack out of all four corners together, not one corner tight and the rest loose, then lock every fastener.
- Final check and anchor. Give the frame a firm shake test before anyone throws at full effort.
Pro Tip: Assemble on a flat, open surface even if you plan to move the net afterward. Fighting uneven ground while poles are only half-connected is how frames get bent and knuckles get pinched.
Manuals for comparable pitching nets flag one specific hazard worth repeating: when lowering or adjusting fiberglass poles, stand to the side rather than directly in front, since a pole under tension can snap back if it slips from a fitting during setup. That single habit prevents most assembly-related bruises and eye injuries.
How Do You Set the Strike Zone to the Right Height?
A strike zone that doesn’t match the pitcher’s body teaches bad habits. The fix takes two minutes with a tape measure and a player standing in a normal batting stance, not stretched tall or slouched.
- Measure from the ground to the top of the knee, then from the ground to the mid-chest or letters on the jersey. That range is the real strike zone for that player.
- Adjust the strike-zone insert so its lower edge lines up with the knee measurement and its upper boundary sits near the chest line, centering the nine-zone grid horizontally on the frame.
- Run three light-effort throws at the corners of the zone, then re-measure if the ball consistently looks high or low relative to where the pitcher expects a strike.
Younger siblings sharing one net should each get a quick re-measure rather than splitting the difference. A zone set for a 14-year-old teaches a 10-year-old to aim at the wrong window entirely.
How Do You Anchor a Strike Zone Net So It Doesn’t Tip?
An unanchored net that shifts on impact does more than annoy you. It actively undermines the accuracy feedback you set the whole thing up for, since a stable frame with a properly weighted base keeps the target where the pitcher last saw it.
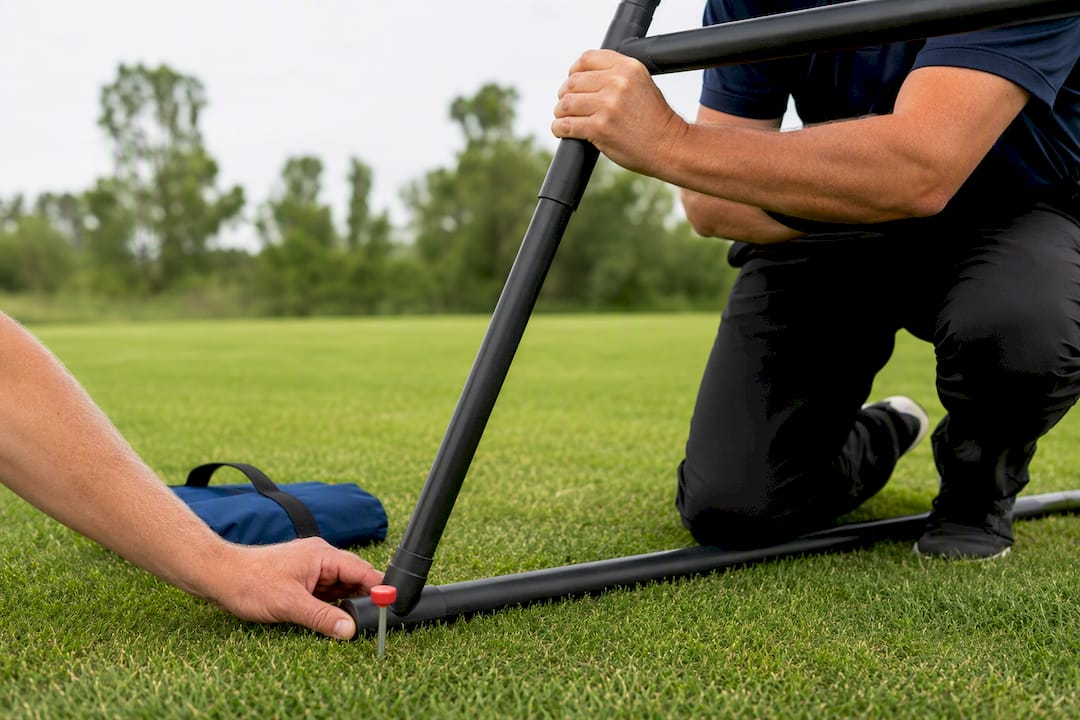
- Soft ground (grass, dirt infield): Drive stakes at a 45-degree angle away from the frame for better pull resistance.
- Turf, concrete, or indoor surfaces: Skip stakes entirely and use sandbags or filled weight bags on each base leg.
- High-wind or high-traffic areas: Add ratchet straps from the frame to a fixed anchor like a fence post for extra insurance.
Keep weight bags flat and tucked close to the base legs so no one trips on them mid-windup, and set a towel or mat underneath indoor weights to protect gym floors from scuffing.
Pro Tip: Before the first real pitch of the day, have someone push the top of the frame firmly from the front. If it rocks more than an inch or the base legs lift, add weight or re-drive stakes before anyone throws at full speed.
What Safety Steps Matter Most for Youth Pitchers?
Assembly hazards and pitching hazards are two different conversations, and both matter here. During setup, keep young helpers away from poles under tension, and always stand to the side rather than in front when raising or lowering frame sections, since fiberglass can spring back unexpectedly.
Once the net is up, the safety rules shift to the arm itself. If a pitcher reports pain, at any point, in the shoulder or elbow, training stops immediately, and a doctor’s evaluation is warranted if the pain persists or returns. This isn’t caution for caution’s sake. Research consistently points to overuse, meaning total pitch counts and the number of months a kid pitches per year, as the leading driver of youth arm injuries, more so than which pitch types they throw.
That’s why coaches who actively track pitch counts and enforce rest see fewer reports of throwing-related arm pain in their players than those who go by feel alone.
A few habits worth building into every session:
- Warm up with easy-distance throws before any full-effort pitching into the zone.
- Cap session length and total throw count rather than chasing “one more good one.”
- Prioritize location and mechanics over max velocity, since technique-first practice is what actually protects young arms long term.
Pairing that mindset with a structured pitching frequency guide turns strike-zone practice into skill development instead of an injury waiting to happen.
How Do You Maintain and Store a Strike Zone Net?
A net that gets put away wet or over-tensioned won’t survive a second season. Before storage, walk the frame and check poles for stress cracks, sleeves for fraying, and mesh for any small tears that haven’t grown into holes yet.
- Let the net dry completely before folding it, especially after dew-heavy morning practices.
- Loosen tension straps before storage so mesh and frame joints aren’t under constant stress all winter.
- Bag the net away from direct sun and away from spaces where rodents or insects can chew through mesh.
- Fix sagging corners by re-tensioning straps rather than adding extra clips, and patch small mesh tears with a repair kit before they spread. For anything structural, contact the manufacturer about replacement poles or panels rather than improvising a fix that compromises stability.
Two-Minute Checklist Before Every Practice Session
Running this before kids start throwing catches problems before they become injuries or wasted trips outside.
- Walk the frame and confirm every clip and fastener is still seated, not just loosely resting.
- Give the strike-zone insert a light tension check, then throw one easy pitch to confirm it’s still centered where you left it.
- Check every stake or weight bag. If a stake has worked loose overnight or a strap has slackened, fix it before the first real pitch.
Skipping this step is how a stable net from last week becomes a wobbly one mid-bullpen this week.
What I’ve Learned Setting Up Nets for Real Practice Sessions
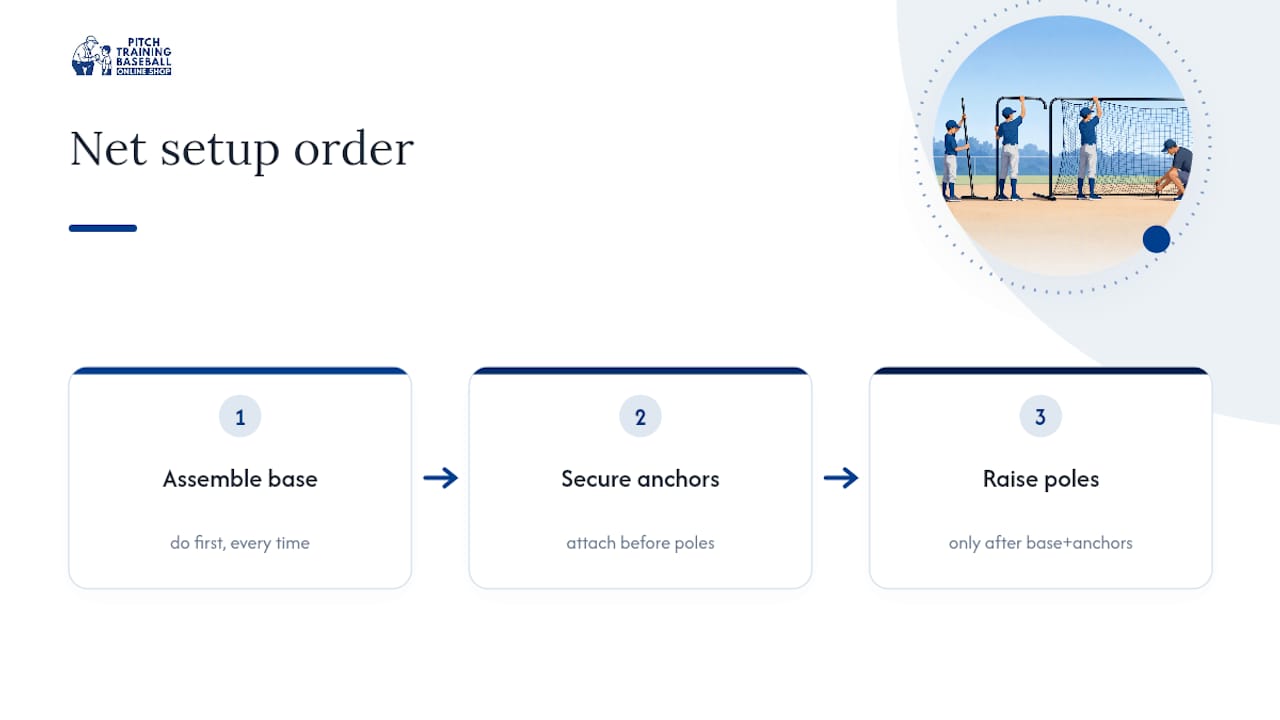
The fastest teams I’ve watched work aren’t the ones with fancier gear. They’re the ones who assemble the base and anchor points first, every single time, before a single pole goes vertical. That order alone cuts setup frustration more than any tool upgrade.
On practice structure, the best sessions I’ve seen mix short location-focused rounds, ten to twelve pitches at a specific zone, with a real rest window before the next round starts. That beats fifty unstructured pitches every time, both for accuracy gains and for arm health. Pair that rhythm with a realistic recovery plan between outings and you get players who improve without the mid-season arm complaints that derail a whole month.
If there’s one blind spot I see repeatedly, it’s parents assuming a sturdy-looking net means a safe practice. The net’s job is target feedback. Arm safety is a separate discipline entirely, and treating them as the same thing is how overuse injuries sneak up on otherwise careful families.
**
Why a Strike Zone Net with Color-Coded Frame Pieces and a Nine-Zone Insert Cuts Setup Time in Half
Most assembly headaches come from unlabeled poles and generic frames that weren’t built with a nine-zone insert in mind. The Pitching Target Net with Colorful Strike 9-Zone solves that at the design stage: labeled frame pieces, a strike-zone insert that seats into place instead of requiring guesswork, and a stable base built to resist the tipping that ruins location feedback mid-session.

That design thinking is exactly what shortens the gap between opening the bag and throwing the first real pitch. Fewer decisions during assembly mean fewer chances to skip a safety step, which matters most when a young pitcher and an impatient parent are both waiting to get started. If you’re ready to replace a generic net with one built around the zone-based practice this article covers, check out the full product details and specs and see if it fits your practice setup this season.
Sources
- HSS — Youth baseball safety
- PMC — caregiver knowledge and safe pitching guidelines
- Diamond Sports Equipment — pitching targets & nets overview (2026)
FAQ
How Long Does Strike Zone Net Assembly Take?
Most single-person assemblies take under 15 minutes when the base and lower frame go together before the vertical poles, following the manufacturer’s ordered steps.
Can One Person Assemble a Strike Zone Net Alone?
Yes, one person can typically handle full assembly, though a second set of hands helps when tensioning the net evenly across all four corners.
How High Should the Strike Zone Be Set?
Set the lower edge at the pitcher’s knee height and the upper edge near mid-chest, measured while the player stands in a natural stance.
What Anchors Work Best for a Strike Zone Net?
Use angled stakes on grass or dirt, sandbags or weight bags on turf and indoor surfaces, and ratchet straps to a fixed anchor in windy or high-traffic spots.
When Should You Stop a Pitching Session?
Stop immediately if the pitcher reports arm pain, and seek a medical evaluation if the pain persists or returns during future sessions.