


A safe, effective off season pitching program is a phased 12-week plan built on three non-negotiables: at least 3–4 months of annual rest from competitive pitching (per Pitch Smart guidance), ground-up strength work targeting the legs, core, and scapular muscles, and a soreness-rule-guided throwing progression. Start there, and the rest of the plan falls into place.
The immediate actions:
- Schedule 3–4 months off from competitive pitching, with at least 2–3 of those months continuous
- Run 6–8 weeks of base strength work before any throwing resumes
- Track every session with throw count, session type, and a simple soreness rating
Key Takeaways
A safe off season pitching program requires annual rest, phased throwing progression, and ground-up strength work before the arm takes on any meaningful load.
| Point | Details |
|---|---|
| Annual rest is non-negotiable | Schedule 3–4 months off from competitive pitching, with at least 2–3 months continuous, every year. |
| Strength before throwing | Complete 6–8 weeks of lower-body, core, and scapular work before starting any throwing phase. |
| Use the soreness rule | Advance to the next throwing step only after two consecutive pain-free sessions; back off immediately if soreness appears. |
| Stop for pain, not after | Sharp elbow or shoulder pain is a stop condition requiring rest and clinician evaluation before resuming. |
| Pitchtrainingbaseball | A target net and light training balls from Pitchtrainingbaseball support bullpen and drill phases without overloading the arm. |
Table of Contents
- Why does a structured off season pitching program reduce injury risk?
- The six components every offseason pitching plan must include
- What does a 12-week off season pitching program actually look like?
- How do you adapt the plan by age and pitch-count limits?
- What pain signals should stop a youth pitcher immediately?
- How do you track progress without expensive technology?
- What should coaches and parents do this week to get started?
- Which drills and equipment actually support the program?
- The pressure to showcase is real, but the arm is not replaceable
- Pitchtrainingbaseball makes the plan easier to run
- Sources
Why does a structured off season pitching program reduce injury risk?
Total pitch volume is the single biggest injury risk factor for youth arms. Lurie Children’s is direct about it: more pitches per game, week, and season means higher injury risk, and the fix is adequate rest between appearances plus at least 24 hours off after any pitching outing.
The off season is when tissue remodeling and growth-plate recovery actually happen. Skipping it, or filling it with a second travel team, removes the window the body needs. Cedars-Sinai specifically flags multiple concurrent teams as a risk factor, alongside insufficient breaks.
Pro Tip: Don’t split the rest into two separate 6-week blocks. Continuous months off allow soft tissue and growth plates to recover in a way that fragmented breaks simply don’t.
The six components every offseason pitching plan must include
A complete winter pitching program covers more than just throwing. Every well-designed plan includes these six elements:
- Planned annual rest: 3–4 months off from competitive pitching, non-negotiable
- Phased throwing progression: an interval throwing program with soreness-rule checkpoints at each step
- Ground-up strength training: lower body (squats, lunges, single-leg work), core (planks, rotational work), and scapular/periscapular exercises (banded T/Y rows, retractions)
- Dynamic warm-up and cooldown: 10-minute dynamic warm-up before every session, shoulder stretches, and 15–20 minutes of ice after intense throwing
- Workload tracking and recovery: throw count, session RPE, sleep quality, and nutrition to support tissue repair
- Mental and mechanical skill work: low-intensity mechanics drills, towel drill, mirror work, and pitch-design concepts
CHOP’s off-season guidance emphasizes that hips, hamstrings, hip flexors, calves, rotator cuff, and core all need attention before the arm takes on load. Cross-training activities like sprinting and plyometrics build general athleticism without stacking arm stress.
Pro Tip: Build 4–6 weeks of lower-body and scapular strength before any throwing phase begins. Pitchers who skip this step tend to compensate with the arm, which is exactly the pattern that leads to overuse injuries.
What does a 12-week off season pitching program actually look like?
This plan fits ages 13–18 with a full off season available. Younger athletes (9–12) should reduce throwing volume and delay mound work by at least two weeks. Anyone returning from arm surgery should begin at Phase 1 under athletic trainer supervision.
Phase breakdown
Phase 0 — Active rest and base strength (Weeks 1–3) No throwing. Focus on full-body movement, mobility, and foundational strength. Single-leg balance, plank holds, bodyweight squats, and light resistance-band work.

Phase 1 — Ground-up strength and light throwing for several weeks Introduce the interval throwing program at short distances (45–60 feet). Advance only after multiple pain-free sessions over 2–3 throwing days. Back off to the prior step if soreness appears.
Phase 2 — Interval throwing progression and power work for several weeks Extend throwing distances gradually (90–120 feet). Add medicine-ball rotational throws and crow-hop long toss. Strength shifts toward power: trap bar deadlifts, lateral bounds, single-leg RDLs.
Phase 3 — Mound readiness and pitch-specific work (Weeks 11–12) Bullpen sessions at reduced pitch counts. Mechanics focus, towel drill refinement, and pitch-design work at low intensity. No max-effort throwing.
Sample weekly micro-schedule (Phase 1–2)
| Day | Session Type | Target Intensity |
|---|---|---|
| Monday | Strength (lower body + core) | Moderate |
| Tuesday | Dynamic warm-up + interval throwing (45–90 ft) | Low–Moderate |
| Wednesday | Rest or light cross-training (sprints, mobility) | Low |
| Thursday | Strength (scapular + rotational power) | Moderate |
| Friday | Interval throwing + mechanics drill | Low–Moderate |
| Saturday | Rest or active recovery | Very Low |
| Sunday | Rest | Off |
Soreness-rule progression checklist
- Complete a 10-minute dynamic warm-up before every throwing session
- Throw at the current distance/intensity with no pain during or after
- Repeat the same step on the next throwing day (2–3 days later)
- Advance to the next step only after two consecutive pain-free sessions
- If soreness appears during warm-up throws, stop and repeat the prior step
- If soreness persists beyond warm-up, rest and consult an athletic trainer
Pro Tip: One pain-free session is not enough to advance. The most common practitioner error is moving athletes forward after a single good day. Require two clean sessions before stepping up.
How do you adapt the plan by age and pitch-count limits?
Age changes everything about how much throwing volume a pitcher can safely handle. Pitch Smart sets daily pitch limits and required rest days that should directly shape how you structure bullpen sessions and throwing frequency.
- Ages 9–12: Maximum 75 pitches per day in-season; during the off season, keep bullpen sessions under 30 pitches and delay mound work until Week 11 at the earliest. Long-toss distances should stay at 45–75 feet through Phase 2.
- Ages 13–15: Maximum 95 pitches per day in-season; off-season bullpens can reach 30–40 pitches by Week 11. Long-toss can extend to 90–120 feet in Phase 2.
- Ages 16+: Maximum 105 pitches per day in-season; off-season bullpens can build to 40–50 pitches in Phase 3. Full long-toss distances are appropriate by Week 9–10.
Younger pitchers also need more recovery days between throwing sessions. A 10-year-old throwing twice a week is already at a reasonable ceiling. Pushing to three throwing days per week should wait until at least age 13.
What pain signals should stop a youth pitcher immediately?
Joint pain is a stop condition, not a “push through it” situation. Lurie Children’s is clear: fatigue and joint pain require immediate rest and, when persistent, medical evaluation.
Red flags that require stopping throwing that day:
- Sharp or sudden elbow or shoulder pain during or after throwing
- Soreness that does not resolve after the warm-up throws
- Swelling, locking, or catching sensation in the elbow or shoulder
- Numbness or tingling in the hand or fingers
- Unexplained velocity drop over multiple sessions
- Consistent mechanical breakdown despite normal fatigue levels
Immediate actions when a red flag appears:
- Stop throwing immediately
- Apply ice for 15–20 minutes
- Document the symptom, the session type, and the throw count from that day
- Contact an athletic trainer or sports medicine clinician before resuming
Pro Tip: When reporting to a clinician, bring a one-week log: dates, session types, throw counts, and when the symptom first appeared. That context cuts diagnosis time significantly.
How do you track progress without expensive technology?
Three metrics cover most of what you need: session type and intensity, throw count, and perceived soreness or fatigue on a 1–10 scale. Log them after every session in a simple notebook or spreadsheet.
Practical tracking tools:
- Session log: date, phase, distance thrown, pitch count, and RPE (rate of perceived exertion, 1–10)
- Soreness check: rate arm soreness before and 24 hours after each throwing session
- Baseline tests: single-leg balance for a moderate period, plank hold to fatigue, and a medicine-ball rotational throw for distance or control — repeat every four weeks to measure progress
- Range-of-motion check: shoulder internal/external rotation, noted weekly during Phase 2–3
Wearable IMU devices can add useful day-to-day workload trends, but clinicians recommend using that data to supplement the soreness rule and pitch counts, not replace them.
Pro Tip: Track pitch counts during off-season bullpens the same way you would in-season. The off season is when habits form, and sloppy tracking now means sloppy tracking when it matters most.
What should coaches and parents do this week to get started?
Getting the program moving takes one focused week. Here is the checklist:
- Confirm rest dates: verify the athlete has had (or will complete) at least 6–8 continuous weeks off before any throwing begins
- Run a baseline movement screen: single-leg balance, plank hold, and a bodyweight squat assessment
- Begin Phase 0 strength sessions: two to three sessions this week, lower body and core only
- Map the throwing calendar: mark throwing days, rest days, and target phase transitions on a calendar through Week 12
- Set up a tracking sheet: create a simple log with columns for date, session type, throw count, distance, and soreness rating
- Check for recent arm pain: if the athlete has had elbow or shoulder pain in the past 8 weeks, or has had arm surgery, consult a clinician before starting Phase 1
For daily habit structure that supports this plan, recommended daily pitching habits from Pitchtrainingbaseball offer a practical starting framework.
Which drills and equipment actually support the program?
You need very little gear to run this plan well. A few affordable items cover the core drills:
- Strike zone target net: for bullpen sessions in Phase 3, gives immediate feedback on command without a catcher
- Light training balls: for early long-toss phases when full-weight balls add unnecessary stress
- Resistance bands: banded T/Y rows, external rotation, and scapular retraction drills
- Medicine ball (4–6 lb): rotational throws, overhead slams, and chest passes for power development
High-value drills by phase:
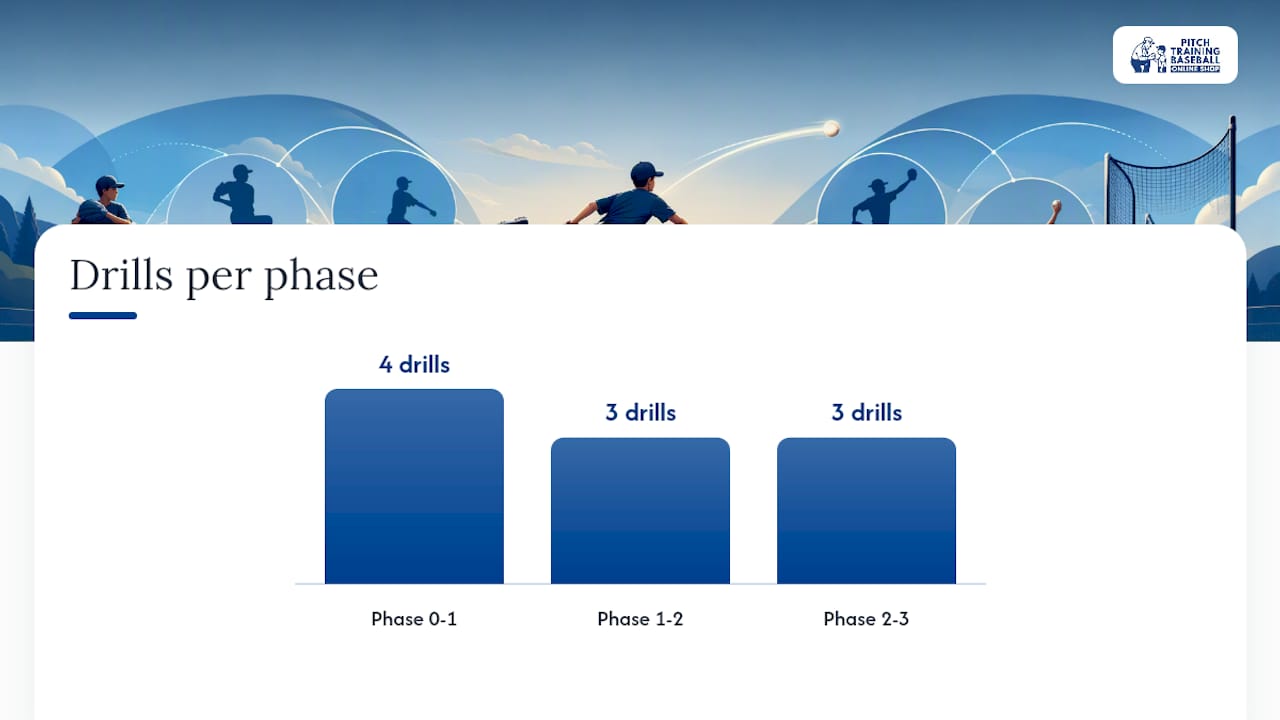
- Phase 0–1: towel drill, mirror delivery work, scapular retractions, single-leg stability holds
- Phase 1–2: crow-hop long toss, banded external rotation, medicine-ball rotational throws
- Phase 2–3: full long-toss progression, bullpen with target net, pitch-grip refinement at low intensity
For arm strength training exercises that pair directly with these drills, Pitchtrainingbaseball’s resource library covers the progressions in detail. A solid beginner strength routine adapted for youth athletes also supports Phase 0–1 work effectively.
Pro Tip: Introduce the target net in Week 10, not Week 8. Pitchers who start command work too early tend to rush mechanics to hit the zone, which reinforces bad habits under fatigue.
The pressure to showcase is real, but the arm is not replaceable
Here is the honest tension: showcase events, fall leagues, and travel ball have compressed the calendar to the point where a true 3–4 month break feels like falling behind. Coaches and parents feel it. Athletes feel it.
But the data does not care about the showcase schedule. Parents who follow Pitch Smart guidelines see lower injury rates, and the gap between compliant and noncompliant coaches is not subtle. The SportsMed review on youth arm protection makes the education gap explicit: many coaches remain noncompliant with published recommendations, and injury rates reflect it.
The practical policy decisions that actually protect athletes: limit fall showcase appearances to two or three events maximum, stagger high-intensity training so it does not overlap with showcase weeks, and make mechanics work the priority over velocity during the off season. A pitcher who arrives at spring tryouts with clean mechanics and a healthy arm is more valuable than one who threw 200 bullpen pitches in October and is nursing elbow soreness in February.
Build a culture where reporting pain is the expected behavior, not a sign of weakness. That one shift, more than any drill or device, changes outcomes.
Pitchtrainingbaseball makes the plan easier to run
The 12-week program above works with minimal gear, and Pitchtrainingbaseball carries the specific tools that make the bullpen and drill phases more productive. The Pitching Target Net with 9-Zone Strike Zone is the most practical addition for Phase 3 command work: portable, adjustable, and gives instant visual feedback without needing a catcher at every session.

For early-phase throwing, lighter training balls reduce arm stress while maintaining mechanics. The 5 Pickeballs work well for pick-off and delivery drills in Phase 2–3. None of these products replace clinician guidance or the soreness rule, but they make consistent, structured practice easier to run at home or on a field. Browse the full training equipment lineup at Pitchtrainingbaseball and match gear to the phase you are currently running.
Sources
- Mlb
- ADOLESCENT BASEBALL PITCHER INTERVAL THROWING PROGRAM (PDF) | Connecticut Children’s
- Optimizing your offseason: guide for adolescent and teen baseball players | CHOP
- Injury Prevention for Pitchers | Lurie Children’s
- Protecting youth baseball arms: the role of education, communication and new technology | SportsMed
This article is general information, not a substitute for advice from a qualified doctor. Consult a qualified healthcare professional about your own circumstances before acting on anything here.
Recommended
- Managing Practice Time for Pitchers: 2026 Youth Guide – Pitch Training Baseball
- Top pitching workouts for youth baseball: build skill safely – Pitch Training Baseball
- Recommended Daily Pitching Habits for Youth Players – Pitch Training Baseball
- How to Plan Pitcher Rotations for Youth Baseball – Pitch Training Baseball