


Efficient proximal-to-distal kinetic chain mechanics are the single most important factor in pitching: they allow a pitcher to generate high ball velocity while keeping shoulder and elbow loads within safer ranges. When the hips and trunk underperform, the shoulder and elbow compensate with higher rotational velocities and torques, accelerating structural fatigue in the medial elbow stabilizers and rotator cuff. The entire motion from front-foot contact to ball release spans a very brief time window, a window so short that errors in sequencing are nearly impossible to self-correct in real time.
Three immediate priorities for coaches and clinicians:
- Assess pelvis-to-torso separation timing: the pelvis should reach peak rotation before the trunk, not simultaneously.
- Measure trunk tilt at ball release: contralateral trunk tilt is consistently associated with higher velocity, but excessive tilt without core contribution raises elbow valgus moments.
- Where lab access allows, track peak shoulder external rotation and elbow valgus torque; literature reports peak elbow valgus torque near 18 Nm during late cocking.
Key Takeaways
Efficient kinetic chain sequencing, where the pelvis leads the trunk and the trunk leads the arm, is the most evidence-supported lever for increasing ball velocity while reducing shoulder and elbow loads.
| Point | Details |
|---|---|
| Kinetic chain efficiency | Pelvis-to-torso separation timing is the highest-priority variable to assess and coach first. |
| Velocity-to-torque ratio | Train for biomechanical efficiency (velocity per unit elbow torque), not raw speed, especially in youth pitchers. |
| Peak loading phase | Elbow valgus torque peaks at late cocking; early trunk rotation and fatigue both amplify it. |
| Workload management | Pitch count limits and mandatory rest days are modifiable risk factors with strong evidence; follow U.S. Pitch Smart guidelines by age. |
| Pitchtrainingbaseball tools | Strike-zone target nets, soft training balls, and Pickeballs support safe, progressive mechanics practice at every skill level. |
Table of Contents
- What does “biomechanics of pitching” actually mean?
- The six phases of the pitching motion
- How the kinetic chain transfers energy to the arm
- Which variables predict velocity, and which raise injury risk?
- How are pitching biomechanics measured?
- Mechanisms of common throwing injuries and how to prevent them
- Drills, strength training, and progressions that build efficient mechanics
- Where the evidence is limited and what coaches get wrong
- When and how to get a formal biomechanical evaluation
- What actually deserves your attention first
- Build better mechanics with the right practice tools
- Sources
What does “biomechanics of pitching” actually mean?
Pitching biomechanics is the study of how the body moves and what forces it produces during the throwing motion. Two categories of measurement define the field.
Kinematics describes motion geometry: joint angles, angular velocities, segment positions, and timing relationships. A kinematic report tells you how the body moved. Kinetics describes the forces and torques that cause or result from that motion: the valgus torque at the elbow, the distraction force at the shoulder, the ground reaction force at foot strike. A kinetic report tells you how hard the joints were loaded.
The kinetic chain is the physical mechanism connecting those two categories. Energy originates in the legs and ground reaction forces, flows through the pelvis into the trunk, and transfers sequentially into the arm and hand. Each proximal segment accelerates and then decelerates, handing momentum distally. When that sequence is timed correctly, the arm arrives at ball release with high angular velocity and relatively low joint torque. When a proximal link is weak or poorly timed, the distal links must generate compensatory velocity, and torque rises sharply at the shoulder and elbow. That compensatory stress is the core injury mechanism in overhand throwing, and it is well documented in the kinetic chain literature.
Biomechanical efficiency, a concept increasingly used in clinical practice, expresses this as a ratio: ball velocity produced relative to elbow varus torque. Training that raises that ratio, rather than raw velocity alone, is the goal for any pitcher whose arm health matters, which is every youth pitcher.
The six phases of the pitching motion
Understanding step-by-step pitching mechanics starts with knowing what each phase demands from the body and where it can go wrong. The six-phase model below draws on EMG and high-speed video benchmarks that have become the standard framework in clinical biomechanics.
| Phase | Main kinematic events | Primary muscles | Typical risk |
|---|---|---|---|
| Windup | Weight shift, hip hinge, lead-leg lift; establishes balance and initial momentum | Hip extensors, core stabilizers | Poor balance leading to early weight shift; minimal direct injury risk |
| Stride | Lead foot advances toward home plate; pelvis begins rotating; stride length set | Gluteus maximus, hip flexors, quadriceps | Short stride reduces hip drive; excessive lateral lean loads shoulder early |
| Early cocking | Front foot contacts ground; shoulder abducts and externally rotates; elbow flexes ~90° | Deltoid, supraspinatus, biceps brachii | Premature trunk rotation (“opening early”) elevates elbow valgus torque |
| Late cocking | Maximum shoulder external rotation; peak elbow valgus torque; pelvis-to-torso separation at maximum | Infraspinatus, teres minor, subscapularis (eccentric) | Peak MUCL stress; anterior shoulder instability risk |
| Acceleration | Rapid internal rotation and elbow extension; ball release; humeral internal rotation can reach several thousand degrees per second | Subscapularis, pectoralis major, latissimus dorsi, triceps | High distraction force at shoulder; UCL stress continues |
| Deceleration / follow-through | Arm decelerates after release; trunk flexes forward; stride leg accepts body weight | Posterior rotator cuff (eccentric), periscapular muscles, hamstrings | Posterior shoulder overload; labral fraying from repetitive eccentric demand |
The timing window from front-foot contact through ball release is approximately 145 ms. Maximum humeral internal rotation velocity during acceleration can reach several thousand degrees per second, which is why high-speed video or motion capture is necessary to observe it at all. Standard 30-fps phone video captures only a handful of frames across the entire critical phase.
Peak elbow valgus torque occurs during late cocking, near maximum shoulder external rotation. That is the moment when the medial ulnar collateral ligament (UCL) is under greatest tensile load, and it is the phase most directly linked to MUCL injury in systematic reviews of elbow stress factors.
What to watch during video analysis: In early cocking, check whether the trunk has already begun rotating before front-foot contact. In late cocking, look at elbow height relative to the shoulder and the degree of shoulder external rotation. In deceleration, watch whether the follow-through is full and controlled or abruptly cut short, which often signals posterior shoulder tightness.
How the kinetic chain transfers energy to the arm
The kinetic chain is not a metaphor. It is a measurable sequence of angular accelerations and decelerations that can be timed, quantified, and coached.
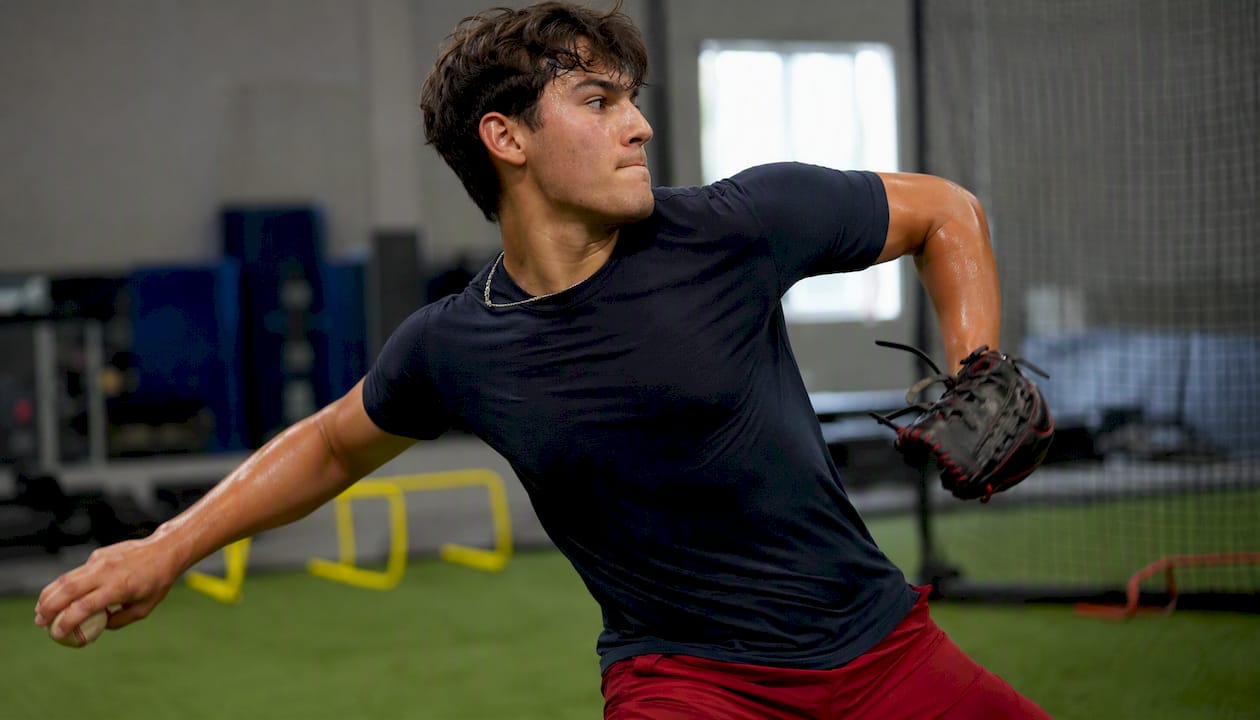
The legs initiate the sequence. At front-foot contact, ground reaction forces push upward through the stance leg while the stride leg plants and braces. The pelvis begins rotating toward the target. Critically, the pelvis reaches peak angular velocity before the trunk does. That delay, called pelvis-to-torso separation or the “hip-shoulder separation angle,” creates a stretch-shortening cycle in the trunk musculature that amplifies rotational power. The trunk then accelerates through its own peak rotation, decelerates, and passes momentum into the arm. The arm follows last.
When a pitcher’s hip contribution drops, the trunk must rotate faster to compensate. When the trunk contribution also drops, the shoulder must compensate further still. Small percentage losses in proximal energy require disproportionately large increases in distal rotational velocity to maintain ball speed. The shoulder and elbow absorb that difference as elevated torque. This compensatory mechanism is the reason kinetic chain efficiency is described as “saving the arm.”
Coaching cues that promote efficient transfer:
Stride length and direction. A stride of roughly 80–90% of body height toward the target creates the mechanical base for hip drive. Cue: “step long and straight, land on a firm front leg.” A short or cross-body stride collapses the base before the hips can fully rotate.
Hip drive before shoulder rotation. The most common mechanical fault in youth pitchers is “opening up early,” where the trunk and shoulders rotate simultaneously with the hips instead of after them. Cue: “show your back pocket to the catcher as long as possible.” That simple image delays trunk rotation and preserves the separation angle.
Lead-knee extension at release. Research consistently links lead-knee extension velocity to ball speed. A collapsing front knee bleeds the energy the legs generated. Cue: “post up on a stiff front leg at release.” The knee does not need to be fully locked, but it should be actively extending through ball release, not buckling.
Delayed arm action. The arm should feel like it is “following” the trunk, not driving it. Pitchers who lead with the arm rather than the trunk are typically compensating for inadequate hip and core power, and they pay for it in elbow stress.
Which variables predict velocity, and which raise injury risk?
Knowing what to measure is half the battle. A systematic review of kinematic predictors across youth to professional levels identifies the following associations.
Variables positively associated with higher ball velocity:
- Pelvis-to-torso separation angle (strong evidence): greater angular separation between pelvis and trunk at front-foot contact predicts higher velocity across skill levels.
- Trunk power and timing of peak trunk rotation (strong evidence): trunk power explained a substantial portion of velocity variance in both high-school and professional pitchers; earlier peak trunk rotation relative to ball release is associated with higher velocity.
- Contralateral trunk tilt at release (moderate evidence): lateral tilt toward the glove side at ball release is consistently associated with higher velocity.
- Lead-knee extension velocity (moderate evidence): faster extension of the front knee through release correlates with greater ball speed.
- Maximum shoulder external rotation (moderate evidence): greater shoulder ER at late cocking is associated with higher velocity, though this variable carries a tradeoff (see below).
- Stride length (moderate evidence): longer strides, within biomechanically appropriate ranges, support greater hip drive and velocity.
Variables associated with higher joint loading and injury risk:
- Early trunk rotation (strong evidence): trunk rotation that begins before or at front-foot contact reduces pelvis-to-torso separation and forces compensatory shoulder/elbow loading.
- Excessive contralateral trunk tilt without adequate core contribution (moderate evidence): tilt that is not supported by trunk musculature shifts load to the elbow.
- Greater shoulder external rotation without proximal kinetic chain contribution (moderate evidence): high ER in isolation, without adequate hip and trunk drive, is associated with elevated anterior shoulder stress and MUCL load.
- Arm slot alterations (limited evidence): extreme arm slots, particularly very low three-quarter or sidearm deliveries, alter the distribution of shoulder and elbow forces, though individual variation makes universal risk claims difficult.
- Elevated pitch counts and fatigue (strong evidence): fatigue degrades kinematic sequencing, increasing compensatory loads even when mechanics are otherwise sound.
The key tradeoff: Increased contralateral trunk tilt and greater shoulder external rotation can both improve velocity, but in youth pitchers without sufficient core and hip strength, they also raise elbow valgus moments. A coach chasing velocity by cueing more tilt or more “lay-back” in a young pitcher who lacks the proximal foundation is trading short-term speed for long-term arm stress.
Three variables to monitor first, in order of priority:
- Pelvis-to-torso separation timing (most actionable, most evidence)
- Trunk tilt at ball release (visible on video, directly linked to both velocity and load)
- Lead-knee behavior through release (easy to observe, directly coachable)
How are pitching biomechanics measured?
The choice of measurement method determines which metrics you can trust and which you are guessing at.
| Method | Typical outputs | Pros | Cons |
|---|---|---|---|
| 3D optical motion capture | Joint angles, angular velocities, segment positions; torques when combined with force plates | Gold standard accuracy; full-body kinematics and kinetics | Expensive; lab-only; marker placement requires trained staff |
| High-speed video (2D) | Qualitative angles, timing events, gross sequencing | Low cost; portable; accessible with modern phones at 240+ fps | No torque estimates; single-plane view misses 3D motion; operator-dependent |
| Inertial wearables (IMUs) | Arm speed, elbow stress proxies, trunk rotation timing | Portable; real-time feedback; increasingly validated | Drift error over time; torque estimates are indirect; calibration-sensitive |
| Surface EMG | Muscle activation timing and relative amplitude | Direct neuromuscular data; identifies which muscles fire and when | Skin prep required; cross-talk between muscles; not practical for full-body in field |
EMG and high-speed motion capture remain the gold standards for lab-based insight into muscle timing and peak velocities, but wearables and high-speed video are closing the field gap for routine monitoring.
Metrics to expect in a clinical biomechanics report:
- Peak shoulder external rotation (degrees)
- Elbow valgus torque at late cocking (Nm)
- Pelvis-to-torso separation angle (degrees) and timing (ms relative to foot contact)
- Trunk tilt at ball release (degrees)
- Ball velocity (mph) and, ideally, velocity-to-torque efficiency ratio
- Timing from front-foot contact to ball release (ms)
Clinic vs. field reality: A full 3D motion capture session with force plates is the only method that directly measures joint torques. For field use, a phone shooting at 240 fps in slow-motion mode can detect gross timing faults, such as early trunk rotation or a collapsing front knee, that are sufficient for coaching corrections. What phone video cannot do is estimate elbow valgus torque or shoulder distraction force. Do not let a vendor selling a wearable sensor tell you otherwise without peer-reviewed validation data for their specific device.
Data quality warnings: Ask any vendor or clinic for their sampling rate (motion capture should be at least 200 Hz for pitching; EMG at least 1,000 Hz), their inter-session reliability coefficients, and how they calibrate between sessions. A report with no reliability data is a report you cannot compare to a follow-up assessment.
Mechanisms of common throwing injuries and how to prevent them
Most serious throwing injuries are not random. They follow predictable kinematic patterns and accumulate over time.
The MUCL (UCL) injury mechanism: Peak elbow valgus torque occurs at late cocking, near maximum shoulder external rotation. The medial UCL resists that valgus stress. When the kinetic chain is inefficient, or when a pitcher is fatigued, that torque rises. Repeated exposure above the tissue’s adaptive capacity leads to microtearing and, eventually, partial or complete UCL rupture. Systematic review evidence links elevated elbow valgus torque to MUCL injury risk, with modifiable contributors including pitch count, fatigue, and early trunk rotation.
Rotator cuff and labral injuries follow a similar logic: high shoulder distraction forces during deceleration, combined with inadequate posterior rotator cuff eccentric strength, produce repetitive microtrauma to the posterior labrum and rotator cuff tendons.
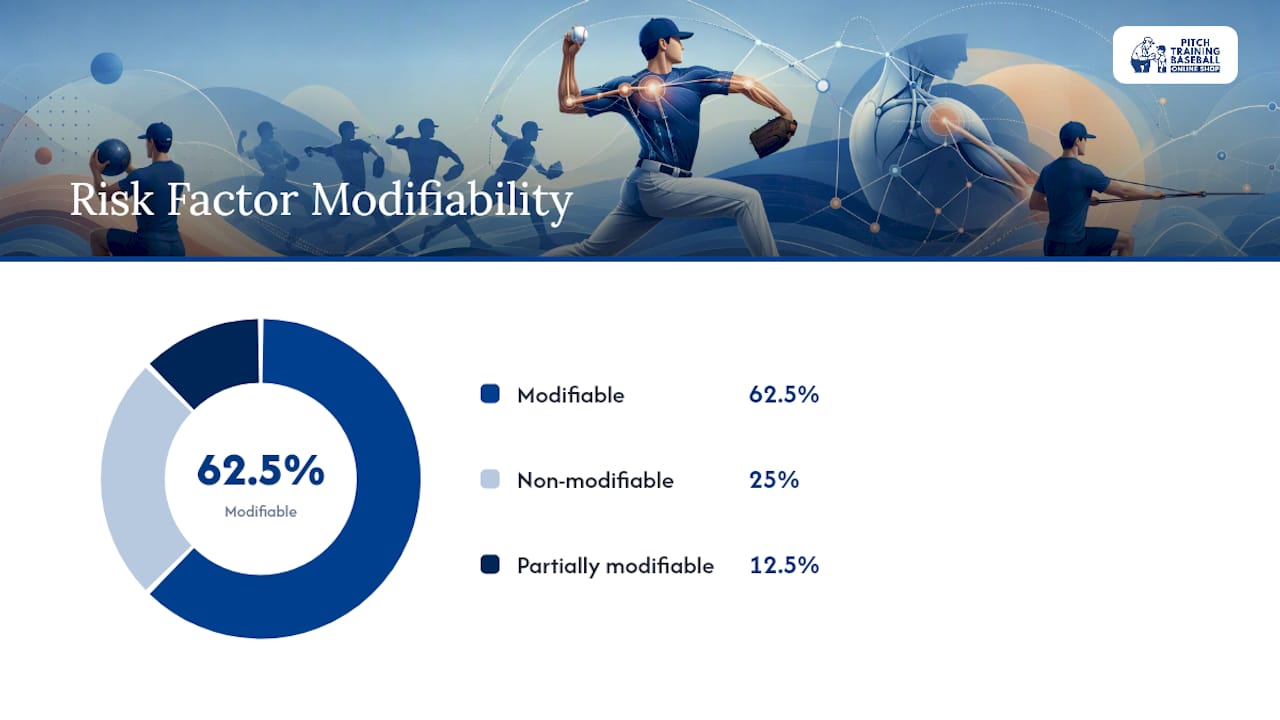
| Risk factor | Modifiable? | Evidence level |
|---|---|---|
| Pitch count / workload | Yes | Strong |
| Fatigue within a session | Yes | Strong |
| Early trunk rotation | Yes | Moderate |
| Inadequate hip/trunk strength | Yes | Moderate |
| Pitching year-round without rest | Yes | Moderate |
| Skeletal maturity (open growth plates) | No | Strong |
| Limb length and shoulder anatomy | No | Limited |
| Prior elbow or shoulder injury | Partially | Moderate |
A note on pitch type: evidence on whether curveballs or sliders inherently produce higher elbow torques than fastballs is mixed. Workload and velocity are more consistently predictive of injury risk than pitch type alone. However, the biomechanical and clinical review literature recommends delaying high-intensity breaking balls in skeletally immature pitchers, not because the torque is necessarily higher, but because the margin for error is smaller when growth plates are open.
Prevention checklist:
- Follow age-appropriate pitch count limits (USA Baseball and MLB Pitch Smart guidelines provide U.S.-standard recommendations by age group).
- Build in mandatory rest days between outings; the guidelines specify minimum rest by pitch count, not just by days.
- Prioritize trunk and hip strength before arm conditioning in youth development programs.
- Use progressive throwing programs that increase intensity and volume gradually, not in jumps.
- Address proper pitching technique before adding velocity targets.
- Stop pitching and seek evaluation for any persistent medial elbow pain, not just pain that limits performance.
- Avoid year-round pitching; at least three to four months of rest from overhead throwing per year is a consistent recommendation across U.S. sports medicine organizations.
Pro Tip: Eccentric loading of the posterior shoulder and hip musculature, not just concentric strength work, builds the tissue resilience that absorbs deceleration forces. Eccentric loading strategies are particularly relevant for the posterior rotator cuff and hamstrings, which absorb enormous forces in the deceleration phase.
Drills, strength training, and progressions that build efficient mechanics
The goal of any training program is to groove the kinetic chain sequence until it becomes automatic under fatigue. That requires both motor pattern work and the physical capacity to execute it.
Lower-body drive and hip-separation drills
- Rocker drill: From a balanced stance, rock back onto the pivot foot, lift the lead leg, and drive forward into a firm landing position. Hold the landing for two seconds. This isolates the stride and front-leg bracing without the distraction of throwing.
- Hip-to-shoulder separation drill (towel drill): Hold a towel in the throwing hand. Execute the full delivery, focusing on keeping the hips rotating while the upper body stays closed. The towel snaps at the end of the motion, giving auditory feedback on timing.
- Stride-and-hold: Full delivery to the point of front-foot contact, then pause and check: is the front knee over the foot? Is the pelvis ahead of the trunk? Is the throwing arm still in the power position? This is the single most useful drill for identifying early trunk rotation.
Long-toss progressions
Long toss is most valuable when the emphasis is on timing and arc, not maximum distance. A pitcher who throws 120 feet with a flat, arm-dominant trajectory is reinforcing poor mechanics at higher intensity. Cue arc and full follow-through at every distance. Increase distance only when the sequencing at the current distance is consistent.
Strength and conditioning targets
The muscles that matter most for kinetic chain efficiency and arm protection are not the ones most coaches focus on. Prioritize:
- Gluteus maximus and hip external rotators: 3 sets of 8–12 reps, hip thrusts and lateral band walks, three times per week during the off-season.
- Core rotators (obliques, transverse abdominis): Pallof press, rotational medicine ball throws, and anti-rotation holds. Ballistic training methods that develop explosive hip and trunk drive directly transfer to pitching power.
- Serratus anterior and lower trapezius: Serratus wall slides and Y-T-W exercises, 2–3 sets of 12–15 reps. These muscles control scapular position during the throwing motion and are consistently undertrained.
- Posterior rotator cuff (infraspinatus, teres minor): Side-lying external rotation and prone Y raises, 3 sets of 15 reps with light resistance. Eccentric emphasis on the lowering phase.
Neuromuscular efficiency training, which coordinates muscle activation timing rather than just building raw strength, is particularly relevant for pitching because the motion demands precise sequencing, not just force production.
Coaching cues and video feedback
Correct one thing at a time. The most common mistake in mechanical coaching is giving a pitcher three cues simultaneously. Pick the highest-priority fault (usually early trunk rotation or a collapsing front knee), address it for two to three weeks, then reassess. Slow-motion video at 240 fps is sufficient to identify gross timing faults and gives pitchers immediate visual feedback that verbal cues alone cannot match. Review the video together with the pitcher, not just at the pitcher.
Pro Tip: Skeletally immature pitchers should not be exposed to high-intensity breaking-ball volume. If you need to teach grip and release mechanics for a curveball, use lighter practice balls at reduced intensity rather than full-effort throws. The wrist snap and pronation pattern can be learned at low velocity; the joint stress scales with effort, not with the grip itself.
Where the evidence is limited and what coaches get wrong
Biomechanical research on pitching is genuinely strong in some areas and genuinely thin in others. Knowing the difference prevents overconfident coaching decisions.
Documented limitations:
- Most biomechanical studies are cross-sectional, meaning they compare pitchers at one point in time. Cross-sectional data can identify associations between kinematics and velocity or injury, but it cannot prove that changing a specific variable causes a change in outcome. Longitudinal studies tracking the same pitchers over seasons are rare and methodologically difficult.
- Inter-individual variation in effective kinematic sequences is substantial. Clinical reviews note that multiple different sequencing patterns can produce similar velocities and similar injury rates. A one-size-fits-all “ideal” mechanics template is not supported by the evidence.
- Sensor and method biases are real. IMU-based elbow stress estimates are indirect and vary significantly between devices and calibration protocols. A number from one vendor’s wearable is not directly comparable to a number from another’s.
- Sample sizes in many pitching biomechanics studies are small, often fewer than 30 pitchers, which limits statistical power and generalizability.
- The review of pitching mechanics and injury covering studies from 1983 to 2016 explicitly cautions that many kinematic correlates of injury have not been tested in prospective designs. Correlation is not causation, and that distinction matters when deciding whether to overhaul a pitcher’s mechanics.
Common misuses of biomechanical data:
- Fixing a single variable (e.g., arm slot) and expecting injury rates to drop without addressing the underlying kinetic chain deficit.
- Using velocity-only targets in youth development without any measure of torque or efficiency. A 13-year-old throwing 75 mph with poor hip-trunk separation is at higher risk than one throwing 68 mph with efficient mechanics.
- Applying professional-level kinematic norms to youth pitchers. Skeletal maturity, limb proportions, and neuromuscular development all differ, and the benchmarks are not directly transferable.
- Treating a biomechanics report as a diagnosis. A report identifies mechanical patterns; it does not replace clinical evaluation for pain, structural injury, or neurologic symptoms.
When and how to get a formal biomechanical evaluation
Not every pitcher needs a full 3D motion capture session, but every pitcher who is experiencing pain, losing velocity, or preparing for a significant competitive jump should consider one.
Pre-evaluation checklist:
- Document recent pitching history: innings per week, pitch counts per outing, rest days, and any recent velocity changes.
- Clarify your goal: performance optimization (velocity and efficiency) versus diagnostic (pain, mechanical fault identification).
- Note any current or recent pain, its location, and whether it occurs during a specific phase of the motion.
- Bring game or practice video if available; even phone footage helps the evaluator contextualize what they observe in the lab.
- Wear form-fitting athletic clothing; loose clothing obscures joint landmarks for marker placement.
Questions to ask the evaluator before you book:
- Which metrics will the report include? (At minimum: peak shoulder ER, elbow valgus torque, pelvis-to-torso separation, trunk tilt at release, ball velocity.)
- What is their sampling rate for motion capture and EMG?
- Do they have test-retest reliability data for their system?
- What does a clinically meaningful change look like in their metrics? (A vendor who cannot answer this is selling data, not insight.)
- Will the report include specific mechanical recommendations, or just numbers?
Red flags that warrant immediate clinical follow-up, not just a biomechanics evaluation:
- Persistent medial elbow pain, especially pain that continues after throwing stops.
- Progressive loss of velocity or control over a short period without an obvious training explanation.
- Tingling, numbness, or weakness in the hand or fingers.
- A “pop” sensation in the elbow or shoulder during or after throwing.
- Pain that wakes the pitcher at night.
Any of these symptoms should go to a sports medicine physician or orthopedic specialist before any return-to-throw program begins. For parents navigating these signs, the overuse injury guide at Pitchtrainingbaseball provides a clear starting framework.
What actually deserves your attention first
Most coaches and parents who read biomechanics research come away wanting to fix everything at once. That instinct is understandable and almost always counterproductive.
The evidence points to a clear priority order. Neuromuscular control and trunk timing come first, because they are the foundation everything else depends on. A pitcher with poor hip-trunk separation cannot benefit from arm-slot adjustments; the arm slot is a downstream symptom, not the root problem. Workload management comes second, because even perfect mechanics accumulate fatigue, and fatigue degrades mechanics. Velocity targets come last, if at all, in youth development. Evidence supports prioritizing biomechanical efficiency over raw speed, particularly in athletes whose growth plates are still open.
The coaches who get the best long-term outcomes are not the ones who produce the hardest throwers at age 13. They are the ones whose pitchers are still throwing at 18 with healthy arms and improving mechanics. That outcome requires patience with the process, consistent monitoring of simple field metrics, and a willingness to slow down velocity development when the kinetic chain is not ready to support it.
Integrate medical evaluation whenever pain is present. A biomechanics report and a training program are not substitutes for clinical assessment of a symptomatic pitcher.
Build better mechanics with the right practice tools
Biomechanical principles only translate into real improvement through consistent, well-structured repetition. The drills and cues in this article require a practice environment where a pitcher can focus on sequencing without worrying about accuracy pressure or equipment that adds unnecessary joint stress.

Pitchtrainingbaseball offers the equipment that maps directly to the training progressions above. The Pitching Target Net with Colorful Strike 9-Zone gives pitchers immediate visual feedback on release-point consistency, which is the downstream result of getting trunk tilt and arm path right. For lighter-ball progressions and skeletally immature pitchers who need to develop mechanics without full-effort stress, soft training balls reduce joint load while preserving the motor pattern. The 5 Pickeballs set supports progressive throwing drills where reduced ball weight allows higher repetition volume at lower tissue stress. All products are designed for safe youth baseball training at home, in the backyard, or on the field. Browse the full product range at Pitchtrainingbaseball and match your equipment to the phase of development you are targeting. If pain is present, seek clinical evaluation before starting any throwing progression.
Sources
The findings in this article draw on peer-reviewed clinical reviews and systematic analyses. The evidence base for pitching biomechanics is strong in some areas (kinetic chain sequencing, workload and fatigue) and more tentative in others (direct causal links between specific kinematics and injury, pitch-type torque differences). Treat strong-evidence findings as reliable guides and moderate- or limited-evidence findings as directional signals worth monitoring, not absolute rules.
- Factors that Increase Elbow Stress in the Throwing Athlete: a Systematic Review of Biomechanical and Motion Analysis Studies of Baseball Pitching and Throwing - PMC
- The Relationship Between Pitching Mechanics and Injury: A Review of Current Concepts
- PubMed entry referenced in research pool
This article is general information, not a substitute for advice from a qualified doctor. Consult a qualified healthcare professional about your own circumstances before acting on anything here.
Recommended
- Why Proper Pitching Technique Matters for Young Players – Pitch Training Baseball
- Pitching Trends in 2026: What Coaches Must Know – Pitch Training Baseball
- What Is Pitching Arm Slot? A Guide for Players – Pitch Training Baseball
- Defining Youth Pitching Mechanics: A Coach’s Guide – Pitch Training Baseball