


Most parents and coaches assume that throwing harder is the goal. Get more velocity, and everything else will follow. That assumption is why proper pitching technique gets overlooked until an injury forces the conversation. The truth is that mechanics are not just about performance. They protect developing arms, build lasting command, and give young pitchers a real foundation for the sport. This article breaks down the biomechanics, the injury risks, and the practical steps you can take right now to teach and reinforce good form in players aged 8 to 16.
Table of Contents
- Key Takeaways
- Why proper pitching technique is the foundation
- How poor mechanics cause injuries in young arms
- When and how to teach proper pitching form
- Mechanics, command, and actual game performance
- Workload management as part of the pitching plan
- My take: stop chasing perfect mechanics
- Build the right habits with the right tools
- FAQ
Key Takeaways
| Point | Details |
|---|---|
| Mechanics beat velocity | Teaching proper form early prevents injury and builds more durable performance than focusing on throwing speed. |
| Injury risk is measurable | Pitchers with poor mechanics face three times the elbow strain risk compared to those using an efficient kinetic chain. |
| Age-appropriate training works | Pitching-specific instruction should start between ages 8 and 12, emphasizing arm health and form over power. |
| Command comes from mechanics | Consistent release points and body alignment directly determine strike zone control, not just raw talent. |
| Recovery is part of technique | Pitch count limits, rest periods, and fatigue management are as important as the mechanics themselves. |
Why proper pitching technique is the foundation
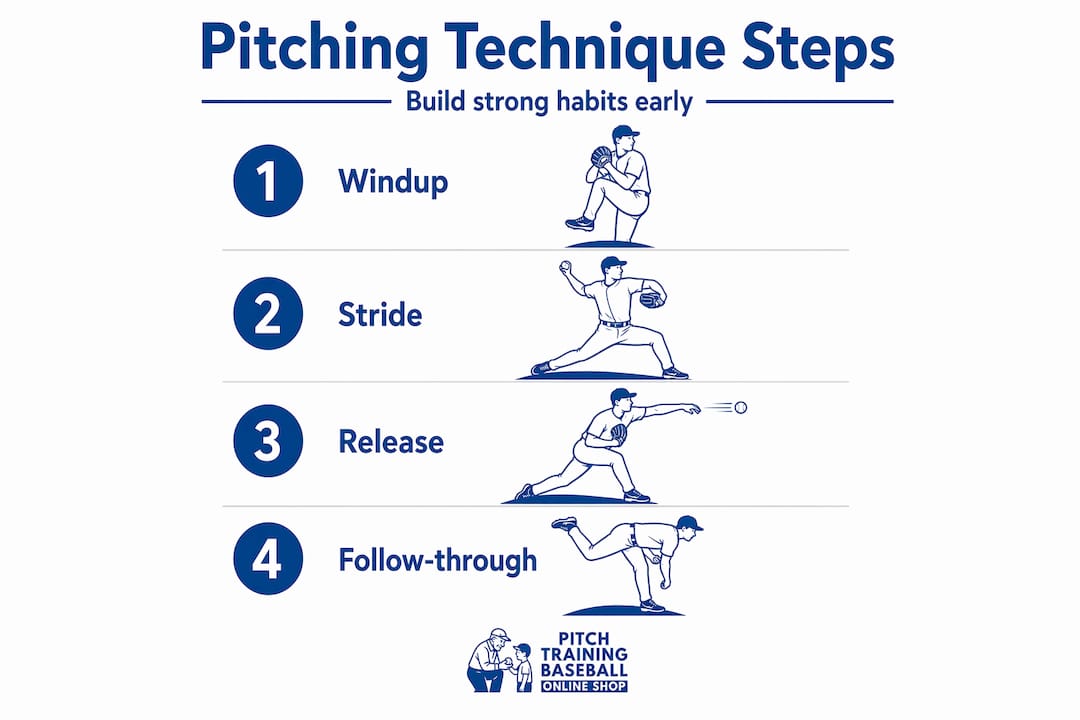
The six phases of the pitching motion each play a specific role, and problems in one phase compound into bigger problems downstream. Understanding these phases gives coaches and parents a clear map for evaluating youth form.
The phases are:
- Windup: The pitcher establishes rhythm and generates initial momentum. Traditional windup technique improves rhythm, aligns body mass, and manages torque effectively. It is a functional movement, not just a stylistic choice.
- Stride: The lead leg drives forward. The length and direction of the stride determine hip-to-shoulder separation, which is where real power originates.
- Arm cocking: The throwing arm moves into external rotation. This phase places the highest stress on the elbow and shoulder, making proper positioning non-negotiable.
- Acceleration: The arm moves from maximum external rotation toward the target. Speed here depends entirely on how well the earlier phases loaded the kinetic chain.
- Deceleration: The arm slows down after release. Young pitchers with weak posterior shoulder muscles often skip this phase unconsciously, which leads to chronic shoulder soreness.
- Follow-through: The body finishes the motion by dissipating remaining force. A short or blocked follow-through sends that energy straight back into the arm.
Young players who learn this sequence in order develop a natural feel for how each movement feeds the next. Those who skip the sequence and just “throw hard” end up compensating in ways that increase strain dramatically.
Pro Tip: Teach each phase separately at half speed before combining them. Slow, controlled practice builds the neural pathways that hold up under game pressure far better than high-speed repetition with sloppy form.
How poor mechanics cause injuries in young arms
Why pitching form matters from a physical standpoint comes down to one concept: force distribution. The body is designed to share the load of throwing across multiple muscle groups and joints. When mechanics break down, that load concentrates in one or two vulnerable spots.
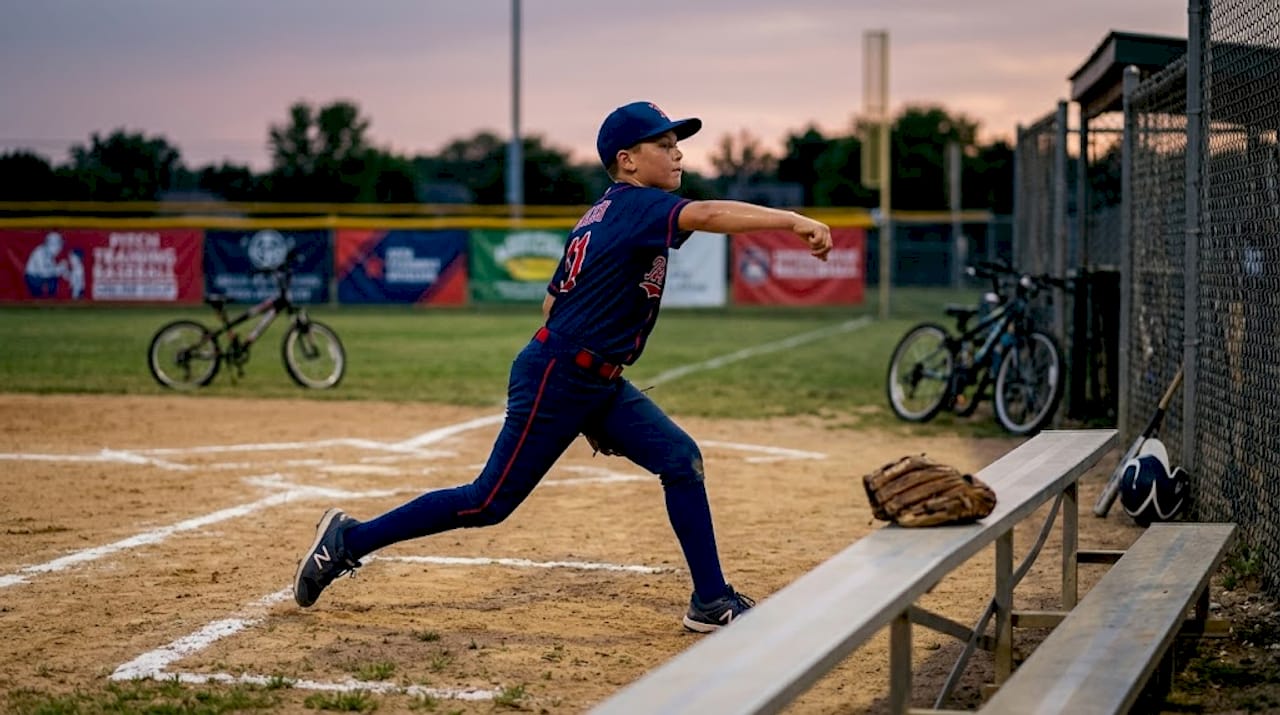
The kinetic chain describes how throwing force flows from the ground up. Legs contribute approximately 30% of pitching power, the shoulder contributes around 20%, and the fingers contribute roughly 10%, with the core and hips connecting everything in between. When that chain breaks, one link absorbs what the others should have shared. Pitchers with poor mechanics face three times higher elbow strain compared to those who use an efficient kinetic chain.
| Mechanical Error | Body Part at Risk | Likely Injury |
|---|---|---|
| Early shoulder opening | Elbow, UCL | Tommy John surgery |
| Short arm path | Shoulder rotator cuff | Rotator cuff tear |
| Blocked follow-through | Shoulder posterior | Impingement |
| Weak core engagement | Lower back, elbow | Overuse strain |
| Stride too short or wide | Hip, knee | Hip labral irritation |
“Muscle recruitment and neural firing patterns must be synchronized for efficient force transfer. When they are not, the arm compensates by taking on structural stress it was never designed to absorb repeatedly.”
For young players, this matters even more than it does for adults. Growth plates near the elbow and shoulder are still developing through adolescence. Repetitive improper mechanics before those plates close creates stress fractures and growth disruptions that can permanently limit a pitcher’s potential. Improper technique repetition elevates injury risk significantly, with gradual progression and controlled load increases recommended as the safest path forward.
Pro Tip: Watch for the early warning signs of mechanical fatigue: the elbow dropping below shoulder height during arm cocking, the front shoulder flying open before the hips rotate, or the stride foot landing across the midline. Any one of these tells you the pitcher is compensating for something.
When and how to teach proper pitching form
Why teach proper pitching form early? Because the habits formed between ages 8 and 12 become deeply ingrained movement patterns. Correcting them at 15 is possible but takes far more time and effort than building them correctly from the start.
Pitching-specific training should begin between ages 8 and 12, with the focus on mechanics and arm health rather than velocity. That is the window where coordination, body awareness, and coachability align to make technical instruction most effective.
Here is a practical progression for how to teach proper pitching form at different stages:
- Ages 8 to 10: Focus entirely on the kinetic chain sequence and basic balance. Use a flat-footed rocker step instead of a full windup to remove variables. No pitch counts needed yet, but keep throwing sessions under 20 minutes.
- Ages 10 to 12: Introduce the full windup with emphasis on hip-to-shoulder separation. Begin tracking pitch counts loosely. The recommendation for this age range is a maximum of 75 pitches per game with enforced rest days following higher-volume outings.
- Ages 12 to 14: Add grip variation and release point consistency work. Formalize pitch count tracking. Players at this age should take at least 3 months off from overhead throwing per year to allow arm tissues to recover and grow.
- Ages 14 to 16: Begin working on secondary pitches only after the fastball mechanics are deeply consistent. Introduce video review so players can see their own form objectively.
Pro Tip: Never let a fatigued pitcher continue practicing form work. Tired arms develop compensations that can override months of good mechanics training. Fatigue is when bad habits form fastest.
Mechanics, command, and actual game performance
Control and command are not the same thing. Control means throwing strikes. Command means throwing to specific locations within the strike zone on purpose. Most youth pitchers who struggle with wildness have a mechanical problem, not a focus problem.
Poor pitch command arises from mechanical flaws that cause early front shoulder opening, slowed arm speed, and rushing through the delivery. When the front shoulder opens before the hips rotate, the arm has no stable platform to throw from. The result is a pattern of pitches that miss arm-side because the body is pulling off the target at the moment of release.
Common mechanical flaws that directly hurt command include:
- Inconsistent arm slot: Changing the arm’s path from pitch to pitch makes a repeatable release point impossible.
- Lead leg landing too closed or too open: Foot position at landing directly determines where the upper body faces at release.
- Rushing the stride: When the stride leg moves too fast, the arm lags behind. The pitcher then muscled the ball rather than using momentum.
- Gripping too tight: Tension in the forearm slows wrist snap and kills backspin. The ball moves unpredictably as a result.
| Approach | What it teaches | Result |
|---|---|---|
| Mirror drills (no ball) | Body position awareness | Better body alignment at all phases |
| Towel drill | Extension and release point | More consistent arm path |
| Wall shadow drill | Hip rotation timing | Improved hip-to-shoulder separation |
| Video analysis | Full motion review | Faster identification of subtle flaws |
| Target net practice | Release point consistency | Tighter command to specific zones |
Targeted drills and video analysis of mechanics significantly improve pitch accuracy and reduce injury risk. The benefit of regular video review is that young pitchers can see exactly what their body is doing rather than relying on feel alone. Perception and reality often diverge, especially under game pressure.
Workload management as part of the pitching plan
No matter how good a pitcher’s mechanics are, overuse will break down the body and degrade form. A pitching skill improvement checklist should always include workload alongside technique items, not as a separate concern.
Key workload principles every coach and parent should track:
- Pitch count limits by age: These are non-negotiable guardrails, not suggestions. Young arms simply cannot recover at the same rate adult arms do.
- Fatigue signals to watch: Decreased velocity, elevated elbow position, shorter follow-through, and visible arm drag are all signs the body is done for the day.
- Rest enforced, not optional: Transitioning fatigued pitchers to less stressful fielding positions reduces cumulative arm strain and keeps players in the game without compounding risk.
- Cross-training year-round: Swimming, resistance bands, and hip-focused strength work build the supporting structures that hold mechanics together under pressure.
- Sleep and nutrition matter: Lack of sleep and poor load management are directly linked to immune compromise and joint degeneration risk. Young athletes need 8 to 10 hours of sleep consistently during active seasons.
The research on elite athletes shows something that applies directly to youth training. Pitchers who build hip extension and trunk rotational endurance delay the onset of mechanical breakdown under fatigue. That means working the hips and core is not optional conditioning. It is a front-line injury prevention strategy for any pitcher who throws regularly.
A baseball pitching safety checklist should include: daily warm-up protocol, pre-pitch count baseline, inning limits by age group, post-outing arm care routine, and a weekly rest day with no overhead throwing. Post these in your dugout and hold to them regardless of scoreboard pressure.
My take: stop chasing perfect mechanics
I have worked around enough youth baseball to be honest about something that rarely gets said out loud. The coaches who obsess over textbook perfect mechanics often produce fragile pitchers who fall apart the moment a game situation gets uncomfortable.
Here is what the research actually shows. Mechanics naturally change under fatigue in well-prepared athletes, and velocity and accuracy remain stable. The body is not breaking down. It is finding alternative movement paths to redistribute load. That is a feature, not a flaw.
What I have seen work better than rigid form chasing is building athletes who are physically strong enough to have options. When a pitcher’s hips are powerful and their trunk has real rotational endurance, their mechanics self-correct under stress rather than collapse. That does not happen from drilling the same textbook motion 200 times. It happens from physical preparation and exposure to varied throwing conditions.
The other issue I have seen with overly mechanical coaching is what some call the “lesson-pitcher” problem. Many youth pitchers learn to prioritize visible coaching approval over internal proprioception, meaning they focus on looking correct rather than feeling what their body is doing. Those pitchers perform well in the bullpen and fall apart in games. The goal is internal ownership of movement, not external performance for the coach.
Teach the phases, enforce the pitch counts, build the hips and trunk, and then let the athlete’s body adapt. That combination produces pitchers who last.
— Albert
Build the right habits with the right tools

Understanding why proper pitching technique works is only half the equation. The other half is getting quality repetitions in a safe, structured practice environment. Pitchtrainingbaseball offers training tools designed specifically for the kind of focused, repeatable work that actually changes mechanics.
The 9-zone pitching target net gives young pitchers immediate visual feedback on release point and command, which is exactly what the drills in this article require. Pair it with the pitch training baseball to build grip consistency and wrist action that translates directly to game situations. These are not novelty items. They are the kind of targeted repetition tools that make the difference between a pitcher who understands mechanics intellectually and one who owns them physically. Check out the safe youth workouts section for programs that pair well with these tools.
FAQ
Why does proper pitching technique matter more than velocity?
Proper mechanics distribute throwing force across the full kinetic chain, protecting the elbow and shoulder while also producing more consistent command. Velocity built on poor form increases injury risk by up to three times compared to efficient mechanics.
At what age should kids start learning proper pitching form?
Pitching-specific instruction works best between ages 8 and 12, when coordination and body awareness are developed enough for technical coaching to take hold without the arm stress of competitive pitch counts.
How do I evaluate pitching form in a young player?
Watch for the five key checkpoints: stride foot landing direction, hip-to-shoulder separation before release, arm slot consistency, follow-through length, and whether the front shoulder stays closed until the hips fire. Video review from the side and behind makes this far more reliable than live observation alone.
What is the fastest way to improve pitch command?
Fix the mechanical flaw that causes the front shoulder to open early. That single correction resolves more command problems than any other adjustment. Towel drills and target net practice reinforce the fix between sessions.
How many pitches should a youth pitcher throw per week?
Total weekly pitch volume should account for both practice and game reps. Most sports medicine organizations recommend no more than 75 to 100 pitches in any single day for players under 14, with mandatory rest periods based on how many pitches were thrown. Three months off from overhead throwing per year is also strongly advised.
Recommended
- Mastering proper pitching grip: boost youth baseball skills – Pitch Training Baseball
- Why Physical Fitness for Young Pitchers Matters – Pitch Training Baseball
- Pitching balance: Boost control and power in young players – Pitch Training Baseball
- Pitching zone knowledge: Boost your young player’s skills – Pitch Training Baseball