


The most effective pitching stance adjustments for youth players are feet width, toe angle, knee bend, stride length, and glove and head alignment. Each one targets a specific mechanical problem, and all of them must preserve the hips-first kinematic sequence to protect young arms.
Here are the top adjustments and when to reach for each:
- Feet width: Narrow to armpit width when a pitcher’s weight drifts or momentum stalls before the stride.
- Toe angle: Rotate the pivot foot more parallel to the rubber when the pitcher’s hips open too early or too late.
- Knee bend: Add a slight flex in the front knee at foot strike to absorb force and stabilize the landing.
- Stride length: Lengthen toward 85% of body height when a pitcher has a “late arm” or loses velocity off a short stride.
- Glove and head alignment: Keep the glove out front and the head centered over the belly button to hold posture through release.
Safety first: Before testing any of these adjustments, remind your pitcher that hips rotate before the arm fires. Every stance change you make should make that sequence easier, not harder. Limit high-effort throws to 15–20 per session when grooving something new.
Table of Contents
- What do common pitching stance adjustments actually change?
- If your pitcher does X, try Y: concrete adjustment examples
- Which drills actually groove each stance adjustment?
- How long does it take to change a pitcher’s stance safely?
- Why kinematic sequence matters more than stance style
- A 30-minute practice plan for one stance adjustment
- Mistakes coaches make when tweaking a pitcher’s stance
- Key Takeaways
- The stance tweak that actually changed things
- Practice stance adjustments at home with Pitchtrainingbaseball
- Further reading and authoritative sources
What do common pitching stance adjustments actually change?
Each stance tweak has a specific mechanical effect. Understanding that chain of cause and effect is what separates a coach who fixes problems from one who creates new ones.
Feet width
An armpit-width stance keeps the center of mass over the base and preserves forward momentum. Go significantly wider and the pitcher’s weight shifts laterally, delaying the stride and often producing a fall-off pattern toward the glove side. The observable sign that this adjustment worked: the pitcher’s weight transfers smoothly forward without a lateral sway at the start of the stride.
Toe angle on the pivot foot
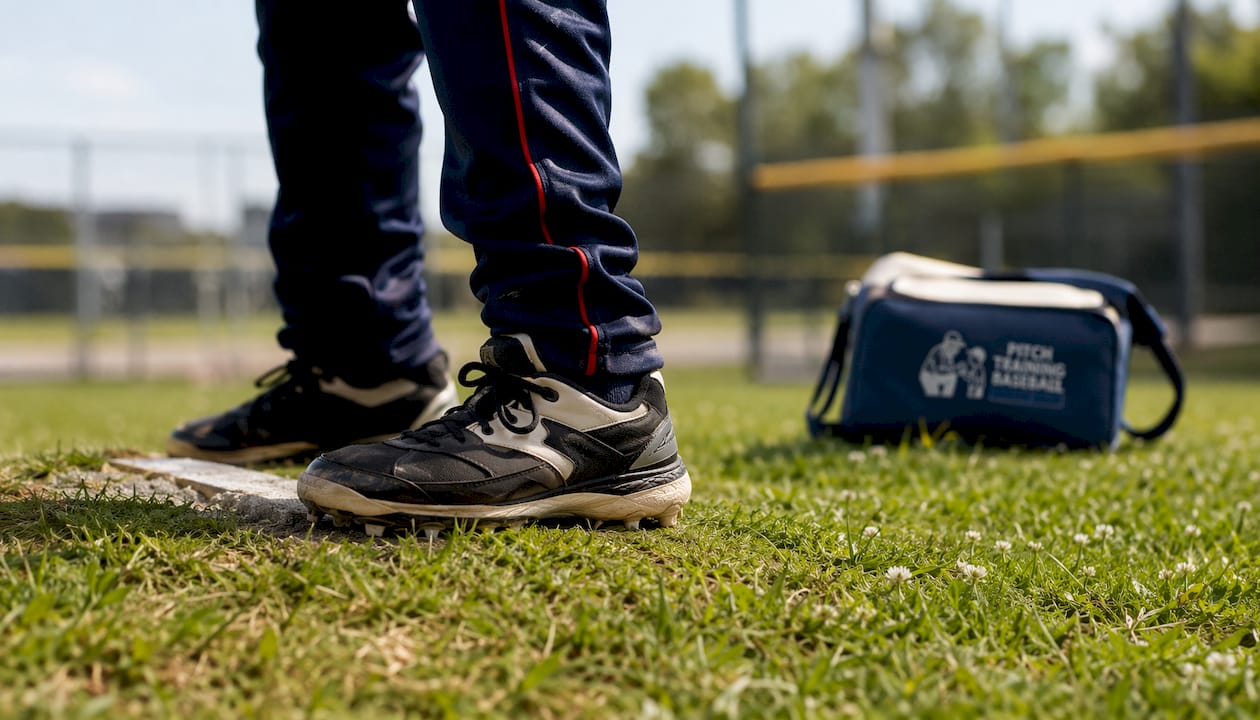
The pivot foot should sit roughly parallel to the rubber, with the inside edge in contact. When a pitcher toes out excessively, the hip can’t rotate efficiently, and the arm compensates by firing early. A simple coaching cue: “Inside edge on the rubber, heel slightly off.” Watch for cleaner hip rotation and a more consistent stride line after the change.
Knee bend at foot strike
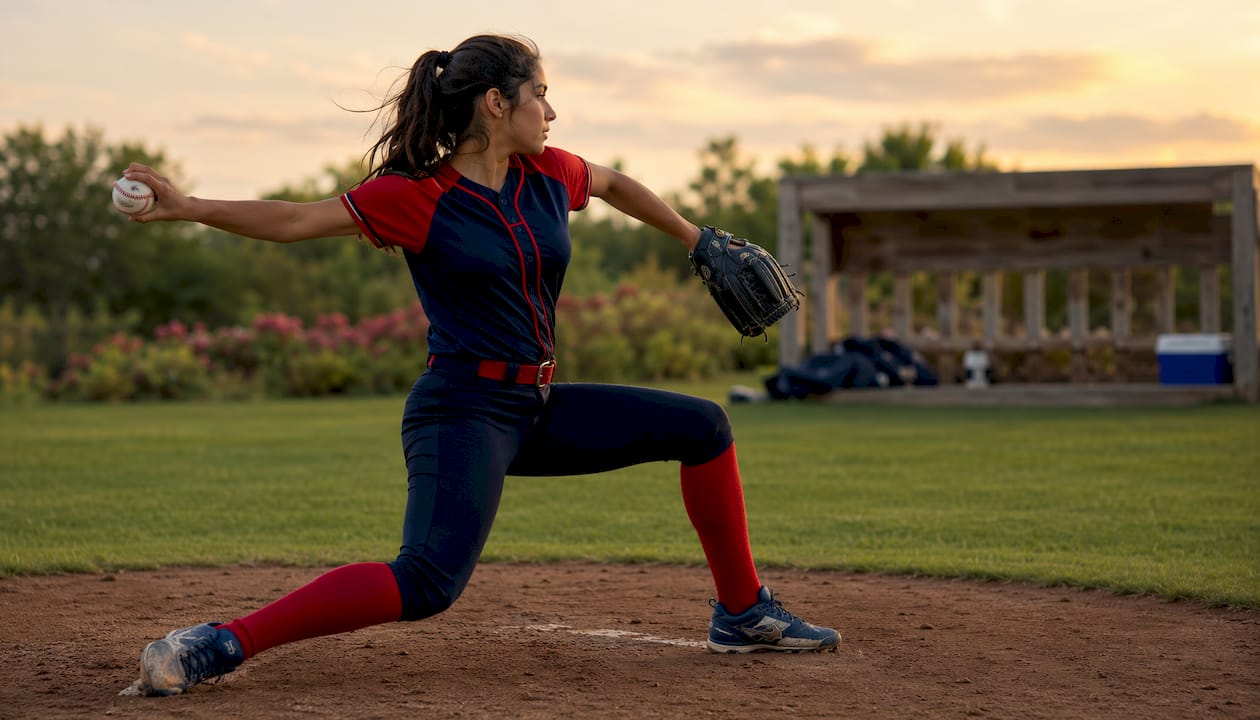
At foot contact, the lead knee should be flexed to absorb landing force and create a stable base. A locked or hyperextended front knee stops the pelvis from rotating and forces the upper body to do extra work. Pitchers with insufficient knee extension at release also tend to produce less ball velocity, since the lead leg drives the trunk tilt forward.
Athletic posture: head over belly button
Head position sounds minor. It isn’t. When a pitcher’s head drifts toward the glove side during the leg lift, the whole delivery tilts. The cue “nose over toes, head over belly button” keeps the center of mass centered and makes the stride more repeatable. This is especially useful for younger players who rush through the balance point.
Glove placement
A glove that collapses to the hip or flies out wide pulls the front shoulder open prematurely. Keep the glove out front, roughly at chest height, through foot strike. The mechanical effect is a longer window for the hips to rotate before the shoulders follow.
Pivot foot contact point and lateral rubber position
Rather than assigning a side of the rubber by handedness, mark the mound center and adjust lateral position so the pitcher’s drag line finishes at that center. This creates a repeatable stride line and cleaner release points across sessions.
Initial weight distribution
At the start of the stretch, weight should sit slightly on the back leg, not evenly split. This loads the pivot foot for a stronger push-off and helps the pitcher feel the “downhill” momentum that Little League coaching resources describe as a key cue for control.
Pro Tip: Film your pitcher from directly behind the mound and from the first-base side (for a right-hander). Two angles reveal what one misses: the rear view shows stride direction, the side view shows head position and knee bend at foot strike.
If your pitcher does X, try Y: concrete adjustment examples
The fastest way to use stance adjustments is to match the problem you see to the single most effective fix. Here’s a direct problem-to-solution map.
| Problem | Stance adjustment | Quick coaching cue |
|---|---|---|
| Falls off to glove side | Narrow feet to armpit width; center head | “Head over belly button, finish at the plate” |
| Short stride / late arm | Lengthen stride toward 85% of height | “Step to the catcher, not at the ground” |
| Toeing out on pivot foot | Rotate pivot foot parallel to rubber | “Inside edge on the rubber” |
| Collapsing front leg | Add knee flex at foot strike | “Bend and brace, don’t lock” |
| Flying open shoulders | Keep glove at chest height through foot strike | “Glove stays, hips go first” |
| Inconsistent release point | Adjust lateral rubber position to center drag line | “Finish your drag line at the mound center” |
Age-specific notes
Youth coaching experts consistently warn against one-size-fits-all changes because growth, flexibility, and strength vary widely across young athletes. Here’s a practical breakdown:
- Ages 8–10: Focus only on feet width and head position. These two changes have the biggest return for the least complexity. Avoid stride-length prescriptions at this age; let the body find its natural length.
- Ages 11–13: Add toe angle and glove position. Players in this range have enough body awareness to respond to two-point cues. Stride length can be introduced once balance is consistent.
- Ages 14–16: All adjustments are fair game, including lateral rubber position and knee bend at foot strike. These players can handle more specific feedback and begin tracking their own metrics.
Be conservative with the intensity of any change. A small tweak applied consistently beats a dramatic overhaul that the pitcher can’t repeat.
Pro Tip: Test any single adjustment over 15–30 throws before deciding whether it helps. One or two bad pitches after a change don’t mean the change is wrong. Look at the trend across the full set, not the last throw.
Which drills actually groove each stance adjustment?
Practical drills like balance holds, towel drills, and stride-box work are effective at isolating the specific elements stance adjustments target. Here’s how to run each one.
Drill sequence
-
Balance point hold (all ages): The pitcher goes through the windup or stretch to the top of the leg lift and holds for three seconds before completing the delivery. No throwing. Run 10 reps. This drill forces the pitcher to feel what a loaded, centered balance point actually is. Coaching cue: “Freeze at the top. Lift knee above the hip. Hands together. If you wobble, you rushed it.”
-
Towel drill (ages 8 and up): The pitcher holds a folded towel in the throwing hand and snaps it past a target held by the coach at chest height. A correct arm path produces an audible snap. A short or early release produces nothing. Run 10 reps. Coaching cue: “Reach for the target. Your release point is in front of your body.”
-
Stride-box drill (ages 10 and up): Place tape or chalk marks on the ground showing the target landing zone for the stride foot, sized to the pitcher’s height-based stride target. The pitcher strides to the box without throwing, checks foot angle, then repeats with a throw. Run 8–10 reps. Coaching cue: “Land in the box, toes slightly closed.”
-
Stride direction drill (ages 8 and up): Draw a chalk line from the pivot foot directly toward home plate. The stride foot should land on or just inside the line. A foot that crosses the midline closes the hip too early; a foot outside the line opens it too soon. Run 10 pitches and check landing after each. Coaching cue: “Your foot points where your pitch goes.”
-
Mirror or line drill for head position (all ages): The pitcher stands in front of a mirror or a line on the gym floor and goes through the leg lift in slow motion, checking that the head stays centered over the belly button. No throwing needed. Run 5–8 slow-motion reps, then transfer to the mound.
Scaling by age
- For players ages 8–10, run drills without a ball first. Add a ball only after the movement pattern is consistent.
- For ages 11–13, add a catcher and a target so the pitcher gets feedback on where the ball lands relative to the adjusted stride.
- For ages 14–16, introduce video review after each drill set. Seeing the adjustment on screen accelerates the feedback loop.
Safety checklist before every drill session
- Five minutes of dynamic warm-up (arm circles, hip rotations, light jog).
- Cap high-effort throws at 15–20 per session when working on a new adjustment.
- Stop immediately if the pitcher reports elbow or shoulder pain.
- Follow age-appropriate pitch count guidelines: 50 pitches maximum per outing for ages 7–8, 75 for ages 9–10, and 85 for ages 11–12.
How long does it take to change a pitcher’s stance safely?
Changing a body position can happen in a single session. Changing the movement pattern underneath it takes far longer. Expert coaching notes are clear: ingraining a new movement habit requires high repetitions spread across weeks, not days.
A practical timeline for one adjustment:
- Micro-test (15–30 throws, one session): Introduce the change and observe the immediate effect on balance, stride, and release. Decide whether to continue.
- Groove phase (1 week, drill-only reps): Run the relevant drill daily or at every practice. No game reps yet. Track whether the pitcher can reproduce the adjustment without a verbal cue.
- Integration phase (weeks 2–3): Move the adjustment into bullpen throws and simulated at-bats. The pitcher should be able to self-correct when the pattern slips.
- Reassessment (end of week 3): Compare video from the start and end of the period. If the adjustment is holding under mild pressure, it’s integrated. If it disappears under game conditions, extend the groove phase.
What to track
- Balance at foot strike: Does the pitcher land without lateral sway?
- Release-point variance: Are pitches grouping tighter or spreading wider?
- Velocity trend: If you have a radar gun, note whether speed holds steady or drops more than 2–3 mph consistently.
- Perceived comfort: Ask the pitcher directly. Discomfort that persists past the first week is a signal, not just soreness.
- Strike percentage in live throws: A useful proxy for whether the adjustment is helping or hurting command.
Weekly coach checklist
- Note the specific adjustment being worked on and the drill used.
- Log rep counts and any pain reports.
- Record one observable sign of improvement and one remaining issue.
- Flag red flags: pain, a velocity drop that persists more than two sessions, or increased mechanical inconsistency under mild pressure.
Pair this tracking with a pitcher rotation plan so workload stays manageable while the adjustment is being groomed.
Why kinematic sequence matters more than stance style
The stance is the starting point. What happens after it is what actually protects the arm.
The kinematic sequence describes how energy moves through the body during a pitch: hips rotate first, then the trunk, then the shoulder, then the forearm, then the hand. Massachusetts General Hospital research identifies this sequence as critical for both performance and injury prevention. When the arm fires before the hips have rotated, the shoulder and elbow absorb torque that the lower body was supposed to generate and dissipate.
The key finding: Differences in joint torques between pitchers are more closely tied to kinematic sequence patterns than to whether a pitcher throws from the windup or the stretch. Biomechanical studies found no significant difference in peak shoulder and elbow torques between the two delivery styles, but did find torque variation across different kinematic sequence patterns.
This matters for stance adjustments because a change that disrupts the hips-first sequence, even a well-intentioned one, can increase stress on the elbow and shoulder. Every adjustment in this article should be evaluated against one question: does it make it easier or harder for the hips to lead?
Coaching cues that preserve hips-first timing
- “Hips go, then throw.” Say it before every bullpen rep during the adjustment phase.
- Delay the arm-load cue. Don’t tell the pitcher to “get the arm up” until after you’ve confirmed the hips are rotating.
- Focus on pelvic rotation as the primary movement. The arm follows; it doesn’t lead.
Injury red flags: when to reduce reps or refer out
- Elbow pain on the medial (inner) side during or after throwing.
- Shoulder pain at the front of the joint.
- A sudden drop in velocity with no mechanical explanation.
- Complaints of “dead arm” that don’t resolve with rest.
- Any pain that persists more than 48 hours after a session.
When any of these appear, reduce throwing volume immediately and consult a sports medicine clinician or certified pitching trainer before resuming. Proper pitching posture and arm-health habits go hand in hand, and no stance adjustment is worth a growth-plate injury.
A 30-minute practice plan for one stance adjustment
This plan targets a single adjustment per session. Trying to fix two things at once splits the pitcher’s attention and slows both changes down.
-
Minutes 0–5: Dynamic warm-up. Arm circles, hip rotations, high knees, and a light jog. End with 5–8 easy flat-ground throws at 50% effort. No mechanics focus yet.
-
Minutes 5–15: Drill work. Run the drill that matches the day’s target adjustment (see the drill sequence above). For a stride adjustment, use the stride-box or stride-direction drill. For a balance issue, run the balance point hold. Do 3 sets of 8–10 reps with a 60-second rest between sets. Coach gives one cue per rep, not three.
-
Minutes 15–25: Progressive throws. Move to the mound (or a flat-ground equivalent for younger players). Throw at 70–80% effort, focusing on the adjusted movement. Start at 30 feet and back up to age-appropriate distance. Cap at 20 throws. Coach watches for the adjustment holding under mild effort increase.
-
Minutes 25–28: Live pitching or simulated at-bats. 3–5 pitches to a catcher with a target. The pitcher applies the adjustment under mild pressure. No velocity push. The goal is one clean rep, not a perfect inning.
-
Minutes 28–30: Cooldown and check-in. Light arm stretches, shoulder cross-body stretch, and a 60-second conversation. Ask the pitcher: “Did that feel different? Where did it feel off?” Log the answer. This feedback is more useful than any metric at this stage.
Scale rep counts down by 20–30% for players ages 8–10. For ages 14–16, the progressive throw phase can extend to 25 throws if the pitcher is within their weekly pitch count budget and reports no discomfort. Always reference daily pitching habits to keep sessions consistent across the week.
Mistakes coaches make when tweaking a pitcher’s stance
The adjustment itself is rarely the problem. How it’s applied usually is.
-
Changing too many things at once. Pick one adjustment per session. Two changes compete for the pitcher’s attention and make it impossible to know which one helped or hurt. Monitoring metric: if strike percentage drops more than 20% from baseline, you’ve likely overloaded the pitcher.
-
Overcorrecting. A pitcher who toes out slightly doesn’t need the foot rotated 30 degrees. Small changes are easier to feel and faster to groove. Monitoring metric: watch for new compensations (a head tilt, a glove collapse) that weren’t there before the adjustment.
-
Ignoring stride direction. Coaches often focus on foot angle and forget where the foot lands relative to the midline. A stride that crosses the midline closes the hip prematurely; one that lands outside the line opens it too early. Both kill velocity and accuracy. Use the chalk line drill every session until the landing is automatic.
-
Not monitoring fatigue. A tired pitcher can’t feel the adjustment, can’t reproduce it, and is more likely to compensate in ways that stress the arm. If the pitcher’s mechanics are deteriorating in the last third of a bullpen session, end the session. The in-game adjustment process applies here too: fatigue changes what’s possible.
-
Giving too many cues at once. One cue per pitch. Two cues create confusion. Three cues create paralysis. Keep cues short, positive, and repeatable: “Hips first.” “Land in the box.” “Glove stays up.” The pitcher should be able to repeat the cue back to you before the next throw.
Key Takeaways
Effective pitching stance adjustments for youth players require testing one change at a time, preserving the hips-first kinematic sequence, and tracking progress across at least three weeks before drawing conclusions.
| Point | Details |
|---|---|
| Start with one adjustment | Test a single change over 15–30 throws before adding anything else. |
| Stride length target | Aim for roughly 85% of body height; too short creates a late arm, too long disrupts balance. |
| Hips-first sequence | Every stance change must make it easier for hips to rotate before the arm fires. |
| Age-appropriate scaling | Players ages 8–10 should focus only on feet width and head position; add complexity as players mature. |
| Pitchtrainingbaseball tools | Strike-zone target nets and training balls from Pitchtrainingbaseball support release consistency and controlled high-rep drill work at home or on the field. |
The stance tweak that actually changed things
Most coaches, when they hear “stance adjustment,” picture a dramatic overhaul. In practice, the changes that produce measurable improvement are almost always small and almost always start with the feet.
The conventional wisdom is to address arm mechanics first because that’s what everyone watches. But the arm is downstream of everything else. A pitcher whose feet are too wide, whose head drifts, or whose stride crosses the midline will develop arm compensations that look like arm problems. Fix the stance, and the arm often corrects itself without a single cue directed at it.
What coaches underestimate is how long it takes for a young pitcher to feel a new position as normal. The first session with a narrowed stance feels wrong to the pitcher even when it looks right to the coach. That gap between what looks correct and what feels correct is where most adjustments get abandoned too early. The research is consistent: changing a movement pattern takes far more repetitions than changing a static position. Patience isn’t a soft skill here. It’s the mechanism.
The other thing worth saying plainly: not every adjustment sticks, and that’s fine. If a change hasn’t shown up in the pitcher’s mechanics after three weeks of deliberate drill work, drop it and try a different entry point. Some pitchers respond to a stride cue; others need a glove cue to get the same result. The goal is a repeatable delivery, not a textbook one.
Practice stance adjustments at home with Pitchtrainingbaseball
Getting reps between team practices is where stance adjustments actually get groomed. The drill work at practice plants the seed; the repetitions at home are what make it stick.

Pitchtrainingbaseball offers three product categories that map directly to the drills in this article. The 9-zone strike target net gives pitchers immediate visual feedback on release-point consistency, which is the clearest sign that a stride or glove adjustment is holding. Set it up in the backyard and run the flat-ground command drill against it. For high-rep drill work where arm health matters, training balls let pitchers complete the stride-box and towel drill progressions without the wear of a full-effort baseball. And for players working on follow-through and fielding position after delivery, the sliding mitt rounds out the post-pitch sequence.
All of Pitchtrainingbaseball’s equipment is portable, adjustable, and built for the kind of focused, low-volume practice that actually changes mechanics. Browse the full training lineup at pitchtrainingbaseball.com and find the tools that match the drills your pitcher needs most.
Further reading and authoritative sources
The studies and coaching resources below are the strongest follow-up reading for coaches who want to go deeper on the biomechanics and drill design behind the adjustments in this article.
| Source | Best for |
|---|---|
| The Clinician’s Guide to Baseball Pitching Biomechanics (PMC) | Detailed biomechanical standards for stride length, foot angle, knee bend, and shoulder position at foot strike |
| Kinematic Sequence and Injury Prevention (Mass General) | Understanding hips-first sequencing and its role in reducing elbow and shoulder stress |
| JSSM Study on Kinematic Sequences and Torque | Research comparing windup vs. stretch torque and the role of kinematic patterns |
| Little League Coaching Young Pitchers | Practical, age-appropriate coaching cues for balance, push-off, and follow-through |
| Youth Baseball Pitching Drills (Veo) | Drill library with coaching cues, age guidance, and video analysis notes |
| National Pitching: Ideal Set Position | Practitioner guidance on feet width, weight distribution, and movement pattern timelines |
| Windup vs. Stretch Biomechanics (PubMed) | Research on delivery style safety and performance for youth and amateur levels |
- For drill libraries and session planning, start with the Veo guide and Little League resource.
- For safety and medical guidance on arm health, the PMC clinician’s guide and Mass General kinematic sequence article are the most authoritative.
- For stance-specific practitioner advice, National Pitching’s set position and rubber position articles are the most directly applicable to youth coaching.
Recommended
- How to Plan Pitcher Rotations for Youth Baseball – Pitch Training Baseball
- Step by Step Pitch Selection: Youth Baseball Guide – Pitch Training Baseball
- The Real Role of Adjustable Pitching Trainers – Pitch Training Baseball
- Defining Youth Pitching Mechanics: A Coach’s Guide – Pitch Training Baseball