


A 30 to 45 minute indoor pitching practice built around mechanics work, the towel drill, and controlled throws can be run in a garage, basement, or living room with almost no equipment. It works because it isolates the parts of a delivery that break down under game pressure, without adding a single competitive pitch to a young arm’s workload.
Here’s the minimum kit for tonight’s session:
- A hand towel (rolled or folded) for arm-path repetition
- A soft or foam practice ball, plus one indoor-safe hard-cored ball if space allows
- A taped strike zone on a wall, or a compact net/target
- A phone on a tripod or propped on a shelf for filming
- Painter’s tape for a stride line on the floor
- A rest area or wall padding if the space is tight
Keep intensity low and mechanics the focus. Indoor work is not a substitute for pitch-count and rest guidelines — treat every thrown rep, even dry ones, as part of a pitcher’s weekly workload picture.
Key Takeaways
Effective indoor pitching practice combines short, high-rep mechanics drills with strict adherence to age-based pitch-count and rest rules, even when no ball leaves the hand at full speed.
| Point | Details |
|---|---|
| Keep sessions short | Run indoor practice for 30 to 45 minutes to hold focus and avoid overloading young arms. |
| Master the towel drill first | Use it as the primary diagnostic tool for arm path before adding rocker throws or wrist-snap work. |
| Track all workload | Log towel and live-throw reps together, since Little League’s rest-day rules apply once pitch counts add up. |
| Match drills to distance | Use 10 to 20 feet for mechanics drills and 25 to 45 feet for flat-ground command and short-box bullpens. |
| Equip the space simply | Pitchtrainingbaseball’s soft practice balls and 9-zone target net support safe, accurate indoor command work. |
Table of Contents
- Why Indoor Pitching Practice Works (and Where It Falls Short)
- How Many Pitches Should a Young Pitcher Throw Indoors?
- Setting Up a Small Space for Indoor Pitching Drills
- Core Indoor Pitching Drills That Actually Move the Needle
- Three Ready-to-Run Indoor Session Plans
- Getting Useful Feedback From a Phone Camera
- Why Trust This Guide on Indoor Pitching Practice
- What Most Indoor Pitching Advice Gets Backward
- Get the Right Gear for Indoor Pitching Practice
- Sources
Why Indoor Pitching Practice Works (and Where It Falls Short)
Indoor training earns its place because it removes the two biggest obstacles to good reps: weather and fatigue accumulation. A basement or garage lets a pitcher run high volumes of low-load work — balance drills, stride checks, arm-path cues — without a mound, a catcher, or the temptation to throw at game speed.
That’s also its ceiling. Indoor sessions can’t replicate mound height, real distance, or the neuromuscular demand of a full-effort pitch, so they’re not a substitute for live bullpens before competition. Think of indoor practice as the maintenance phase and outdoor mound work as the test.
It fits best in three situations: rained-out weeks, the off-season when arms need rest from live throwing but not from skill work, and short daily tune-ups (10 to 15 minutes) that keep mechanics sharp between practices. Coaches who treat every indoor session as a mechanics lab, not a bullpen, get the most out of the format.
How Many Pitches Should a Young Pitcher Throw Indoors?
Indoor drills don’t erase pitch-count rules. They just change how those counts get filled. A 9 or 10 year old tops out at 75 pitches a day, and an 11 or 12 year old at 85, with required rest days tied to how many pitches were thrown.
Statistic Callout: Little League’s pitch-count rules require zero rest days for 1–20 pitches, one day for 21–35, two days for 36–50, three days for 51–65, and four days for 66 or more, according to Little League’s pitching rules. The PMC review of youth pitching workload sets daily maximums at 75 pitches for ages 9–10 and 85 for ages 11–12.
Towel drill reps and dry mechanics work don’t carry the same joint stress as a full-effort pitch, but they aren’t free, either. Repetitive arm-cocking motion still loads the shoulder and elbow, so cumulative volume matters even without a ball leaving the hand at speed.
A simple way to track this without overcomplicating it:
- Log every session in a notebook or phone note: date, drill type, approximate reps, and any live throws.
- Count live-intensity throws (anything thrown hard at a target) toward the daily pitch-count max, even indoors.
- Treat towel and rocker reps as “low load” and don’t stack them heavily the day before or after a scheduled bullpen.
- Build in a full rest day after any session that included more than a handful of hard throws.
Our pitcher recovery guide breaks down how rest days actually help tissue recover between sessions.
Setting Up a Small Space for Indoor Pitching Drills
Most homes have enough room for real work. The trick is matching the drill to the distance available, not trying to force a full mound setup into a two-car garage.
Two layout templates that actually work:
- 10 to 20 feet (basement, small garage bay, living room): Use this space for the towel drill, rocker throws, and wrist-snap drills. None of these require a ball to travel far, so a short runway is plenty. Tape a stride line on the floor toward a wall or padded target.
- 25 to 45 feet (larger garage, gym, multi-use room): This distance supports flat-ground command work and short-box bullpen sessions with a soft or indoor-safe ball, aimed at a taped strike zone or strike zone target net.
Before the first throw, take a few protective steps:
- Move breakables, lamps, and anything glass out of the throwing lane.
- Pad the wall behind the target with a moving blanket or foam mat if throwing anything harder than a foam ball.
- Swap a regulation hard baseball for a soft indoor practice ball or even a tennis ball when ceiling height or wall proximity makes a hard ball risky.
- Use painter’s tape, not permanent marker or paint, for stride lines and target zones so the setup can be adjusted or removed cleanly.
A taped strike zone works fine for command reps, but a small net gives better ball control and saves you from chasing rebounds around the room.
Core Indoor Pitching Drills That Actually Move the Needle
These six drills cover the full progression from raw mechanics to command, and every one of them works in a space smaller than a two-car garage.
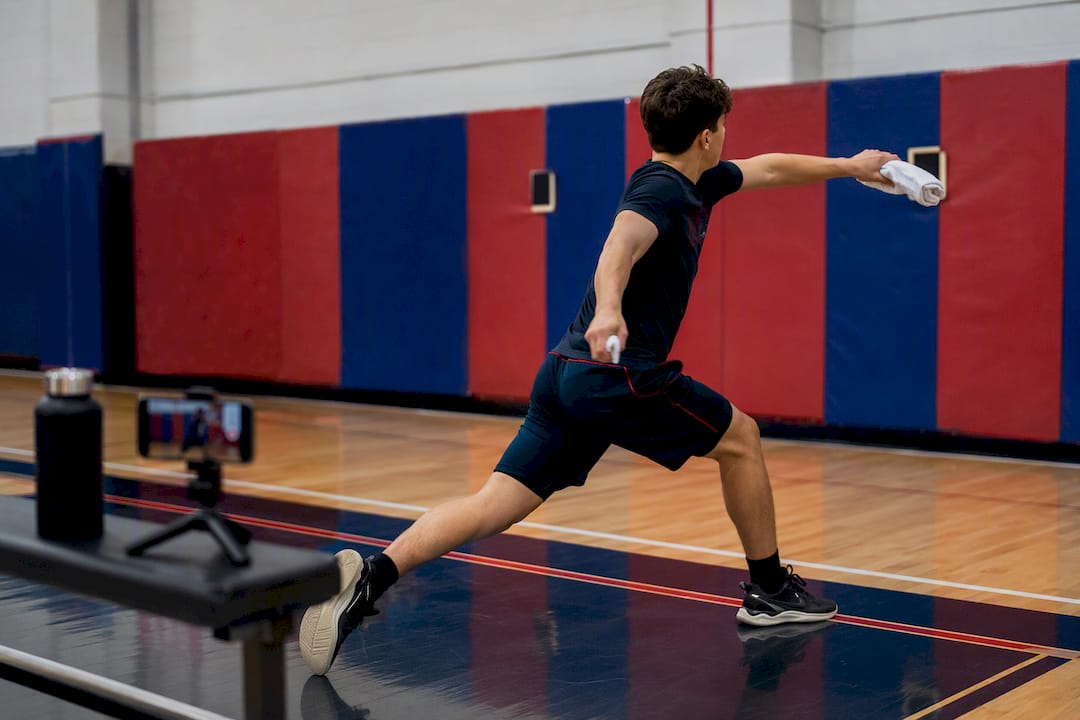
1. Towel drill. Roll a hand towel and hold it where the ball would sit in a normal grip. Take the pitcher through a full wind-up and delivery, snapping the towel at a target on the wall at release point. Coaches should cue “lead shoulder stays closed” or “finish tall” rather than stacking multiple corrections at once. Film every set from the side. For ages 9 to 12, three sets of 8 to 12 reps is enough to reinforce a single mechanical cue without fatigue creeping into form.
2. Rocker throws. Start in a split stance, back foot elevated slightly on a small step or book, and rock forward into the throw to emphasize hip drive and weight transfer. This isolates the lower body’s contribution to velocity without needing distance. Ten to fifteen reps per set, two to three sets, works well for most youth pitchers.
3. Wrist-snap and release-feel drills. From a short distance (5 to 8 feet) into a wall or soft net, the pitcher focuses purely on wrist snap and finger pressure at release, checking that the ball comes out with backspin and the arm finishes down and across the body. Keep these short: 10 to 15 reps is plenty since the goal is feel, not volume.
4. Balance point hold. Especially useful for U8 to U10 pitchers still learning body control, this drill has the pitcher lift the front leg to the balance point in the delivery and hold for a two-count before continuing. It exposes wobble or early collapse that’s hard to spot at full speed.
5. Stride-direction tape drill. Lay a strip of tape on the floor pointing straight at the target. The pitcher’s stride foot should land on or very near that line every time. This single visual cue fixes more command problems than almost any verbal instruction, according to insights from Northwell’s youth pitching coverage.
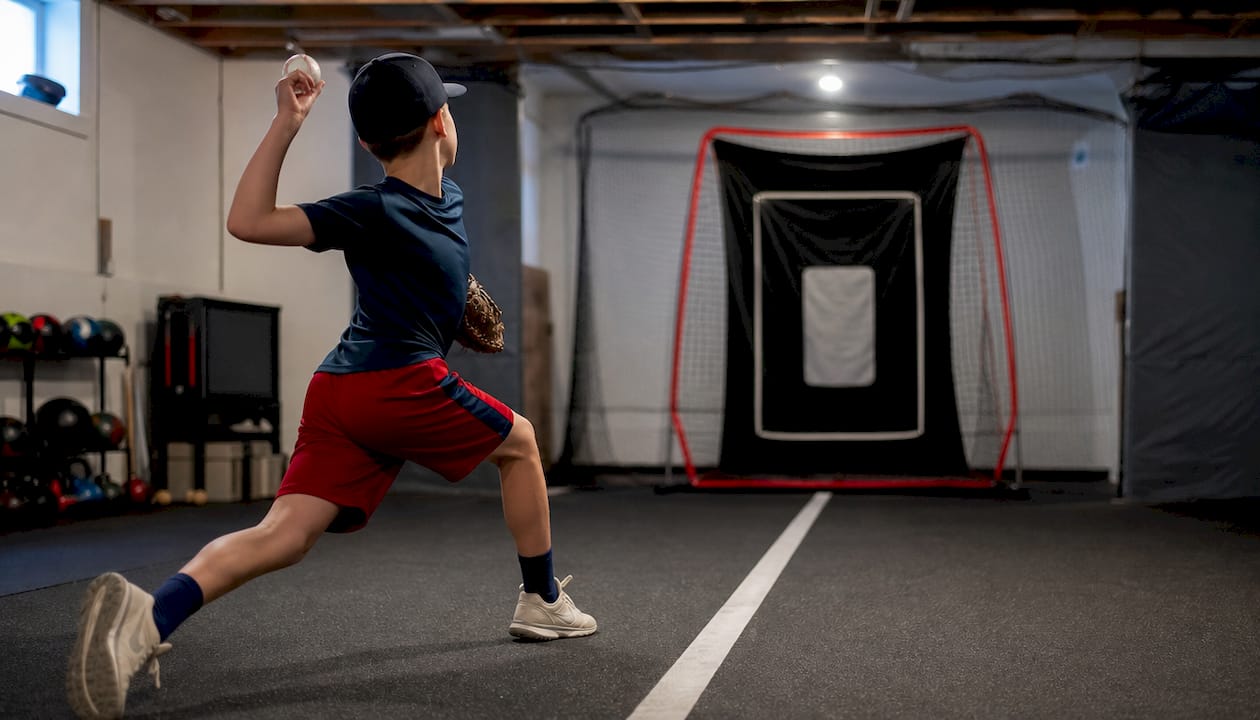
6. Flat-ground command and short-box bullpen. At 30 to 45 feet, the pitcher throws to a taped zone or target net, calling out a location before each throw. Track results with a 20-throw accuracy test: count makes versus misses, and aim to improve make percentage by 5 to 10% across four sessions before adding distance or intensity.
Pro Tip: Don’t correct more than one mechanical flaw per session. Pick the biggest issue on film, drill it for a week, and only then move to the next one — stacking corrections usually makes both worse.
Progression only matters if it’s sequenced. Start every new pitcher on towel drill and stride-direction work for two to three weeks before introducing rocker throws and wrist-snap drills. Flat-ground command and short-box bullpens come last, once the earlier drills show clean, repeatable positions on film. Live, full-effort throws only reenter the plan once a coach can confirm balance, stride direction, and release point are consistent across multiple filmed sets.
Three Ready-to-Run Indoor Session Plans
30-minute solo maintenance session:
- Dynamic warm-up: arm circles, band work, light jogging in place (5 minutes)
- Mechanics drills: towel drill and stride-direction work (15 minutes)
- Film review: watch two sets back, note one cue for next time (5 minutes)
- Cooldown and stretch (5 minutes)
45-minute small-group session (3 to 6 players):
Break the group into stations and rotate every 10 to 12 minutes: one station for towel drill and filming, one for rocker throws, and one for flat-ground command with a partner logging makes and misses. This keeps reps high and downtime low, a structure that works especially well in gyms or shared indoor spaces.
- Warm-up together (5 minutes)
- Three station rotations (30 minutes total)
- Group film review and cooldown (10 minutes)
Recovery/light day session:
- Band work and light mobility (10 minutes)
- Towel drill only, no live throws (15 minutes)
- Balance point holds (10 minutes)
- Stretch and log the session as a rest day toward pitch-count totals (10 minutes)
Our pitcher fatigue prevention guide has more detail on structuring recovery weeks around these lighter sessions.
Getting Useful Feedback From a Phone Camera
You don’t need a motion-capture lab to catch mechanical flaws. Two phone angles cover almost everything a coach needs to see.
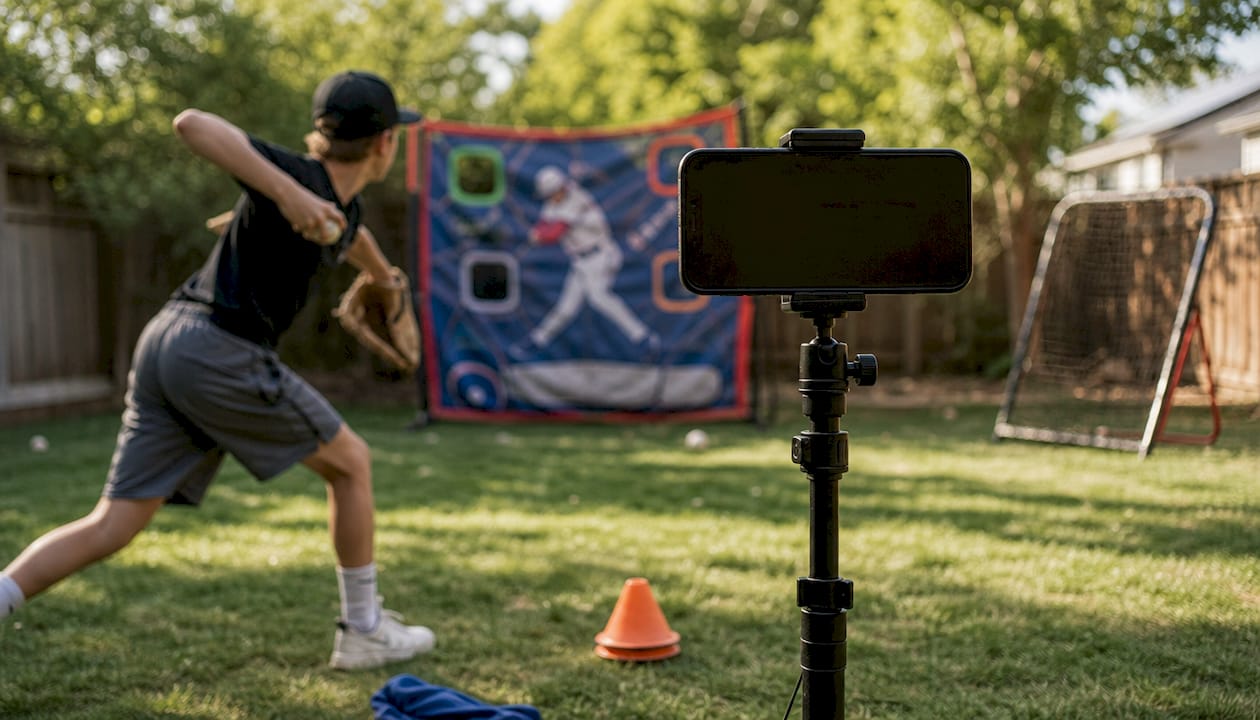
Set the phone up at side view, roughly waist height, far enough back to catch the full delivery. This angle reveals balance, stride length, and stride direction clearly. A 45-degree angle from behind the throwing arm shows arm path and release point, catching flaws like a dropped elbow or early arm action that a straight side view can miss.
Review every set with a three-point checklist:
- Balance and stride: does the front foot land on the tape line, and does the pitcher stay balanced through the delivery?
- Arm path and release: is the arm on time, and does the ball release out front with a clean wrist snap?
- Finish and fielding position: does the pitcher finish athletic, ready to field, rather than falling off toward one side?
Pro Tip: Slow the video down to quarter speed and freeze it at foot strike. That single frame tells you more about a pitcher’s timing than watching the full clip five times.
If you want a slightly more structured setup for capturing and reviewing motion at home, a home analytics workflow built for simulator training translates well to filming pitching mechanics too.
Why Trust This Guide on Indoor Pitching Practice
Pitch Training Baseball builds equipment specifically for the drills covered here: soft practice balls sized for indoor use, a colorful 9-zone strike net for command work, and instructional resources on grips and mechanics that coaches and parents actually use between practices.
Beyond the gear:
- Our pitching mechanics guide breaks down the cueing language coaches use during towel drill and stride work.
- Our daily pitching habits post covers how to build small, repeatable indoor routines around a school-week schedule.
What Most Indoor Pitching Advice Gets Backward
Most advice on this topic treats indoor practice as a scaled-down bullpen: fewer pitches, same intent. That’s backward. The research on youth arm health points the other way: indoor time is most valuable when it has zero pitch-count pressure and total focus on repeatable positions, filmed and corrected one cue at a time.
The conventional approach also underrates the towel drill, treating it as a warm-up gimmick rather than the single best diagnostic tool a coach has for arm path and timing. A pitcher who can’t hold a clean towel-drill position on film has no business adding velocity or distance yet, regardless of how good the live bullpen looked last week.
What should a parent or coach prioritize first? Not the short-box bullpen, and not filming for style points. Get the stride-direction tape line down and the balance point holding clean before anything else. Everything else in a pitcher’s mechanics, including command and eventually velocity, sits downstream of those two fundamentals.
— Albert
Get the Right Gear for Indoor Pitching Practice
Building the drills in this guide gets a lot easier with equipment sized for small spaces instead of a full field. Pitchtrainingbaseball designs its gear around exactly this problem: a strike zone target net that turns a garage wall into a real accuracy drill, and soft practice balls that let young pitchers throw wrist-snap and rocker-throw reps without worrying about denting drywall or bruising a hand catching rebounds.

If fielding and finish position are part of your practice too, the America sliding mitt rounds out indoor work that covers more than just the throwing motion. Start with the target net and a soft ball, run the flat-ground command drill from this guide for two weeks, and track your 20-throw accuracy scores to see the improvement for yourself. Browse the full training equipment lineup to build out a setup that fits your space.
Sources
- PMC article on youth pitching workload and fatigue
- Veo — Indoor baseball drills
- Little League — Regular season pitching rules / pitch-count
Recommended
- Game-like pitching practice: Raise youth baseball skills fast – Pitch Training Baseball
- Managing Practice Time for Pitchers: 2026 Youth Guide – Pitch Training Baseball
- PITCH TRAINING BASEBALL ⚾ – Pitch Training Baseball
- How Practice Drives Skill Development in Youth Pitching – Pitch Training Baseball